
Picture this: you’re geared up for an epic bike ride, the sun is shining, and the trails are calling. You grab your bike, give the tires a quick squeeze… and your heart sinks. Soft. Very soft. You reach for your pump, only to be met with that slender, alien-looking valve stem – the Presta. If you’ve ever felt a pang of confusion or frustration when encountering a Presta valve, you’re not alone. Many cyclists, especially those new to the sport or upgrading their bikes, find the Presta valve a bit of a mystery.
But fear not, fellow rider! This comprehensive guide is your one-stop shop to demystifying the Presta valve. We’ll break down everything you need to know, from identifying your valve type to mastering the art of inflation with various pump types. By the end of this article, you’ll be pumping your Presta-equipped tires with confidence and ease, ensuring you spend more time on the road or trail and less time scratching your head.
Understanding Your Valve: Presta vs. Schrader
Before we dive into the “how-to,” let’s quickly differentiate between the two most common bicycle tire valve types:
- Schrader Valve: This is the valve you’re likely most familiar with – the fatter, more robust valve found on car tires and many entry-level bikes. It has a visible pin in the center that you depress to release air. Schrader valves are generally easier to inflate as they are compatible with standard gas station air pumps and most basic bicycle pumps.
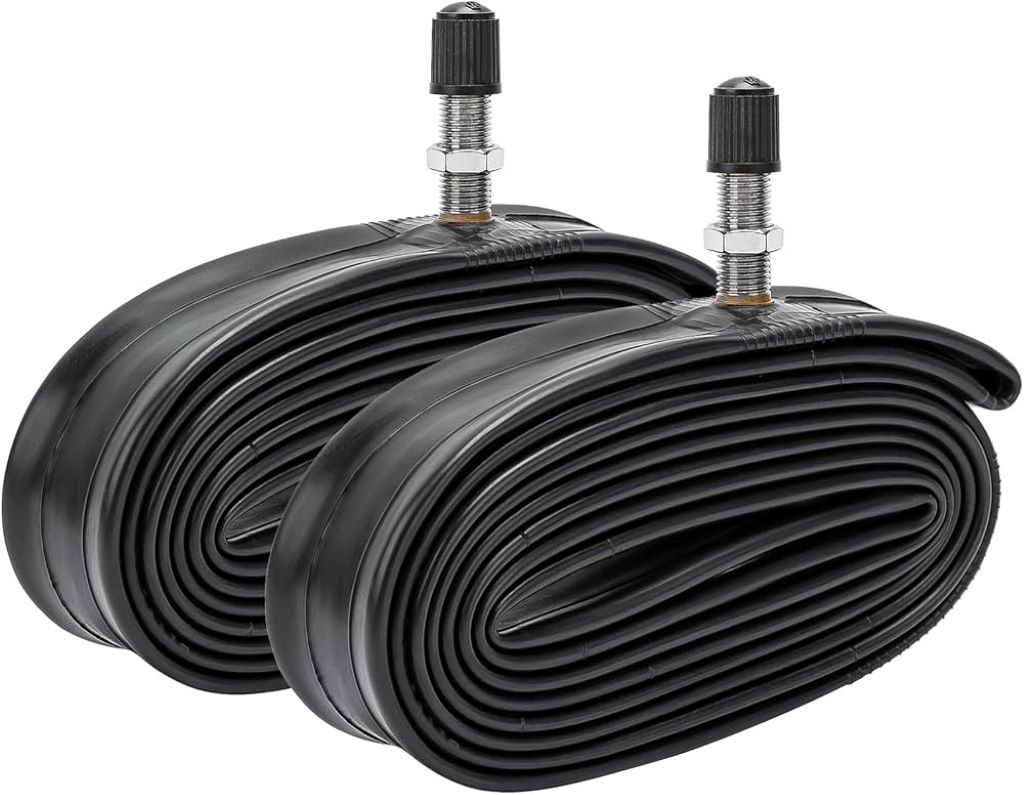
- Presta Valve: Thinner and more elegant, the Presta valve is typically found on road bikes, mountain bikes, and higher-end bicycles. It’s easily identifiable by its slender stem and a small threaded tip that needs to be unscrewed before inflation. Presta valves are lighter, allow for higher tire pressures, and are often preferred for their ability to seal more effectively at those higher pressures.
While the Presta valve might seem a bit more finicky at first glance, its advantages in performance and weight make it the valve of choice for many serious cyclists. And once you know the trick, pumping them is just as straightforward as Schrader.
Why Presta? The Advantages Beyond the Aesthetic
It’s worth pausing to appreciate why Presta valves are so prevalent in the cycling world, especially for performance bikes:
- Higher Pressure Capacity: Presta valves are designed to handle higher tire pressures more effectively than Schrader valves. This is crucial for road bikes, which often run at 90-120 PSI (pounds per square inch) for optimal rolling resistance and speed.
- Better Air Retention: The design of the Presta valve creates a more secure seal, which can lead to better air retention over time. This means fewer top-offs between rides.
- Lighter Weight: While seemingly negligible, every gram counts for serious cyclists. Presta valves are inherently lighter than Schrader valves.
- Smaller Rim Hole Required: The thinner Presta valve stem requires a smaller hole in the rim, which can contribute to a stronger and more aerodynamic wheel design.
- Less Prone to Valve Stem Damage: Because you manually open and close the valve, there’s less chance of dirt or debris getting into the valve core and causing issues.
The Essential Toolkit: What You’ll Need
Before you embark on your tire-pumping journey, gather these essential tools:
- A Bicycle Pump with a Presta-Compatible Head: This is the most crucial item.
- Floor Pumps: Ideal for home use, these provide excellent leverage and often have built-in pressure gauges for accurate inflation. Most modern floor pumps come with dual heads (Presta and Schrader) or a reversible head.
- Hand Pumps (Mini Pumps): Perfect for on-the-go repairs and emergency top-ups. Ensure yours has a Presta-compatible nozzle or an adapter.
- CO2 Inflators: A rapid and convenient way to inflate tires, especially during a flat tire repair on the road. These use compressed CO2 cartridges.
- A Pressure Gauge (Optional but Recommended): While many floor pumps have integrated gauges, an external gauge can offer more precise readings and is useful for hand pumps or CO2 inflators that lack them.
- A Presta Valve Adapter (Optional): If your pump only has a Schrader head, a small, inexpensive Presta valve adapter (a tiny metal cylinder that screws onto the Presta valve stem) will allow you to use a Schrader pump.
Step-by-Step: Pumping Your Presta Valve Tire Like a Pro
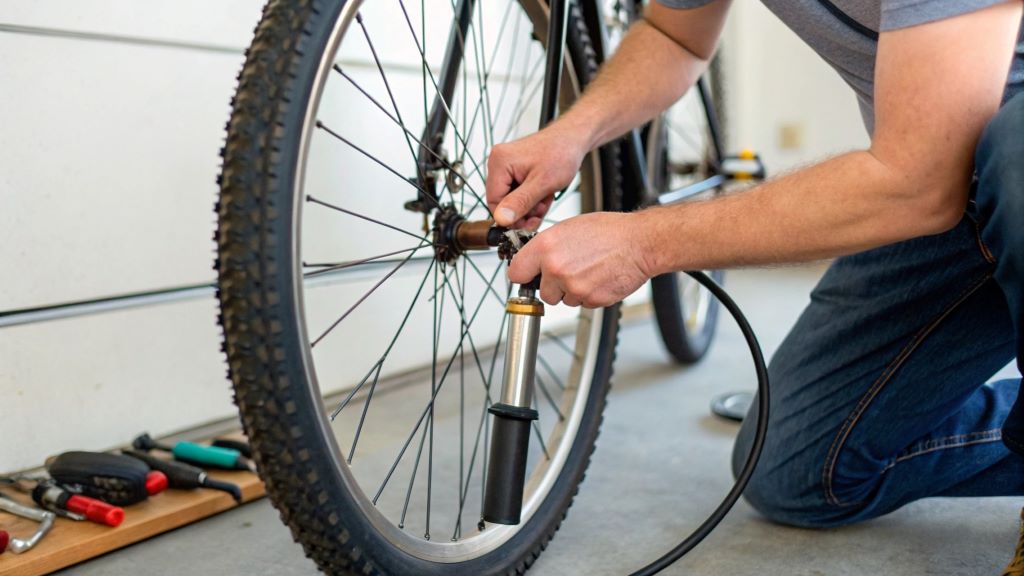
Now, let’s get down to business! Follow these steps for a perfectly inflated Presta valve tire:
Step 1: Locate and Prepare the Presta Valve
- Find the Valve: Look for the thin, metal stem protruding from your wheel rim.
- Unscrew the Valve Cap: If your tire has a valve cap (a small plastic or metal cover), unscrew it and set it aside. This cap is primarily for protecting the valve from dirt, not for sealing air.
- Unscrew the Valve Core Nut: At the very top of the Presta valve, you’ll see a small, knurled (ridged) nut. This is the valve core nut. Unscrew it counter-clockwise until it is loose. You don’t need to remove it completely; just loosen it so it can move freely.
Step 2: “Crack” the Valve (Release the Seal)
This is a crucial step that often trips up beginners. After loosening the valve core nut, gently tap the top of the valve stem to release the seal. You should hear a slight hiss of air. This “cracking” of the valve ensures that air can flow freely into and out of the tire. If you skip this step, your pump will struggle to push air into the tire.
Step 3: Attach the Pump Head
This step varies slightly depending on your pump type:
- For Dual-Head Pumps (Most Common Floor Pumps): Identify the smaller opening on the pump head – this is for the Presta valve. Push the Presta opening firmly onto the valve stem until it’s snug. Many dual-head pumps have a lever that you then flip to lock the head onto the valve.
- For Reversible Head Pumps: These pumps require you to physically remove and flip a rubber gasket or internal component to switch between Presta and Schrader. Ensure the pump head is configured for Presta. Then, push the head firmly onto the valve stem and secure it with the locking lever (if applicable).
- For Presta-Only Hand Pumps: Simply push the pump head firmly onto the valve stem. Some hand pumps have a screw-on mechanism for a more secure fit.
- Using a Presta Valve Adapter: If you’re using an adapter with a Schrader-only pump, first screw the adapter onto the Presta valve stem. Then, attach the Schrader pump head onto the adapter.
Important: A good seal between the pump head and the valve is vital for efficient inflation. If air is leaking out, you may need to push the pump head on more firmly or adjust its position.
Step 4: Start Pumping!
- Check Your Desired Tire Pressure: Look at the sidewall of your tire for the recommended PSI (pounds per square inch) range. It will typically be listed as a minimum and maximum pressure (e.g., “MIN 90 PSI – MAX 120 PSI”). Sticking within this range is crucial for safety, performance, and preventing flats.
- Pump Slowly and Steadily: Begin pumping air into the tire. If you’re using a floor pump, use long, smooth strokes. If you’re using a hand pump, it will require more strokes.
- Monitor Pressure: Keep an eye on your pump’s pressure gauge (if it has one) or use a separate gauge to check your progress. Avoid over-inflating your tires, as this can lead to a harsh ride, reduced traction, and even blowouts. Under-inflation, on the other hand, can lead to pinch flats and poor handling.
Step 5: Remove the Pump Head and Close the Valve
- Unlock the Pump Head: If your pump has a locking lever, flip it back to the unlocked position.
- Remove the Pump Head: Gently but swiftly pull the pump head straight off the valve stem. A small hiss of air is normal as the last bit of air escapes the pump head.
- Tighten the Valve Core Nut: Screw the small knurled nut back down onto the valve stem. Tighten it securely, but don’t overtighten it. This seals the valve and prevents air from escaping.
- Replace the Valve Cap (Optional): Screw the valve cap back on if you removed it.
Troubleshooting Common Presta Valve Pumping Issues
Even with the right technique, you might encounter a few hiccups. Here’s how to troubleshoot them:
- Air Leaking When Pumping:
- Solution: Ensure the pump head is fully and securely seated on the valve stem. Push it on further. If your pump has a lever, make sure it’s fully locked. Sometimes, the rubber gasket inside the pump head can wear out and need replacing.
- Pump Won’t Push Air In:
- Solution: Did you “crack” the valve? This is the most common reason. Unscrew the valve core nut, gently tap the tip, and then reattach the pump. Also, double-check that your pump head is properly configured for Presta.
- Valve Core Nut Keeps Coming Loose:
- Solution: Ensure you’re tightening it sufficiently after inflation. If it consistently loosens, the valve core itself might be faulty and need replacement. Valve cores are inexpensive and easily replaceable with a small valve core tool.
- Bending the Valve Stem:
- Solution: This usually happens when you apply too much sideways force while attaching or detaching the pump. Always push the pump head on and pull it off in a straight line with the valve stem.
Read More: How To Replace A Mountain Bike Tire – The Easy Way
Beyond the Basics: Presta Valve Maintenance Tips
To ensure your Presta valves remain in top working order, consider these maintenance tips:
- Keep Them Clean: Periodically wipe down your valve stems to prevent dirt and grime from accumulating.
- Check for Leaks: If your tire consistently loses air, check for leaks around the valve stem. You can do this by applying a little soapy water to the valve; if bubbles appear, you have a leak.
- Consider Valve Extenders (for Deep Dish Rims): If you have aerodynamic wheels with very deep rims, you might need valve extenders to allow your pump to reach the valve. These screw onto the Presta valve stem.
- Replace Worn Valve Cores: If your valve core is damaged or leaking, you can easily replace it. This is much cheaper than replacing the entire tube.
Conclusion: Pump Up Your Confidence and Ride On!
Congratulations! You’ve now mastered the art of pumping a Presta valve bike tire. What once might have seemed like a daunting task is now a simple, routine part of your cycling preparation. By understanding the valve’s mechanics, using the right tools, and following these straightforward steps, you’ll ensure your tires are always at the optimal pressure for a safe, comfortable, and efficient ride.
So, the next time you encounter that slender Presta valve, you can confidently unscrew, “crack,” attach, pump, and seal. No more flat-tire anxieties, just smooth sailing on two wheels. Happy riding!
Read More:
How to Install Road Tires on a Mountain Bike – The Easy Way
The 5 Best Tires For Rollers: Review of the Top Picks

Welcome to outdoorxsports.com! I’m Russell, your guide to the awesome world of mountain biking. This blog is all about building a community of riders who love to share their passion for the sport. Expect inspiring stories, local trail recommendations, fun challenges, and tips for making the most of your time on two wheels.