
Riding a BMX bike requires precision, balance, and control. One often overlooked aspect is the angle of your bmx seat. Studies show that 70 percent of riders experience discomfort due to poor seat positioning. Adjusting the angle can improve your performance and reduce strain.
A well-positioned seat helps maintain balance during tricks and jumps. It also ensures comfort during long rides. Many riders ignore this simple adjustment. Small changes can make a big difference in your riding experience.
Why Adjusting Your BMX Seat Angle Matters
The angle of your BMX seat affects your riding posture. A poorly angled seat can cause back pain. It can also reduce your control over the bike. Proper alignment helps distribute your weight evenly.
Correct seat positioning enhances maneuverability. It allows for quicker movements during tricks. Riders often find improved stability with the right angle. This is especially true for beginners learning new skills.
Comfort is another major benefit. Long rides become less tiring with the right setup. You will feel less pressure on your wrists and shoulders. This leads to a more enjoyable riding experience.
Tools You Will Need
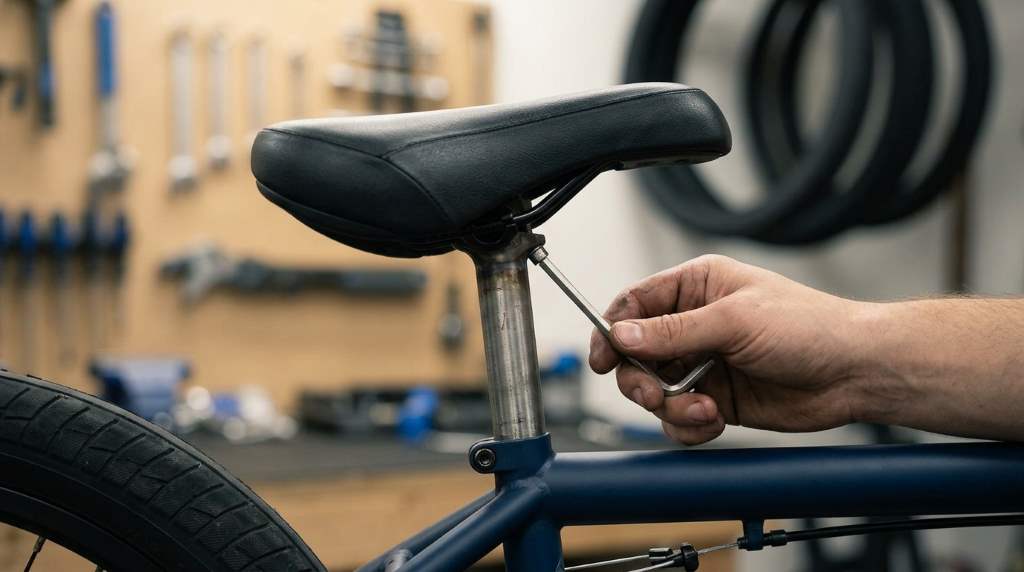
Adjusting your BMX seat angle requires a few basic tools. A hex wrench is essential for most seats. Some bikes may need an Allen key instead. Always check your bike’s manual for specifics.
A torque wrench can help prevent overtightening. Overtightening can damage the seat post. A level tool ensures your seat is straight. These tools are inexpensive and widely available.
Gloves can protect your hands during adjustments. A clean cloth helps keep parts free of dirt. Dirt can make it harder to tighten or loosen bolts. Always work in a well-lit area.
Step-by-Step Guide to Adjusting Your BMX Seat Angle
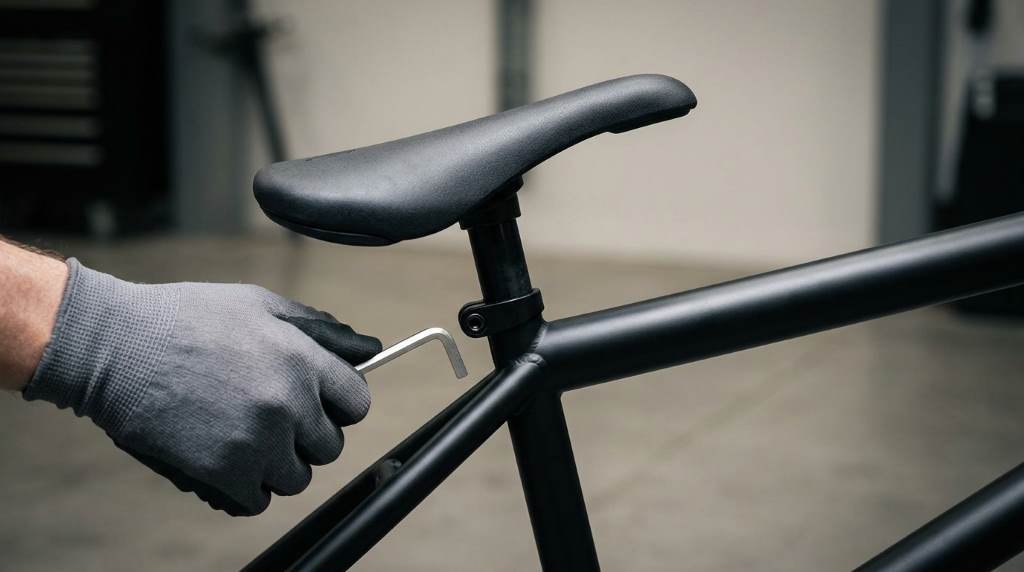
Step 1: Locate the Seat Clamp
The seat clamp is usually found under the seat. It secures the seat to the post. Loosen the bolt with your hex wrench. Turn it counterclockwise to release the clamp.
Some clamps have quick-release levers. These allow for tool-free adjustments. If your bike has one, flip the lever to open. This makes the process faster and easier.
Step 2: Adjust the Seat Angle
Tilt the seat forward or backward to find your preferred angle. Start with a neutral position. This means the seat is level with the ground. Test this position first.
For more control during tricks, tilt the seat slightly upward. This helps keep you in place during jumps. For comfort during long rides, tilt it slightly downward. Avoid extreme angles.
Small adjustments make a big difference. Move the seat in small increments. Test each position before making another change. This ensures you find the best angle.
Step 3: Secure the Seat Clamp
Once you find the right angle, tighten the clamp. Use your hex wrench to turn the bolt clockwise. Ensure it is snug but not overtightened. Overtightening can strip the bolt.
If using a quick-release lever, flip it back to the closed position. Check that the seat is firmly in place. Give it a gentle tug to confirm it is secure.
Double-check the angle with a level tool. This ensures your seat is exactly where you want it. A level seat improves balance and control.
Finding the Perfect Angle for Your Riding Style
For Street Riding
Street riders often prefer a slightly upward tilt. This helps with quick movements and tricks. It keeps you centered over the bike. This position is ideal for jumps and grinds.
An upward tilt also helps with manuals. Manuals require balance and control. The seat acts as a guide for your body. This makes tricks easier to execute.
For Park Riding
Park riders may prefer a neutral or slightly downward tilt. This provides comfort during long sessions. It also allows for easier movement on ramps.
A neutral position is versatile for most park riding. It offers a balance between control and comfort. This is great for riders who do a mix of tricks.
For Racing
Racers often choose a slightly downward tilt. This reduces wind resistance. It also allows for a more aggressive riding position. This can improve speed and efficiency.
A downward tilt helps keep your body low. This is important for maintaining speed. It also reduces drag during sprints. Test different angles to find what works best.
Common Mistakes to Avoid
One common mistake is overtightening the seat clamp. This can damage the bolt or seat post. Always tighten just enough to secure the seat. Check the clamp regularly for wear.
Another mistake is ignoring the seat angle entirely. Many riders leave it in the default position. This can lead to discomfort and poor performance. Always take the time to adjust it.
Avoid extreme angles. Too much tilt can make riding uncomfortable. It can also reduce your control over the bike. Stick to small, incremental changes.
Forgetting to check the seat after adjustments is another issue. Always test the seat after making changes. Ensure it is secure and comfortable before riding.
Unique Tips for BMX Seat Adjustment
Consider the climate when adjusting your seat. In hot climates, a slightly upward tilt can prevent slipping. Sweat can make the seat slippery. An upward tilt helps keep you in place.
In wet climates, ensure the seat clamp is tight. Moisture can cause the bolt to loosen over time. Regularly check and retighten as needed. This prevents unexpected adjustments while riding.
Use a marker to note your preferred angle. This makes it easier to readjust if needed. It also helps when switching bikes or seats. Consistency improves performance.
Try adjusting the seat height along with the angle. A higher seat can improve control for some riders. A lower seat may be better for tricks. Experiment to find your ideal setup.
Testing and Fine-Tuning Your Seat Angle
After adjusting, take a short test ride. Pay attention to your comfort and control. Note any discomfort or instability. This helps you fine-tune the angle.
Try different riding styles with each adjustment. Street, park, and racing all have unique demands. What works for one may not work for another. Be open to experimentation.
Ask for feedback from experienced riders. They may notice things you miss. Sometimes a small tweak can make a big difference. Don’t hesitate to seek advice.
Keep a journal of your adjustments and results. Note the angle, riding style, and comfort level. This helps track what works best for you. Over time, you will find your perfect setup.
Maintaining Your BMX Seat
Regularly check the seat clamp for tightness. Vibrations from riding can loosen it over time. A quick check before each ride prevents issues. This ensures your seat stays in place.
Clean the seat and clamp regularly. Dirt and grime can affect performance. Use a damp cloth to wipe down the seat. Dry it thoroughly to prevent rust.
Inspect the seat for wear and tear. Look for cracks or damage to the material. Replace the seat if it shows signs of wear. A damaged seat can be unsafe.
Lubricate the seat post occasionally. This prevents it from seizing in the frame. Use a bike-specific lubricant for best results. Avoid over-lubricating, as this can attract dirt.
Conclusion
Adjusting the angle of your BMX seat is a simple yet powerful way to improve your riding. It enhances control, comfort, and performance. Take the time to find your perfect angle.
Experiment with different positions and riding styles. Keep track of what works best for you. Small changes can lead to big improvements on the bike.
Remember to maintain your seat and clamp regularly. This ensures longevity and safety. A well-adjusted seat makes every ride more enjoyable.
Start adjusting your BMX seat angle today. Notice the difference in your control and comfort. Share your experiences with fellow riders. Happy riding!
FAQ
How often should I adjust my BMX seat angle?
Adjust your seat angle whenever you feel discomfort or notice a change in your riding style.
What is the best angle for beginners?
A neutral or slightly upward tilt is often best for beginners learning control and balance.
Can I adjust my seat angle without tools?
If your bike has a quick-release clamp, you can adjust the angle without tools.
How do I know if my seat angle is wrong?
If you experience discomfort, poor control, or instability, your seat angle may need adjustment.
Does seat angle affect speed?
Yes, a slightly downward tilt can reduce wind resistance and improve speed for racers.

Welcome to outdoorxsports.com! I’m Russell, your guide to the awesome world of mountain biking. This blog is all about building a community of riders who love to share their passion for the sport. Expect inspiring stories, local trail recommendations, fun challenges, and tips for making the most of your time on two wheels.