

A well-tuned brake system is key to a safe and enjoyable ride. Studies show that 60 percent of bike accidents happen because of poor brake performance. The VEVOR Mountain Bike is a popular choice for riders who want reliability and control on tough trails. Adjusting the brakes on this bike can greatly improve your stopping power and overall safety. This guide will walk you through the process with clear and practical steps.
Whether you ride on rocky paths or smooth city streets, knowing how to fine-tune your brakes is essential. It ensures your bike responds quickly when you need it most. With the right adjustments, you can extend the life of your brake pads and avoid unnecessary wear. This skill is simple to learn and will make every ride smoother and safer.
Why Adjusting Your VEVOR Mountain Bike Brakes Matters
Properly adjusted brakes ensure your bike stops quickly and safely. This is especially important for mountain biking, where sudden stops are common. Poorly adjusted brakes can lead to longer stopping distances and increased risk of accidents. They also cause uneven wear on the brake pads, reducing their lifespan.
Regular brake maintenance also improves your riding experience. It gives you better control over your bike, especially on steep or uneven terrain. Well-adjusted brakes respond more predictably, which builds confidence during rides. This is why learning to adjust them is a valuable skill for any cyclist.
In addition, adjusted brakes reduce strain on the brake cables and levers. This prevents damage to other parts of your bike and saves you money on repairs. For riders in humid climates, like those in Bangladesh, moisture can affect brake performance. Regular adjustments help counteract these effects.
Tools You Will Need
Gather the right tools before you start. A 5mm Allen wrench is essential for most brake adjustments on a VEVOR Mountain Bike. You will also need a Phillips head screwdriver for some models. A pair of pliers can help with stubborn cables or tight spaces.
A clean rag is useful for wiping down brake components. Dirt and grime can affect performance, so keep everything clean. If your bike has hydraulic brakes, you may need a bleed kit, but this guide focuses on mechanical brakes. Always check your bike’s manual for specific requirements.
Step-by-Step Guide to Adjusting VEVOR Mountain Bike Brakes
Step 1: Check the Brake Pads
Start by inspecting the brake pads for wear. If they are thinner than 3mm, replace them before adjusting. Look for uneven wear, which may indicate misalignment. Ensure the pads are centered over the rim or rotor. Misaligned pads can cause squeaking or poor braking.
Spin the wheel to see if the pads rub against the rim or rotor. If they do, they need adjustment. Loosen the bolt holding the brake pad in place with your Allen wrench. Reposition the pad so it sits evenly on both sides of the rim or rotor. Tighten the bolt securely once aligned.
Step 2: Adjust the Brake Cable Tension
Locate the barrel adjuster on the brake lever or caliper. This small knob controls the cable tension. Turn it clockwise to tighten the cable and counterclockwise to loosen it. Test the brake lever after each adjustment to find the right tension.
The lever should move about halfway to the handlebar before the brakes engage. If it moves too far, the cable is too loose. If it barely moves, the cable is too tight. Fine-tune the tension until the lever feels responsive but not stiff.
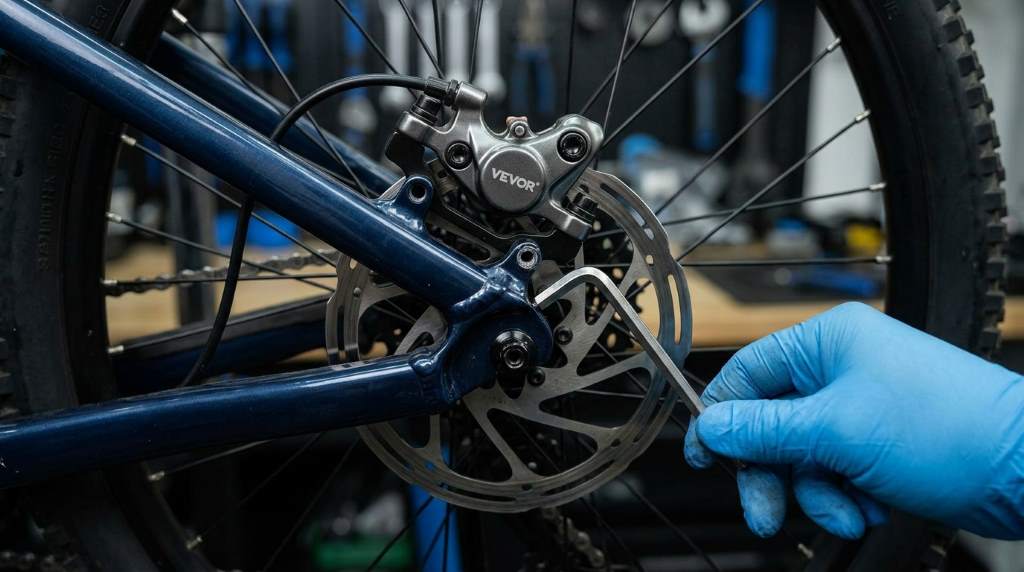
Step 3: Center the Brake Caliper
For disc brakes, the caliper must be centered over the rotor. Loosen the bolts holding the caliper in place. Squeeze the brake lever to self-center the caliper, then retighten the bolts. This ensures even pad contact on both sides of the rotor.
For rim brakes, check that both pads hit the rim at the same time. If one pad touches before the other, adjust the caliper position. Use your Allen wrench to shift the caliper slightly until both pads make even contact. This prevents uneven wear and improves stopping power.
Step 4: Test the Brakes
Take your bike for a short test ride in a safe area. Apply the brakes gently at first to feel their response. Gradually increase pressure to ensure smooth and even stopping. Listen for any unusual noises like squeaking or grinding.
If the brakes feel spongy or unresponsive, recheck the cable tension and pad alignment. For hydraulic brakes, you may need to bleed the system if air has entered the lines. Always test your brakes before riding on busy or challenging trails.
Unique Tips for Different Climates
Riders in humid climates, like Bangladesh, often face issues with rust and corrosion. Apply a thin layer of bike grease to brake bolts and contact points to prevent rust. This keeps your brakes functioning smoothly even in wet conditions.
In dry and dusty areas, dirt can accumulate on the brake pads and rotors. Clean them regularly with a dry cloth to maintain performance. Avoid using water, as it can leave residue that affects braking. A quick wipe after each ride can make a big difference.
For riders in cold climates, brake performance can drop due to stiff cables. Lubricate the brake cables periodically to keep them moving freely. This is especially important before winter rides when temperatures are low.
Common Mistakes to Avoid
One common mistake is overtightening the brake cables. This can cause the brakes to drag and wear out the pads quickly. Always aim for a balance where the lever has a firm but smooth pull. Another mistake is ignoring uneven pad wear, which can lead to poor braking and damage.
Avoid adjusting the brakes without testing them afterward. Always take a short ride to confirm the adjustments work. Skipping this step can result in unsafe braking during your next ride. Also, never use tools that are too large or small for the bolts, as this can strip them.
Some riders forget to check the brake pads regularly. Worn pads reduce stopping power and can damage the rim or rotor. Replace them as soon as they show significant wear. This simple step can prevent costly repairs and keep you safe on the trails.
Maintaining Your VEVOR Mountain Bike Brakes
Regular maintenance keeps your brakes in top condition. Clean the brake components after every few rides to remove dirt and debris. Check the brake pads for wear and replace them as needed. This prevents damage to the rim or rotor and ensures consistent performance.
Lubricate the brake cables and pivot points every few months. This reduces friction and keeps the brakes responsive. For hydraulic brakes, check the fluid levels and top up if necessary. Always refer to your bike’s manual for specific maintenance guidelines.
Store your bike in a dry place to avoid rust and corrosion. If you ride in wet conditions, dry the brakes thoroughly afterward. This extends the life of your brake components and keeps them working reliably.
Conclusion
Adjusting the brakes on your VEVOR Mountain Bike is a straightforward process that greatly improves safety and performance. By following the steps outlined in this guide, you can ensure your brakes respond reliably in any situation. Regular maintenance and adjustments will also extend the life of your brake components.
Take the time to check and adjust your brakes before every ride. This small effort can prevent accidents and make your rides more enjoyable. If you are unsure about any step, consult a professional bike mechanic for assistance.
Now that you know how to adjust your brakes, get out there and ride with confidence. Share this guide with fellow cyclists to help them stay safe on the trails. Happy riding!
FAQ
How often should I adjust my VEVOR Mountain Bike brakes?
Check and adjust your brakes every 100 miles or if you notice reduced stopping power.
Can I use any type of grease on my brake components?
Use bike-specific grease to avoid damaging rubber or plastic parts.
Why do my brakes squeak after adjustment?
Squeaking often means the pads are not aligned properly or are contaminated with dirt.
Do I need special tools to adjust disc brakes?
A 5mm Allen wrench and a screwdriver are usually sufficient for basic adjustments.
How do I know if my brake pads need replacing?
Replace the pads if they are thinner than 3mm or show uneven wear.

Welcome to outdoorxsports.com! I’m Russell, your guide to the awesome world of mountain biking. This blog is all about building a community of riders who love to share their passion for the sport. Expect inspiring stories, local trail recommendations, fun challenges, and tips for making the most of your time on two wheels.