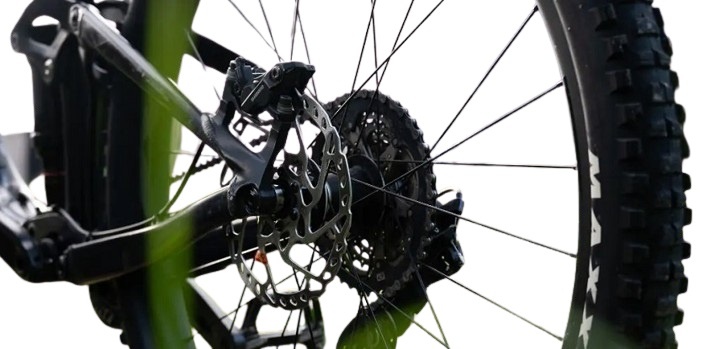
For any mountain biker, having confident and responsive brakes is paramount. Over time, air can infiltrate your hydraulic disc brake system, leading to a spongy lever feel and reduced braking power. This is where bleeding your brakes comes in.
Bleeding your brakes might seem intimidating, but with the right tools and a little know-how, it’s a manageable task you can tackle at home. This guide will walk you through the process, whether you’re a complete beginner or a seasoned rider looking to refresh your memory.
Before You Begin
- Identify Your Brake Brand: Different brands (Shimano, SRAM, Magura, etc.) have slight variations in the bleeding process. Knowing your brand will help you find specific instructions and avoid confusion.
- Gather the Tools: You’ll need a bleed kit specific to your brakes, which typically includes syringes, bleed blocks (to hold pistons in place), and brake fluid (mineral oil for most, DOT fluid for some). A zip tie or hose clamp can help hold the lever.
- Cleanliness is Key: Contaminated fluid can lead to brake issues down the line. Use clean rags and avoid letting dirt or debris enter the system while it’s open.
Bleeding Process:
- Prep the System: Refer to your brand’s instructions for specifics, but generally, you’ll loosen the bleed screw at the caliper (the braking mechanism attached to the frame) and attach a bleed hose from the kit.
- Fill the Reservoir: Locate the brake fluid reservoir on the lever (the handlebar control) and top it up with fresh fluid according to the manufacturer’s recommendations. Be mindful not to overflow.
Here, the process diverges slightly depending on your brake brand:
- Shimano and Most Mineral Oil Brakes: With the lever in its upright position (highest point in the system), use a syringe filled with fresh fluid to push fluid through the caliper bleed screw, purging old fluid and air bubbles. Monitor the reservoir and keep it topped up to prevent air from entering.
- SRAM Bleeding Edge Brakes (from 2017 onwards): This system uses a syringe at both the lever and caliper for a simpler bleed. Fill both syringes with fluid and follow the manufacturer’s guide for a relatively straightforward process.
General Tips for Both Methods:
- Maintain Pressure: Use a zip tie or hose clamp to hold the brake lever in a squeezed position throughout the bleed. This helps push fluid through the system.
- Watch for Bubbles: Keep an eye on the fluid coming out of the caliper bleed screw. Once you see a steady stream of fresh fluid with minimal air bubbles, you’re nearing completion.
- Repeat for the Other Brake: Once you’ve bled one brake, follow the same process for the other.
Final Touches:
- Close the System: Tighten the bleed screw at the caliper to the manufacturer’s torque specifications. Double-check for leaks.
- Top Up and Test: Top up the reservoir on the lever one last time. Gently cycle the brake lever to re-establish a firm feel. If the lever remains spongy, there might be trapped air – repeat the bleeding process.
For Experienced Riders:
- Advanced Techniques: While the above covers the basics, experienced riders can explore methods like reverse bleeding (pushing fluid from the caliper upwards) or using a vacuum pump for a more thorough bleed.
- Contaminated Fluid: If your brake fluid is excessively dirty or dark, it might be a good idea to flush the entire system before bleeding. Consult your brand’s instructions for proper flushing procedures.
Remember: When in doubt, consult a professional bike mechanic. They have the expertise and tools to ensure your brakes are bled properly and safely.
By following these steps and keeping your brakes bled regularly, you can maintain confident control on the trails and enjoy worry-free mountain biking adventures.
Bleeding Your Mountain Bike Brakes: Frequently Asked Questions
Bleeding your mountain bike brakes can seem daunting, but here are some answers to frequently asked questions that might ease your concerns:
Q: How often should I bleed my brakes?
There’s no one-size-fits-all answer. It depends on factors like riding frequency, conditions, and how much air gets into the system. Generally, aim to bleed your brakes every 6-12 months, or if you notice a decrease in braking power or a spongy lever feel.
Q: Can I use any type of fluid for bleeding?
Absolutely not! Different brake brands require specific fluids. Most use mineral oil, while some SRAM and other brands use DOT fluid. Using the wrong fluid can damage your brakes.
Q: What happens if I accidentally get fluid on my rotors?
Brake fluid can contaminate your rotors, reducing braking power. If this happens, thoroughly clean the rotors with isopropyl alcohol and wear gloves to avoid transferring any oils from your skin.
Q: I followed the steps but my brakes still feel spongy. What could be wrong?
There could be a few reasons:
- Trapped air: Double-check for leaks and ensure all air bubbles are purged from the system.
- Contaminated fluid: If your fluid is very dirty, a full flush might be necessary.
- Damaged components: In rare cases, worn pistons, caliper seals, or a faulty lever could be the culprit. Consider consulting a mechanic.
Q: Is it better to bleed my brakes myself or take them to a mechanic?
If you’re comfortable with mechanical tasks and have the right tools, bleeding your brakes at home is achievable. However, if you’re unsure about any steps or don’t have the proper tools, it’s best to take your bike to a qualified mechanic for a safe and efficient bleed.

Taylor is an outdoors & sports equipment specialist, sports author, bike traveler, bicycling and skating expert, and smoke-free ride activist. He is also a regular reviewer of outdoor sports gadgets and accessories. About safety gear and biking facts he analyzes and gives his feedback to outdoorxsports. Writes and tests to help him, you, and us.

