
Assembling a bike at home can seem tough at first. The AVASTA AV300 26 27.5 inch Mountain Bike is a popular choice for beginners and pros alike. Over 60 percent of new bike owners now assemble their bikes themselves. This guide will help you build your bike with ease and confidence.
You will need basic tools like a wrench and screwdriver. The process takes about one to two hours. Many riders find it rewarding to build their own bike. This guide covers every step in detail.
Why Assemble Your Bike at Home
Building your bike at home saves time and money. You avoid long waits at bike shops. It also helps you learn about your bike’s parts. This knowledge is useful for future repairs.
Home assembly lets you check each part for quality. You ensure everything is tight and safe. Many riders feel a sense of pride after finishing. It also makes future maintenance easier.
Tools and Materials You Will Need
Gather all tools before you start the process. A set of Allen wrenches is essential. You will also need a screwdriver and a pedal wrench. A torque wrench helps avoid over tightening.
Have some grease ready for the seat post and pedals. A bike pump is needed for the tires. Keep a rag nearby to clean parts. Gloves can protect your hands from grease.
Preparing Your Workspace
Choose a clean and well lit area to work. Lay down a soft mat to protect your bike. Organize tools within easy reach. This setup prevents losing small parts.
Ensure the space is free from clutter. Good lighting helps you see small details. A stable table is better than the floor. Keep the bike box nearby for reference.
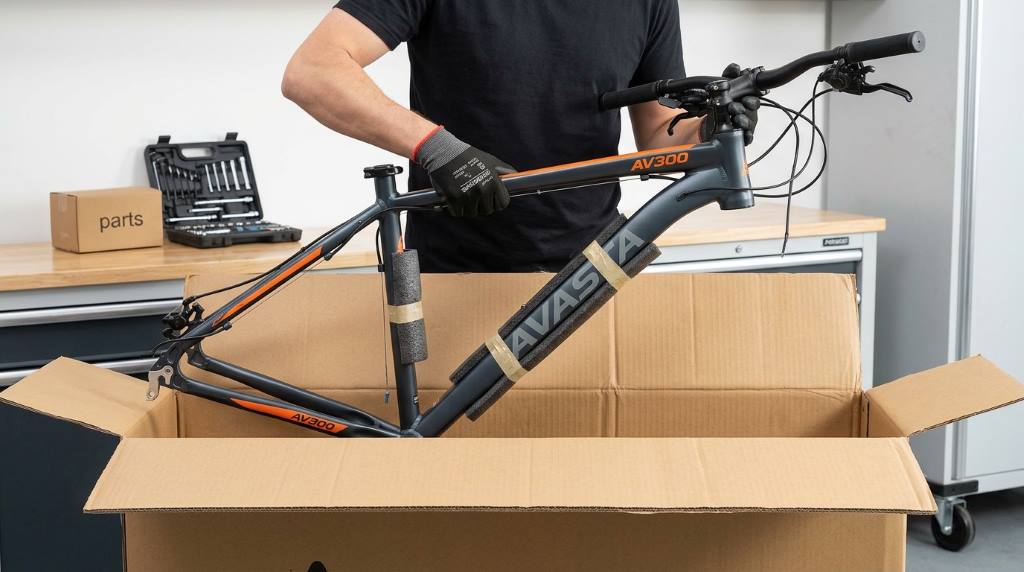
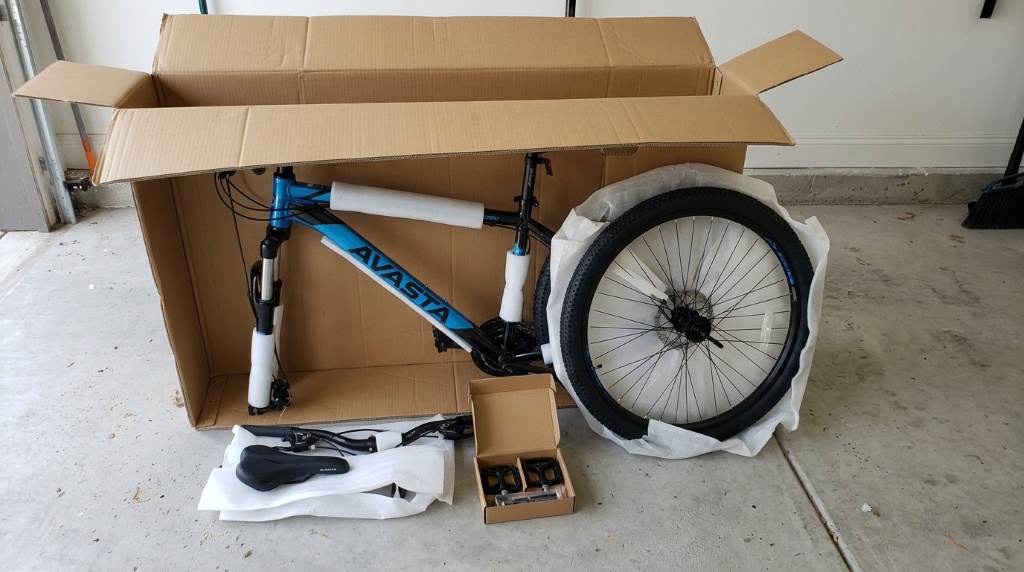
Unboxing and Organizing Parts
Carefully open the bike box and remove all parts. Check the manual for a parts list. Group similar items together. This makes the process smoother.
Look for the frame, wheels, handlebars, and seat. Small parts like bolts and washers go in a tray. Keep the manual open to the parts diagram. This helps you identify each piece.
Step by Step Assembly Guide
Step 1: Attach the Handlebar and Stem
Start by attaching the stem to the handlebar. Use the Allen wrench to tighten the bolts. Ensure the handlebar is centered. Check the alignment before fully tightening.
Insert the stem into the fork’s steerer tube. Align it with the front wheel. Tighten the top cap bolt first. Then secure the side bolts evenly.
Step 2: Install the Front Wheel
Place the front wheel into the fork dropouts. Ensure the axle is fully seated. Secure it with the quick release lever. Check that the wheel spins freely.
If your bike has disc brakes, align the rotor with the caliper. Tighten the axle nuts or quick release. Spin the wheel to test for wobble. Adjust if needed.
Step 3: Attach the Seat and Seat Post
Insert the seat post into the frame’s seat tube. Adjust the height to your preference. Use the Allen wrench to tighten the seat clamp. Ensure the seat is level.
Attach the seat to the seat post. Adjust the angle for comfort. Tighten the bolts securely. Check the seat for stability before riding.
Step 4: Install the Pedals
Apply grease to the pedal threads. Insert the right pedal into the right crank arm. Turn it clockwise to tighten. The left pedal goes into the left crank arm.
Turn the left pedal counterclockwise to tighten. Use the pedal wrench for a snug fit. Ensure both pedals are secure. Test by pulling on them.
Step 5: Assemble the Rear Wheel and Drivetrain
Place the rear wheel into the frame dropouts. Align the chain with the rear derailleur. Secure the wheel with the quick release or axle nuts. Ensure the chain moves smoothly.
Shift through the gears to test the drivetrain. Adjust the derailleur if the chain skips. Check the brake alignment. Ensure the wheel spins freely.
Step 6: Install the Brake System
Attach the brake calipers to the frame and fork. Align them with the rotors. Tighten the bolts securely. Test the brakes by squeezing the levers.
Ensure the brake pads contact the rotor evenly. Adjust the caliper position if needed. Check the brake lever tension. Test the brakes before riding.
Step 7: Final Checks and Adjustments
Go through every bolt and connection. Ensure all are tight and secure. Check the tire pressure with a gauge. Inflate to the recommended PSI.
Test the gears and brakes again. Spin the wheels to check for wobble. Ensure the handlebar and seat are secure. Take a short test ride in a safe area.
Unique Tips for a Smooth Assembly
Use a magnet to keep track of small bolts. This prevents them from rolling away. Label parts with sticky notes if needed. This helps avoid confusion.
Take photos at each step for reference. This helps if you need to disassemble later. Use a torque wrench to avoid over tightening. This protects the bike’s parts.
Apply carbon paste if your bike has a carbon frame. This prevents creaking noises. Check the manual for specific torque values. This ensures safety and longevity.
Common Mistakes to Avoid
Do not over tighten bolts as it can damage parts. Always follow the manual’s torque specs. Avoid cross threading bolts. This can strip the threads.
Ensure the handlebar is aligned with the front wheel. Misalignment can cause poor handling. Do not forget to grease the seat post. This prevents it from seizing.
Check the brake pads for proper alignment. Misaligned pads can cause poor braking. Avoid using incorrect tools. This can damage bolts and parts.
Safety Tips for First Time Builders
Wear gloves to protect your hands from sharp edges. Work in a well ventilated area. Avoid rushing the process. Take breaks if needed.
Double check every connection before riding. Ensure the quick releases are secure. Test the brakes thoroughly. Always wear a helmet during test rides.
Maintenance After Assembly
Clean your bike regularly to prevent dirt buildup. Lubricate the chain every few rides. Check the tire pressure before each ride. This ensures optimal performance.
Inspect the brakes and drivetrain periodically. Tighten any loose bolts. Keep the bike stored in a dry place. This extends its lifespan.
Climate Considerations for Bangladesh
Bangladesh has a humid and wet climate. Use waterproof grease for all metal parts. This prevents rust and corrosion. Check the bike often for signs of wear.
Store the bike in a dry place when not in use. Use fenders to protect against mud and rain. Clean the bike after riding in wet conditions. This keeps it in top shape.
Conclusion
Assembling your AVASTA AV300 26 27.5 inch Mountain Bike at home is rewarding. It helps you understand your bike better. Follow this guide for a smooth process.
Take your time and enjoy the experience. Regular maintenance keeps your bike in great condition. Now grab your tools and start building your dream bike today.
FAQ
How long does it take to assemble the AVASTA AV300 bike?
It typically takes one to two hours for a first time builder.
Do I need special tools for assembly?
Basic tools like Allen wrenches and a screwdriver are sufficient.
Is it safe to assemble the bike at home?
Yes if you follow the manual and double check all connections.
What should I do if a part does not fit?
Recheck the manual and ensure you are using the correct part.
How often should I maintain my bike after assembly?
Perform basic checks before every ride and deep maintenance monthly.

Welcome to outdoorxsports.com! I’m Russell, your guide to the awesome world of mountain biking. This blog is all about building a community of riders who love to share their passion for the sport. Expect inspiring stories, local trail recommendations, fun challenges, and tips for making the most of your time on two wheels.