
BMX riding puts a lot of stress on your bike and its parts. Over time even the best bmx grips wear out and lose their grip. Studies show that 70 percent of BMX riders replace their grips at least once a year. Worn grips can cause blisters and reduce control during tricks. Replacing them is a simple process that can make a big difference in your riding experience.
This guide will walk you through the process of removing old grips and installing new ones. You will also learn about the tools you need and some tips to make the job easier. Whether you are a beginner or an experienced rider this guide has something for you.
Signs Your BMX Grips Need Replacement
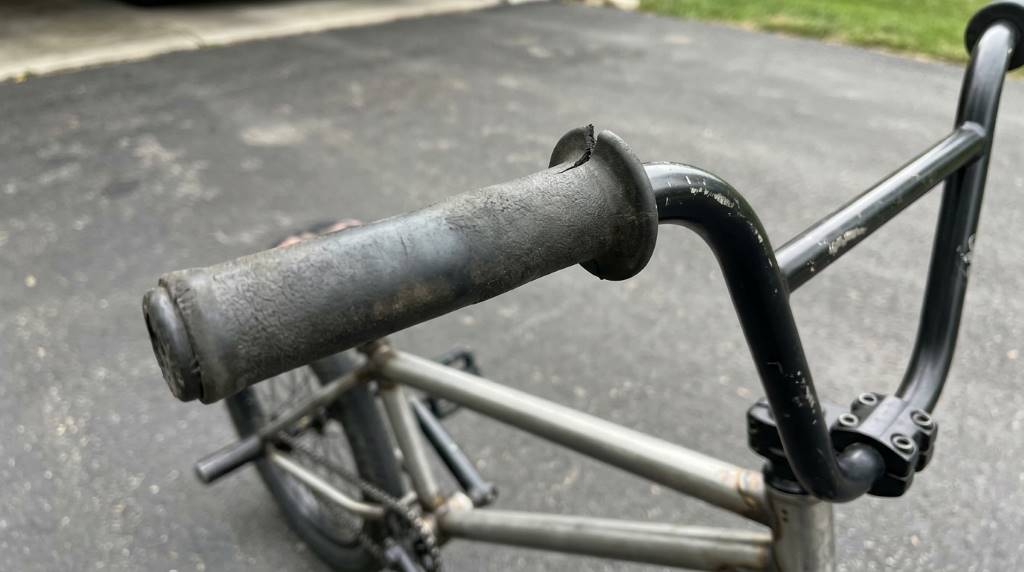
The first sign that your grips need replacing is a loss of texture. Grips that feel smooth or slippery no longer provide the friction you need. This can lead to your hands sliding off during tricks.
Another sign is visible wear and tear. Look for cracks splits or thinning material. These issues can cause discomfort and even injuries. If your grips are hard or brittle they have likely lost their cushioning properties.
Pay attention to how your hands feel after riding. If you notice more blisters or soreness than usual it might be time for new grips. Grips that no longer absorb shock can make your rides less enjoyable.
Tools and Materials You Will Need
Gather a few basic tools before you start. You will need a flathead screwdriver or a grip removal tool. A pair of scissors or a utility knife can help with cutting old grips.
You will also need rubbing alcohol or a similar solvent. This helps to loosen the grip glue. A clean rag is useful for wiping down the handlebars. Do not forget to have your new grips ready.
Some riders prefer to use hairspray or grip glue for extra hold. These are optional but can improve the longevity of your new grips. Make sure you have all your tools within reach before you begin.
Step-by-Step Guide to Removing Old BMX Grips
Step 1: Prepare Your Workspace
Find a clean and well lit area to work in. Lay down a towel or mat to protect your surfaces. This will also make it easier to find small parts if they fall.
Make sure your bike is stable. You can lean it against a wall or use a bike stand. Having a stable bike makes the process much smoother. Keep your tools organized and within easy reach.
Step 2: Loosen the Grip
Start by locating the end of the grip near the handlebar plug. Use your flathead screwdriver to gently pry the grip away from the bar. Be careful not to damage the handlebar.
If the grip is stuck you can use a grip removal tool. Slide it under the grip and twist to break the bond. This tool makes the job easier and reduces the risk of injury.
Work your way around the grip until it starts to move. Once it is loose you can pull it off by hand. If it is still stuck apply some rubbing alcohol to the inside of the grip.
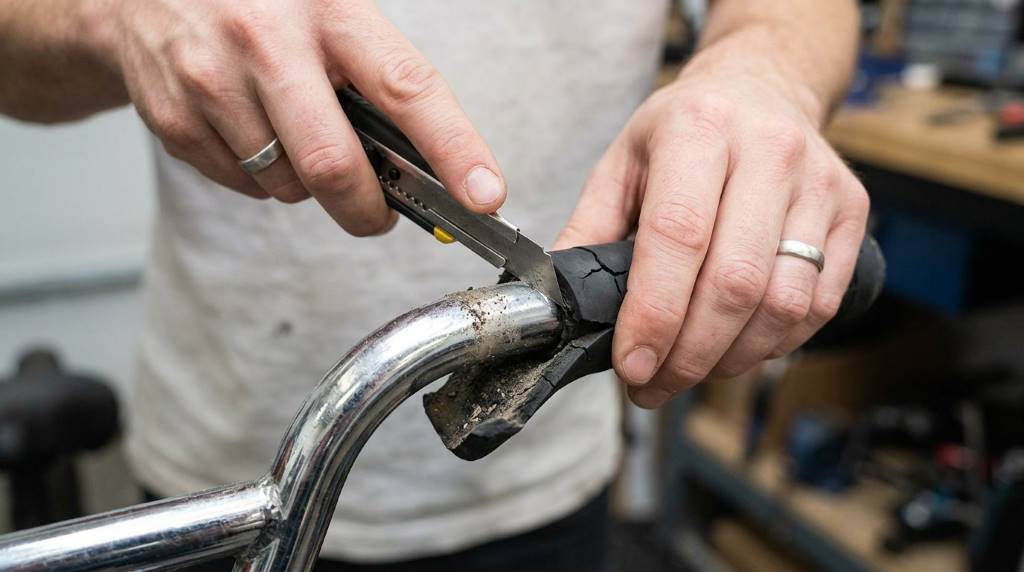
Step 3: Remove the Grip Completely
Once the grip is loose pull it off the handlebar. If it is still tight use a twisting motion as you pull. This helps to break any remaining glue or residue.
If the grip is cut or damaged you may need to use scissors or a utility knife. Carefully cut along the length of the grip and peel it away. Be cautious not to cut into the handlebar.
After removing the grip clean the handlebar with a rag. Remove any leftover glue or debris. This ensures a smooth surface for the new grip.
Step 4: Clean the Handlebar
Use rubbing alcohol to clean the handlebar thoroughly. This removes any old glue or dirt that could affect the new grip. A clean surface helps the new grip adhere better.
Let the handlebar dry completely before installing the new grip. This step is important for a secure fit. Skipping it can lead to the new grip slipping or not lasting as long.
Step-by-Step Guide to Installing New BMX Grips
Step 1: Choose the Right Grips
Select grips that match your riding style and preferences. Some grips are softer for comfort while others are harder for durability. Consider the texture and thickness as well.
If you ride in wet conditions look for grips with a tacky surface. These provide better grip in all weather. Some grips also have flanges for added security.
Make sure the grips are the right size for your handlebars. Most BMX handlebars use a standard size but it is always good to double check. This ensures a snug fit.
Step 2: Prepare the New Grips
If your new grips have plugs remove them before installation. Some grips come with adhesive already applied. If not you can use hairspray or grip glue for extra hold.
Apply a small amount of glue or hairspray to the inside of the grip. This helps it stick to the handlebar. Be careful not to use too much as it can make the grip too tight.
If you prefer a glue free installation you can skip this step. However using some form of adhesive can make the grips last longer. It also prevents them from twisting during use.
Step 3: Install the New Grip
Align the grip with the handlebar and start sliding it on. Make sure it is straight and even. Twisting the grip slightly as you push can help it slide on more easily.
If the grip is tight use a bit of soapy water on the handlebar. This acts as a lubricant and makes installation easier. Wipe off any excess water after the grip is in place.
Once the grip is on adjust it to your desired position. Make sure it is even on both sides. The grip should cover the entire handlebar up to the stem.
Step 4: Secure the Grip
If your grips have end plugs insert them now. These plugs help keep the grips in place and prevent them from sliding off. Make sure they are secure and flush with the end of the handlebar.
Give the glue or adhesive time to set. This usually takes a few hours. Avoid riding your bike until the grips are fully secured. This ensures they do not move or twist during use.
Once the grips are secure check them for any gaps or loose spots. If everything looks good you are ready to ride. Enjoy the improved grip and control.
Tips for Prolonging the Life of Your BMX Grips
Regular cleaning can extend the life of your grips. Use a damp cloth to wipe them down after rides. This removes dirt and sweat that can break down the material.
Avoid exposing your grips to extreme heat or direct sunlight. These can cause the material to degrade faster. Store your bike in a cool dry place when not in use.
If your grips start to feel slippery use a bit of grip glue to restore their tackiness. This can buy you some time before needing to replace them. It is a quick and easy fix.
Rotate your grips occasionally to ensure even wear. This can help them last longer and maintain a consistent feel. It is a simple step that many riders overlook.
Common Mistakes to Avoid When Replacing BMX Grips
One common mistake is not cleaning the handlebar before installing new grips. Dirt and old glue can prevent the new grips from adhering properly. Always take the time to clean the surface.
Another mistake is using too much glue or adhesive. This can make the grips too tight and difficult to install. It can also cause the grips to degrade faster. Use a moderate amount for the best results.
Avoid pulling the grips too hard during installation. This can stretch them out and affect their fit. Use a twisting motion to help them slide on more easily. Be patient and take your time.
Do not forget to check the alignment of your grips. Misaligned grips can cause discomfort and affect your control. Make sure they are even and straight before securing them.
Unique Discussion: Customizing Your BMX Grips
Customizing your BMX grips can add a personal touch to your bike. Many companies offer grips in a variety of colors and patterns. You can mix and match to create a unique look.
Some riders like to add custom designs or logos to their grips. This can be done with stickers or paint. Make sure any additions do not affect the grip or safety of the grips.
You can also experiment with different textures and materials. Some grips have raised patterns or soft rubber for added comfort. Find what works best for your riding style.
Custom grips can also be a fun way to show off your personality. Whether you prefer bold colors or subtle designs there are plenty of options. Just make sure they are functional as well as stylish.
Conclusion
Replacing your BMX grips is a simple but important task. Worn grips can affect your control and comfort while riding. By following this guide you can ensure a smooth and successful replacement.
Remember to take your time and use the right tools. Cleaning the handlebar and using adhesive can make a big difference. Do not forget to check your grips regularly for signs of wear.
Customizing your grips can also add a personal touch to your bike. Whether you prefer standard or custom grips make sure they suit your riding style. Happy riding and enjoy your new grips.
If you found this guide helpful share it with your fellow riders. Feel free to leave a comment with your own tips and experiences. Your feedback is always welcome.
FAQ
How often should I replace my BMX grips?
Replace your BMX grips every 6 to 12 months or when they show signs of wear.
Can I reuse old grips?
It is not recommended as old grips lose their grip and cushioning over time.
What is the best way to clean BMX grips?
Use a damp cloth with mild soap to clean your grips after rides.
Do I need special tools to replace BMX grips?
A flathead screwdriver and rubbing alcohol are usually enough for the job.
Can I install BMX grips without glue?
Yes but using glue or hairspray can help them last longer and stay in place.

Welcome to outdoorxsports.com! I’m Russell, your guide to the awesome world of mountain biking. This blog is all about building a community of riders who love to share their passion for the sport. Expect inspiring stories, local trail recommendations, fun challenges, and tips for making the most of your time on two wheels.