
Tubeless tire technology has revolutionized cycling, offering superior grip, comfort, and puncture resistance. But the benefits come with a unique challenge: effectively seating and maintaining proper pressure in these seal-dependent systems. Unlike traditional inner tubes, tubeless tires require a sudden, high-volume burst of air to snap the tire bead onto the rim, creating an airtight seal. This is where the best bike pumps for tubeless tires become your best friend.
This comprehensive guide will delve into everything you need to know about choosing the best bike pump for your tubeless setup, ensuring you spend less time wrestling with your tires and more time enjoying the ride.
Why Tubeless Tires Demand a Different Pump
Before we dive into pump types, let’s understand why tubeless inflation is different. A standard floor pump works by gradually increasing air pressure in the tire. While this is fine for inner tubes, tubeless tires often have a loose fit on the rim when deflated. To “seat” the bead, you need a rapid influx of air that pushes the tire sidewalls outwards and locks them into place on the rim’s shelves. Without this initial burst, the air simply escapes around the loose bead.
This need for high-volume, rapid inflation is the primary differentiator for pumps designed for tubeless tires.
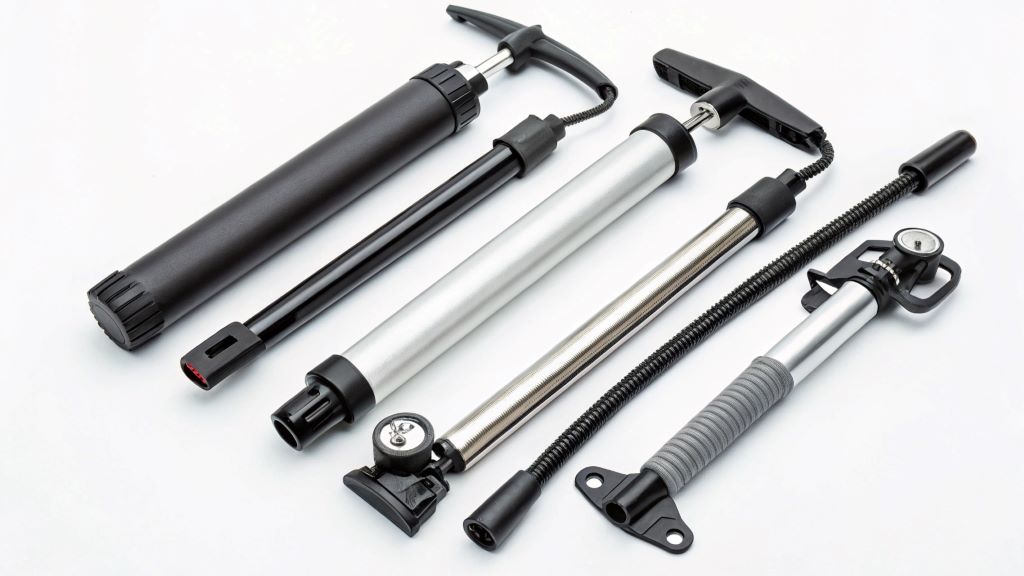
Types of Pumps for Tubeless Tires: Choosing Your Weapon
There are several categories of pumps suitable for tubeless tires, each with its own advantages and disadvantages.
1. Tubeless-Specific Floor Pumps (Charge/Booster Pumps)
These are arguably the most effective and popular option for home mechanics. They feature an integrated air chamber or reservoir that you pump up to a high pressure (typically 120-160 PSI) before releasing the accumulated air into the tire in one powerful blast. This mimicks the action of an air compressor, providing the necessary force to seat even the most stubborn tubeless beads.
Pros:
- Reliable Bead Seating: Designed specifically for tubeless tires, they excel at getting the bead to pop into place quickly and efficiently.
- High Volume and Pressure: Deliver the necessary volume and pressure for quick inflation.
- Convenient for Home Use: A staple for any cyclist running tubeless.
- Versatile: Many models can also be used as standard floor pumps for topping up tires.
Cons:
- Higher Cost: Generally more expensive than standard floor pumps.
- Can Be Bulkier: The integrated air chamber adds to their size and weight.
- May Require “Equalization”: Some models require you to release air from the main chamber before topping up tires to avoid over-inflating.
Key Features to Look For:
- Large Air Chamber: A bigger chamber means a more powerful burst of air.
- Clear Gauge: An accurate and easy-to-read pressure gauge is essential for precise inflation.
- Durable Construction: Look for metal barrels, sturdy bases, and quality chucks for longevity.
- Valve Compatibility: Most modern pumps are compatible with both Presta and Schrader valves.
- Ergonomic Handle: A comfortable handle makes pumping easier, especially when building pressure in the chamber.
Top Contenders in this Category:
- Bontrager TLR Flash Charger: A popular choice known for its ease of use and effectiveness in seating tubeless tires.
- Topeak JoeBlow Booster: Another highly-rated option, often praised for its efficiency in inflating and seating.
- Lezyne Pressure Over Drive: Offers excellent build quality and a foot-operated lever for quick air release.
- Blackburn Chamber Tubeless: A premium option with accurate readings and smooth operation.
2. Air Compressors
If you have access to an air compressor, it’s an excellent tool for seating tubeless tires. The high, continuous airflow is perfect for forcing the bead into place.
Pros:
- Ultimate Seating Power: Provides consistent, powerful airflow that effortlessly seats most tubeless tires.
- Fast Inflation: Inflates tires rapidly.
- Versatile: Can be used for various other tasks around the home or garage.
Cons:
- Not Portable: Clearly not an option for on-the-go repairs.
- Noise: Can be quite loud.
- Cost: Initial investment can be significant.
- Moisture Management: Some compressors can introduce moisture into the tire, which can degrade sealant over time. Draining the tank regularly is important.
Considerations:
- Tank Size: A larger tank means more air capacity for multiple tires.
- PSI Output: Ensure it can deliver sufficient pressure for your tires (usually 60-80 PSI is enough for seating, but higher is better for versatility).
- Nozzle Type: You’ll need an appropriate chuck or adapter for bike valves.
3. CO2 Inflators
For quick, on-the-go tubeless repairs, CO2 inflators are a game-changer. They deliver a rapid burst of compressed gas, which is often enough to seat a popped tubeless bead trailside.
Pros:
- Extremely Compact and Lightweight: Easy to carry in a saddlebag or jersey pocket.
- Instant Inflation: Inflates tires in seconds.
- Effortless: No pumping required.
Cons:
- Limited Use: Each cartridge is single-use, leading to ongoing costs.
- Environmental Impact: Empty cartridges contribute to waste.
- Sealant Degradation: CO2 can cause some latex-based sealants to dry out prematurely or become less effective. It’s often recommended to deflate and reinflate with regular air from a floor pump once you get home.
- No Pressure Control (typically): Once you engage the cartridge, the air is released, making precise pressure adjustments difficult. Some models offer flow control.
- Cold Hands: Cartridges get extremely cold during inflation.
Key Considerations:
- Cartridge Size: 16g cartridges are generally suitable for road and gravel tires, while 20g or 25g are better for wider mountain bike tires.
- Flow Control: Look for inflators with a trigger or twist mechanism for controlled inflation.
- Valve Compatibility: Ensure it works with your valve type (Presta/Schrader).
4. High-Volume Floor Pumps (Non-Booster)
While not specifically designed for tubeless seating, some high-volume floor pumps can, with a bit of technique, manage to seat tubeless tires, especially if the tire and rim fit is good. These pumps move a large amount of air per stroke, making them efficient for general inflation.
Pros:
- More Affordable: Generally less expensive than tubeless-specific booster pumps.
- Good for General Inflation: Excellent for topping up tires before rides.
Cons:
- Less Reliable for Seating: May struggle with stubborn tubeless beads, requiring more effort and technique.
- Not Ideal for Initial Setup: Can be frustrating for first-time tubeless installations.
Tips for Seating Tubeless with a Standard Floor Pump:
- Remove the Valve Core: This dramatically increases airflow, making it easier to seat the bead. Once seated, quickly reinstall the valve core and pump to desired pressure.
- Use Soapy Water: Applying soapy water to the tire beads can help them slide into place more easily and indicate where air is escaping.
- Ratchet Strap/Inner Tube Trick: Wrap a ratchet strap or an old inner tube around the circumference of the tire and tighten it. This forces the beads outwards against the rim, aiding in seating.
- Pump Vigorously: Push down on the pump handle as quickly and forcefully as possible.
Essential Features for Any Tubeless Pump
Regardless of the type, certain features are crucial for a good tubeless bike pump:
- Accurate Pressure Gauge: Tubeless tires benefit from precise pressure settings, especially for mountain biking. A large, easy-to-read gauge (preferably digital) is a big plus.
- Secure Valve Chuck: A pump head that forms a tight, leak-free seal with your valve stem is paramount. Screw-on chucks (like those found on Lezyne pumps) are often praised for their secure connection, though push-on designs can also be effective if well-made. Look for compatibility with both Presta and Schrader valves.
- Durable Construction: A pump is an investment. Look for sturdy materials like steel or aluminum barrels, a robust base, and a comfortable handle that won’t flex or break under pressure.
- Long Hose: A longer hose provides more flexibility and convenience when positioning the pump and bike.
Tubeless Tire Inflation Techniques & Maintenance
Beyond the pump itself, proper technique and regular maintenance will ensure your tubeless system runs smoothly.
Inflation Techniques:
- Prepare the Tire: Ensure the tire is properly positioned on the rim. If it’s completely deflated, manually push the beads closer to the rim hooks.
- Remove Valve Core (Optional but Recommended for Seating): For initial seating, removing the valve core can significantly increase airflow and make it easier to get the bead to pop.
- Attach Pump Securely: Ensure a tight seal between the pump chuck and the valve stem.
- Inflate with a Burst: For booster pumps, charge the chamber to maximum pressure, then release the air in a single, rapid blast. For standard pumps, pump as quickly and forcefully as possible. You should hear distinct “pops” as the bead seats.
- Check for Leaks: Listen for hissing sounds. You can apply soapy water around the tire beads and valve stem; bubbles indicate a leak.
- Add Sealant (if not already done): If you removed the valve core, add sealant through the valve stem using a syringe. If the sealant is already in, ensure it’s evenly distributed by shaking the wheel.
- Reinstall Valve Core (if removed): Tighten it firmly but don’t overtighten.
- Fine-Tune Pressure: Use the pump’s gauge to adjust to your desired riding pressure. Remember tubeless tires typically run at lower pressures than their tubed counterparts.
Read More: How to choose the best bike pump?
Maintenance of Your Pump and Tubeless System:
- Pump Maintenance: Keep your pump clean, especially the chuck. Regularly check for any signs of wear or damage to the hose or seals. Some pumps have replaceable seals, which can extend their lifespan.
- Sealant Refresh: Tubeless sealant dries out over time. It’s crucial to refresh your sealant every 3-6 months, or more frequently if you ride in hot, dry conditions.
- Inspect Rim Tape: The rim tape is critical for an airtight seal. Inspect it periodically for cuts, tears, or signs of peeling. Replace if necessary.
- Clean Valve Cores: Sealant can sometimes clog valve cores, making inflation difficult. Remove and clean them periodically with a valve core tool.
The Best Bike Pump for Tubeless Tires: A Final Recommendation
For most home mechanics running tubeless, a tubeless-specific floor pump with an air chamber/booster function offers the best balance of performance, convenience, and reliability. They are purpose-built for the task and will save you considerable frustration.
While a regular high-volume floor pump can work in a pinch, or with specific techniques, the dedicated tubeless pumps simplify the process significantly. CO2 inflators are excellent for emergency trailside repairs but shouldn’t be your primary inflation method due to cost and sealant considerations. Air compressors are ideal if you have one, but lack portability.
Investing in the right pump will make your tubeless cycling experience smoother and more enjoyable, allowing you to quickly and confidently get your tires ready for whatever the road or trail throws your way. Happy riding!
Read More:
The 5 Best Electric Bike Pumps of 2025
Revolutionizing Roadside Assistance: The TCCBAC Portable Air Compressor

Welcome to outdoorxsports.com! I’m Russell, your guide to the awesome world of mountain biking. This blog is all about building a community of riders who love to share their passion for the sport. Expect inspiring stories, local trail recommendations, fun challenges, and tips for making the most of your time on two wheels.