
Mountain biking is an exhilarating sport, a symphony of speed, technical skill, and pure joy as you carve through trails. But beneath the gnarly tires and aggressive geometry lies a critical component that dictates your ride quality, control, and even safety: your suspension. And for anyone running air-sprung forks or shocks, a single, unassuming tool holds the key to unlocking its full potential: Mountain bike suspension pumps.
Often overlooked, the suspension pump is far from a mere accessory; it’s an indispensable piece of kit that empowers you to precisely dial in your bike’s most crucial performance aspect. Without it, you’re essentially riding blind, leaving comfort, traction, and efficiency on the table.
In this comprehensive guide, we’ll dive deep into the world of mountain bike suspension pumps. We’ll explore why they’re essential, how to use them effectively, what features to look for, and even touch upon some of the best models on the market. Get ready to transform your trail experience from good to absolutely sublime.
Why Your Suspension Pump is Your Mountain Bike’s Best Friend
Imagine driving a car with under-inflated or over-inflated tires. It feels sluggish, unpredictable, and downright unsafe. Your mountain bike’s suspension is no different. The air pressure within your forks and rear shock acts as the “spring,” supporting your weight and absorbing impacts. An incorrectly set pressure can lead to a multitude of issues, from a harsh, unforgiving ride to a wallowy, uncontrollable mess.
Here’s why a suspension pump is non-negotiable for any serious mountain biker:
Setting Sag: The Foundation of Performance:
Sag refers to the amount your suspension compresses under your own weight when you’re in your riding position. It’s the critical starting point for any suspension setup. Too little sag means your bike won’t absorb small bumps effectively, leading to a harsh ride and reduced traction. Too much sag means your suspension will “bottom out” too easily and feel inefficient, particularly on climbs. A suspension pump with its accurate gauge allows you to precisely adjust the air pressure to achieve the manufacturer’s recommended sag (typically 15-20% for forks and 25-35% for rear shocks, depending on bike type and riding style).
Tailoring to Your Weight and Riding Style:
Riders come in all shapes and sizes, and so do their bikes and riding preferences. A heavier rider will require more air pressure than a lighter one to achieve the same sag. Similarly, aggressive riders tackling big drops might want a firmer setup, while those prioritizing comfort on long cross-country rides might opt for a slightly softer feel. Your suspension pump enables you to customize your suspension to your exact needs.
Adapting to Terrain:
The trails you ride can vary dramatically. A hard-packed, flowy trail might benefit from a slightly firmer setup for maximum pumping efficiency, while a rocky, technical descent might demand a softer, more compliant suspension for better grip and comfort. With a suspension pump, you can make on-the-fly adjustments to optimize your bike for the specific terrain you’re encountering.
Maximizing Traction and Control:
Properly set suspension keeps your tires glued to the ground, even over rough terrain. This translates to better traction for climbing, more predictable handling on descents, and increased confidence when navigating technical sections.
Preventing Damage and Prolonging Component Life:
Riding with incorrect pressure can put undue stress on your suspension components, leading to premature wear and tear or even damage. Regularly checking and adjusting your pressure with a quality pump helps extend the lifespan of your expensive forks and shocks.
Fine-Tuning Damping:
While the suspension pump primarily adjusts air spring pressure, the proper air pressure also influences how your damping (rebound and compression) performs. Getting the spring rate right is the first step to truly dialing in your damping settings.
How to Use Your Mountain Bike Suspension Pump: A Step-by-Step Guide
Using a suspension pump is straightforward, but precision and understanding the sequence are key. Here’s how to do it:
Before You Begin:
- Gather Your Tools: You’ll need your suspension pump, a ruler or sag tool, and your bike’s manufacturer’s manual (or online resources) for recommended sag percentages and pressure ranges.
- Wear Your Riding Gear: Always set sag with all your typical riding gear on (helmet, shoes, backpack, water, etc.). This ensures the sag measurement accurately reflects your riding weight.
- Open Damping Adjusters: Ensure any compression damping dials or levers on your fork and shock are in the “fully open” or “least damped” position. This allows the suspension to move freely.
Setting Sag (Rear Shock):
Locate the Valve:
Your rear shock will have a Schrader valve, usually covered by a cap. Unscrew the cap.
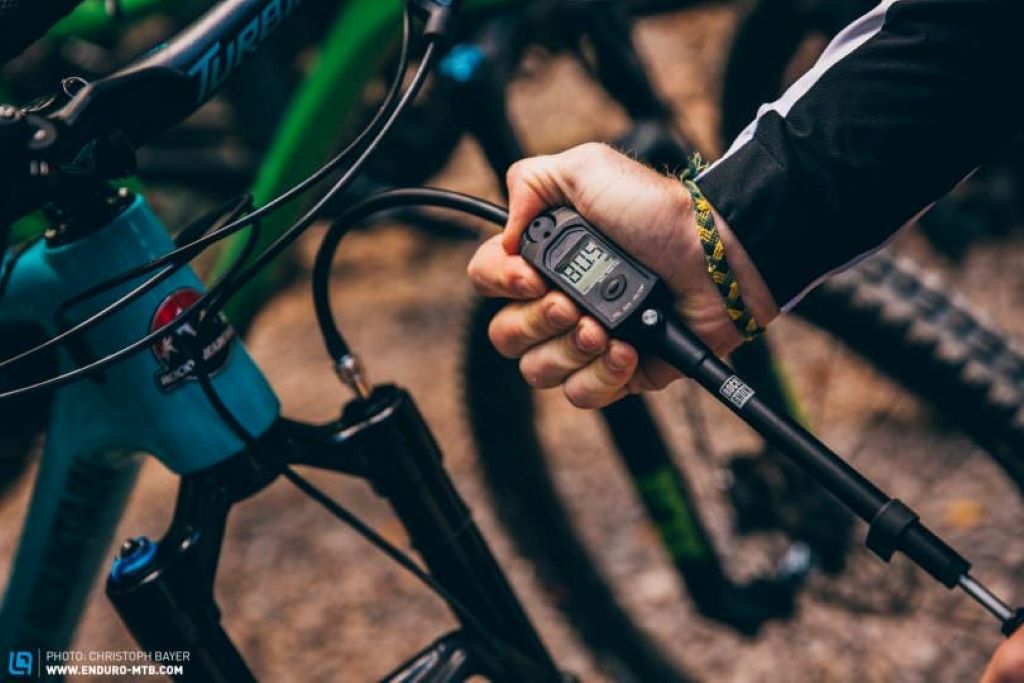
Attach the Pump:
Carefully thread the pump head onto the shock valve. Most modern shock pumps have a two-stage connection. First, thread the silver collar on until it’s snug. Then, thread the red or inner collar down to engage the valve pin. This “zero-loss” design minimizes air loss when connecting and disconnecting.
Inflate to Starting Pressure:
Pump air into the shock until you reach a pressure slightly higher than your estimated target. It’s easier to release air than to add it.
Reset O-Ring:
Slide the rubber O-ring (sag indicator) on the shock body all the way down against the wiper seal.
Assume Riding Position:
Gently get on your bike in your normal seated riding position. Bounce lightly a few times to settle the suspension and activate the negative air spring. Hold your position for a few seconds.
Carefully Dismount:
Without bouncing or disturbing the O-ring, carefully dismount the bike.
Measure Sag:
Measure the distance the O-ring has moved from the wiper seal. This is your sag.
Calculate Sag Percentage:
Divide the measured sag by the total shock stroke (not total shock length!) and multiply by 100. (e.g., (15mm sag / 50mm shock stroke) x 100 = 30% sag). Your bike’s manual will specify the shock stroke.
Adjust Pressure:
- Too little sag (too much pressure): Use the pump’s bleed valve (small button or lever) to slowly release air until you achieve the desired sag. Release small amounts at a time and re-measure.
- Too much sag (too little pressure): Add more air with the pump and repeat the sag measurement process.
Disconnect and Replace Cap:
Once your sag is set, unthread the pump head. Again, follow the two-stage process: unthread the inner collar first, then the outer silver collar. This minimizes air loss. Replace the valve cap.
Setting Sag (Front Fork):
The process for the front fork is very similar, but you’ll typically set sag in your “attack position” (standing with elbows and knees bent, ready to ride).
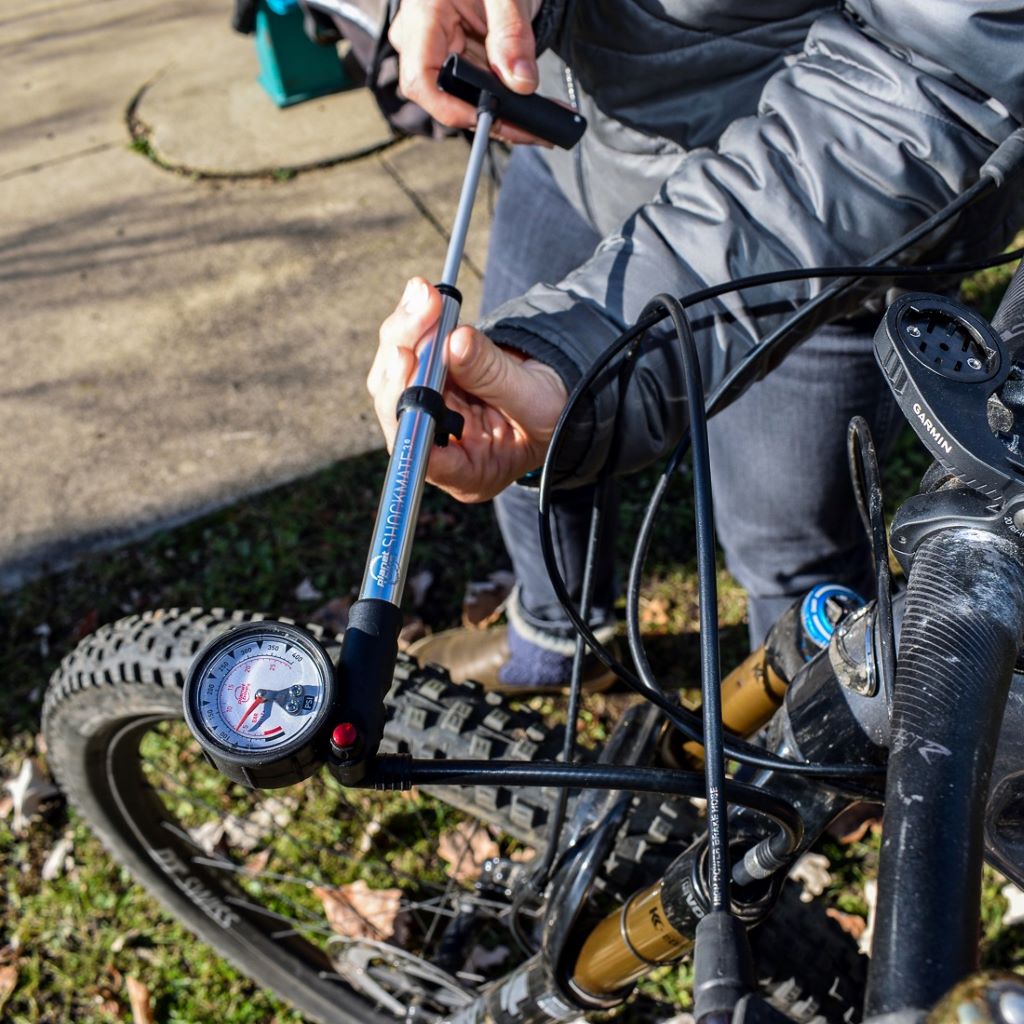
- Locate the Valve: The air valve is usually on the top cap of one of your fork stanchions (often the left side). Unscrew the cap.
- Attach the Pump: Connect the pump head to the valve using the two-stage process.
- Inflate to Starting Pressure: Pump to a slightly higher pressure than your target.
- Reset O-Ring: Slide the O-ring on the fork stanchion down to the wiper seal.
- Assume Attack Position: Get on your bike in your neutral, standing attack position. Bounce lightly to settle the suspension. Hold your position.
- Carefully Dismount: Step off the bike without disturbing the O-ring.
- Measure and Calculate Sag: Measure the O-ring’s travel and calculate the sag percentage. Fork sag is typically 15-20% of total travel.
- Adjust Pressure: Add or release air as needed using the bleed valve.
- Disconnect and Replace Cap: Unthread the pump head (inner then outer collar) and replace the cap.
Important Considerations:
- Consistency is Key: Always use the same suspension pump for your adjustments to ensure consistent readings. Different pumps can have slight variations in their gauges.
- Small Adjustments: When fine-tuning, make very small adjustments (e.g., 5 PSI at a time) and re-check.
- Ride and Refine: The sag setting is a starting point. The true test is on the trail. Pay attention to how your bike feels. If it’s bottoming out frequently, add a few PSI. If it feels too stiff or unforgiving, release a few PSI.
- Record Your Settings: Once you find a setup you like, record the pressure settings for both your fork and shock. This will save you time in the future and help you return to your preferred setup.
Key Features to Look for in a Mountain Bike Suspension Pump
Not all suspension pumps are created equal. When choosing one, consider these crucial features:
Accurate Gauge:
This is paramount. Look for a pump with a clear, easy-to-read gauge. Digital gauges often offer superior precision compared to analog ones, making fine adjustments much easier.
High-Pressure Capacity:
Mountain bike suspension operates at high pressures (often 100-300 PSI, sometimes up to 600 PSI for certain systems). Ensure the pump’s maximum PSI rating exceeds your bike’s requirements.
Zero-Loss Connector/Valve Head:
This is a game-changer. A zero-loss connector (often a two-stage design) ensures that no air escapes from your shock or fork when you connect or disconnect the pump. This is critical for accurate pressure readings.
Bleed Valve:
A small bleed valve allows you to precisely release small amounts of air, enabling micro-adjustments to your pressure. This is invaluable for dialing in that perfect sag.
Flexible Hose:
A flexible hose makes it easier to connect the pump to valves that might be in awkward or tight spaces on your bike. Look for a braided hose for enhanced durability and high-pressure resistance.
Durable Construction:
Suspension pumps are subjected to significant pressure. Opt for models made from robust materials like aluminum, designed to withstand regular use and the rigors of trail life.
Portability:
If you plan to carry your pump on rides for on-the-fly adjustments, consider its size and weight. Compact and lightweight designs are ideal for throwing in your pack.
Ergonomics:
A comfortable handle and intuitive design make the pumping and adjusting process much smoother.
Read More: How to choose the best bike pump?
Top Suspension Pump Brands and Models (Examples)
While specific models evolve, certain brands consistently produce high-quality suspension pumps. Some popular and well-regarded options include:
- Lezyne Digital Shock Drive: Known for its compact size, durable aluminum construction, accurate digital gauge, and zero-loss chuck. A favorite for portability and precision.
- RockShox High-Pressure Shock Pump: Often rebranded by other companies, RockShox pumps are generally reliable, accurate, and come in various pressure capacities. Many feature a digital gauge for easy reading.
- Topeak PocketShock DXG: A popular choice for its compact design, large digital display, and “Pressure-Rite” connector that minimizes air loss.
- SKS SAM Suspension Pump: Features a clever design that aims to lose no pressure when removed, making it highly accurate for fine-tuning.
- Birzman Zacoo Macht/Salut: Birzman offers well-built pumps with good gauges and air-lock functions to reduce air loss.
The Unsung Hero of Your Mountain Bike Toolkit
In the grand scheme of mountain biking gear, a suspension pump might seem like a minor detail. However, its impact on your riding experience is anything but. It’s the silent workhorse that allows you to translate the theoretical world of suspension settings into tangible improvements on the trail.
Investing in a quality mountain bike suspension pump is an investment in better comfort, enhanced control, improved performance, and ultimately, more fun on every ride. So, if you’re serious about your mountain biking, make sure this essential tool has a prominent place in your gear bag. Your bike, and your body, will thank you for it.
Read More:
The 5 Best Electric Bike Pumps of 2025
The TCCBAC Portable Air Compressor

Welcome to outdoorxsports.com! I’m Russell, your guide to the awesome world of mountain biking. This blog is all about building a community of riders who love to share their passion for the sport. Expect inspiring stories, local trail recommendations, fun challenges, and tips for making the most of your time on two wheels.