
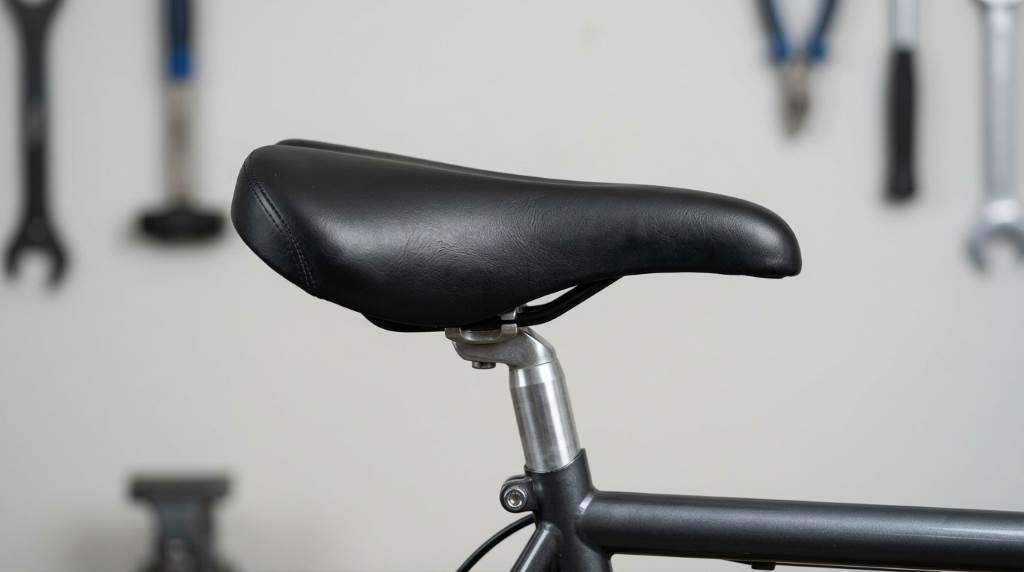
Installing a Zacro bike seat cushion takes only a few minutes and requires no tools. Center the cushion over your saddle, secure the drawstring and straps, then check for movement before riding. The Zacro bike seat cushion uses a simple slip-on design that makes installation straightforward. The small version measures about 11 by 8 inches, so accurate saddle measurement matters.
Key Takeaways
- Measure your bike saddle before installing the cushion for a secure fit.
- Center the cushion from front to rear before tightening anything.
- Pull the drawstring evenly around the saddle base for better stability.
- Use both included straps when your cushion model provides them.
- Test the cushion while stationary before starting your first ride.
- Recheck the fit whenever the cushion starts feeling loose.
What You Need Before Installing
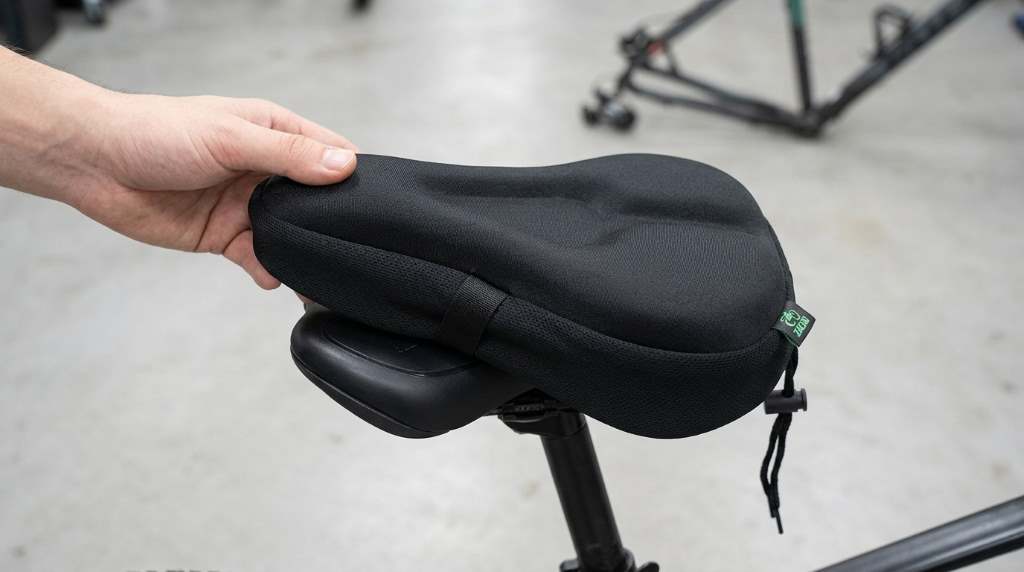
You do not need special tools for a standard Zacro cushion installation. However, preparation makes the fitting process faster and prevents unnecessary adjustments later. First, place your bicycle on level ground where you can reach the saddle comfortably. Then inspect the cushion, straps, drawstring, and underside before fitting it.
Check your saddle shape before placing the cover over it. Zacro cushions suit several saddle styles, including exercise, indoor, cruiser, and outdoor bike seats. Nevertheless, different cushion sizes fit different saddles, so never assume universal compatibility. Measure the saddle length and width against your cushion specifications before continuing.
Check The Cushion Orientation
Identify the wider rear section and narrower front section of the cushion. The wider section should sit toward the back of your saddle. Turn the cushion correctly before stretching it over the seat. This simple step prevents uneven padding and awkward positioning during installation.
Step-By-Step Installation Method
1. Clean The Original Saddle
Start with a clean, dry saddle surface for the best possible grip. Wipe away dust, moisture, mud, or oily residue before installing the cushion. A dirty surface can reduce friction between the saddle and non-slip underside. Therefore, cleaning the saddle first can improve stability without changing the cushion itself.
2. Position The Cushion Over The Saddle
Hold the cushion by its front and rear sections before placing it onto the saddle. Align the narrow front portion with the saddle nose. Then pull the wider rear portion evenly over the back of the saddle. Make sure the cushion sits centrally instead of favoring either side.
Do not tighten the straps immediately after placing the cushion. First, check the padding alignment from above and from both sides. The centerline should follow the centerline of your bicycle saddle. Correct positioning now prevents repeated adjustments during your first ride.
3. Pull The Cushion Fully Into Position
Stretch the cushion gently around the saddle edges until the cover sits evenly. Avoid pulling one side excessively while leaving the opposite side loose. Instead, alternate between both sides as you work toward the rear. This approach creates more balanced tension around the saddle.
Next, check whether the cushion covers the intended seating area completely. Too much exposed saddle usually indicates incorrect positioning or an unsuitable size. Conversely, excessive bunching can indicate a cushion that does not match your saddle shape. Fix these problems before tightening the securing system.
4. Tighten The Drawstring
Locate the drawstring around the cushion’s lower edge and pull it gradually. Keep the cushion centered while tightening the string. Pulling aggressively from one point can shift the cover toward that side. Instead, tighten progressively until the cushion grips the saddle evenly.
Once the drawstring feels secure, inspect the front and rear edges again. The cushion should remain smooth without large folds beneath your sitting area. Tie or secure the excess drawstring according to your specific cushion design. Keep loose ends away from moving bicycle components.
5. Secure The Additional Straps
Some Zacro cushion versions include two additional straps for extra stability. If your model includes them, attach both straps according to their intended routing. Tighten each strap gradually rather than pulling one side completely first. This balanced approach helps keep the cushion centered while riding.
Do not make the straps excessively tight against the saddle. Excessive tension can distort the cushion and create uneven pressure beneath you. The goal involves firm contact without crushing the padding. After tightening, press the cushion gently from several directions to check its movement.
How To Check Whether The Cushion Fits Correctly
A properly installed cushion should feel stable when you push it sideways by hand. It should not slide noticeably toward either side of the saddle. Likewise, the front should remain aligned with the saddle nose during movement. If the cover shifts easily, stop and adjust it before riding.
Next, sit on the bicycle while keeping both feet firmly on the ground. Shift your weight slightly from left to right and forward to backward. Watch for sliding, bunching, or excessive movement beneath you. If you notice movement, reposition the cover and tighten its securing system again.
The Three-Point Fit Check
- Center: The cushion sits evenly along the saddle’s centerline.
- Tension: The drawstring and straps hold the cover firmly.
- Stability: The cushion resists movement during seated weight shifts.
These three checks reveal most installation problems before your first ride. They also help distinguish poor installation from incorrect cushion sizing. Therefore, perform them whenever you reinstall the cushion after cleaning. A few seconds of inspection can prevent discomfort later.
How To Prevent Zacro Cushion Slipping
Slipping usually comes from poor alignment, insufficient tension, or an incompatible saddle shape. First, make sure the cushion sits fully over the saddle instead of hanging unevenly. Then tighten the drawstring while maintaining equal positioning on both sides. Finally, use the additional straps when your version provides them.
Also check the saddle surface for moisture or residue before installation. Water can reduce friction between surfaces and encourage movement during pedaling. Similarly, loose fabric can create shifting even when the straps appear tight. Keep the cushion dry and properly tensioned for better stability.
What If The Cushion Still Moves?
Remove the cushion and reinstall it rather than simply tightening everything harder. Confirm that the cushion matches your saddle dimensions and overall shape. Then repeat the alignment and tension process from the beginning. If movement continues, the cushion may simply be too large or too small.
Installation Differences For Indoor And Outdoor Bikes
Indoor exercise bikes often have wider saddles than conventional road or mountain bikes. Therefore, a cushion designed for a broad saddle may fit them especially well. Outdoor bicycles can use narrower saddles, which require closer attention to cushion dimensions. Always compare the actual saddle measurements before installation.
Outdoor riding also exposes the cushion to rain, dust, sunlight, and road debris. Some Zacro models include a waterproof protective cover for storage or outdoor exposure. Use that cover when appropriate instead of leaving the cushion exposed unnecessarily. Proper protection can help preserve the cover’s appearance and materials.
Common Installation Mistakes To Avoid
Installing Without Measuring
Many fitting problems begin before the cushion reaches the saddle. Buyers sometimes choose a size based only on the bicycle type. However, bicycles within the same category can use noticeably different saddle dimensions. Measuring first provides a much more reliable fit.
Leaving The Front Too Loose
A loose front section can allow the cushion to shift during pedaling. This problem becomes more noticeable when you frequently change your riding position. Pull the cover evenly toward the saddle nose before final tightening. Then confirm that the front remains centered.
Overtightening One Strap
Uneven tension can pull the cushion sideways even when everything feels tight. Avoid treating one strap as the primary securing point. Instead, distribute tension across every available securing mechanism. This method keeps the cushion balanced under your body weight.
Ignoring Early Movement
Small movement can become larger movement during a longer ride. Therefore, never dismiss slipping simply because the cushion feels comfortable initially. Stop and correct the fit as soon as you notice repeated shifting. Comfort matters, but stable positioning matters just as much.
How Long Does Installation Take?
Most installations take only a few minutes when the cushion matches the saddle properly. The process involves positioning, centering, tightening, and checking the cover. You should spend more time verifying the fit than rushing through the installation. A careful first setup usually makes later adjustments much easier.
If you frequently remove the cushion, remember its correct position before taking it off. You can also inspect the strap tension before each reinstall. Over time, this creates a simple routine that takes very little effort. Consistent installation also reduces unnecessary shifting during rides.
When Should You Reinstall Or Adjust The Cushion?
Reinstall the cushion whenever it begins moving during normal riding. You should also adjust it after cleaning, transporting, or changing the bicycle saddle. Regular inspection helps identify stretched straps or worn fastening components. Replace damaged securing parts rather than relying on a loose installation.
Pay attention to changes in comfort as well as visible movement. Uneven pressure can indicate that the cushion has shifted from its original position. If the padding feels concentrated on one side, stop and realign it. A comfortable cushion only works properly when it remains correctly positioned.
Quick Installation Checklist
| Check | What To Confirm |
|---|---|
| Saddle size | The cushion matches the saddle’s length and width. |
| Orientation | The narrow front matches the saddle nose. |
| Centering | The cushion follows the saddle’s centerline. |
| Drawstring | The lower edge grips the saddle evenly. |
| Straps | Included straps hold the cover securely. |
| Stability | The cushion resists movement during seated checks. |
What To Do After Installation
Take a short test ride after completing the installation. Start slowly and pay attention to movement, pressure, and overall positioning. If everything stays centered, continue with your normal riding routine. If the cushion shifts, stop and adjust it before riding farther.
Do not judge the installation solely by softness during the first few minutes. A cushion can feel comfortable while still sitting incorrectly. Stability, alignment, and even contact provide better indicators of proper installation. Once those factors work together, the cushion can deliver its intended comfort benefits.
Frequently Asked Questions
Do I Need Tools To Install A Zacro Bike Seat Cushion?
No, standard Zacro cushion covers use a slip-on fastening system that requires no installation tools.
Why Does My Zacro Cushion Keep Sliding?
Your cushion may slide because of incorrect sizing, poor centering, loose fastening, or moisture underneath.
Can I Install The Cushion On An Exercise Bike?
Yes, many Zacro cushion models work with exercise bikes when the saddle dimensions match the cover.
Should I Tighten The Straps As Much As Possible?
No, tighten them firmly enough to prevent movement without distorting or compressing the cushion.
How Can I Tell If The Cushion Fits Correctly?
A correct fit keeps the cushion centered, smooth, and stable when you shift your seated weight.
Final Thoughts
Installing a Zacro bike seat cushion is simple when you focus on fit before comfort. Measure the saddle, position the cushion carefully, tighten the drawstring, and secure every available strap. Then perform a stationary movement check before starting your ride. This process addresses the most common causes of slipping and uneven positioning.
For the best result, treat installation as part of your riding setup rather than a one-time task. Check the cushion whenever you remove it, clean it, or notice movement. Follow these steps today, then take a short test ride to confirm the fit. A properly secured cushion can make your existing saddle noticeably more comfortable without replacing it.
Welcome to outdoorxsports.com! I’m Russell, your guide to the awesome world of mountain biking. This blog is all about building a community of riders who love to share their passion for the sport. Expect inspiring stories, local trail recommendations, fun challenges, and tips for making the most of your time on two wheels.