
Upgrading your bmx pedals can transform your riding experience by improving grip, control, and durability. Studies show that over 60 percent of BMX riders replace their pedals at least once a year to maintain peak performance. Whether you are a beginner or a seasoned rider, knowing how to install new BMX pedals using standard tools is essential. This guide will walk you through the process with clear, actionable steps. You will also discover a unique tip that most blogs overlook: how to use household items to ease the installation process.
Why Upgrading Your BMX Pedals Matters
BMX pedals take a beating during rides, especially in urban or park settings. Worn-out pedals reduce traction and can lead to slips, which are dangerous during tricks. New pedals provide better grip, which is crucial for executing stunts safely. They also last longer, saving you money in the long run.
Riding with damaged pedals can also cause foot fatigue, as your feet work harder to stay in place. This is particularly true in humid climates, where sweat and moisture speed up wear. Upgrading ensures a smoother, more comfortable ride every time.
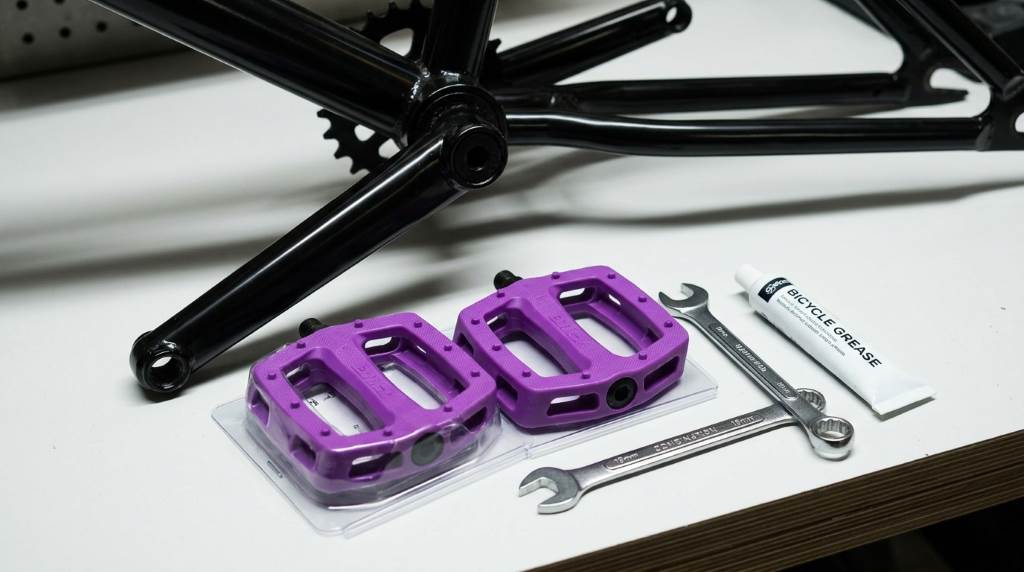
Tools You Will Need
Gather the right tools before you start to avoid delays. A 15mm wrench is the most common tool for removing and installing BMX pedals. Some pedals may require a 6mm Allen key, so check your new pedals for compatibility.
You will also need a grease or lubricant to ensure smooth threading. A rag or cloth helps clean the crank arms and pedal threads. If your pedals are stuck, a penetrating oil like WD-40 can loosen them.
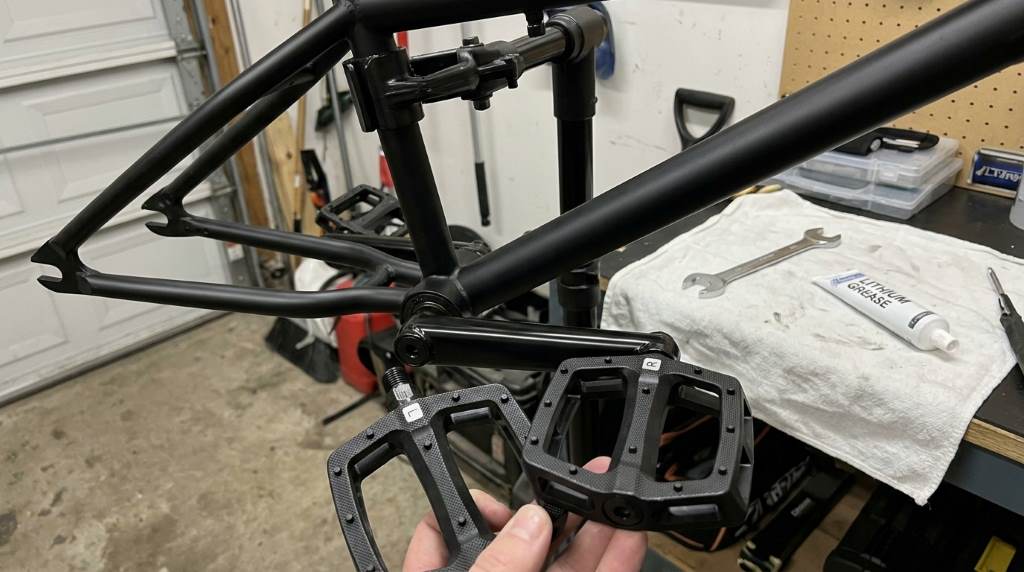
Step-by-Step Installation Guide
Step 1: Remove the Old Pedals
Start by positioning your bike so the crank arm is accessible. Use your 15mm wrench to turn the pedal counterclockwise to loosen it. Remember that the left pedal is reverse-threaded, so you turn it clockwise to remove it.
If the pedal is stuck, apply penetrating oil and wait a few minutes. Use a longer wrench for extra leverage if needed. Once loose, unscrew the pedal completely by hand to avoid damaging the threads.
Step 2: Clean the Crank Arms
Use your rag to wipe down the crank arms and remove any dirt or debris. This step is often skipped but is critical for a smooth installation. Clean threads ensure the new pedals screw in evenly and securely.
Inspect the crank arms for damage or wear. If you notice stripped threads, consider taking your bike to a professional for repairs. Damaged threads can make it impossible to secure new pedals properly.
Step 3: Apply Grease to the New Pedals
Apply a thin layer of grease to the threads of your new pedals. This reduces friction and prevents the pedals from seizing over time. Greasing also makes future removals much easier.
Avoid using too much grease, as excess can attract dirt and debris. A small amount is all you need for effective lubrication. This step is especially important in wet climates, where rust is a common issue.
Step 4: Install the New Pedals
Align the new pedal with the crank arm and begin screwing it in by hand. This ensures the threads engage properly and prevents cross-threading. Turn the right pedal clockwise and the left pedal counterclockwise to tighten.
Once the pedal is hand-tight, use your wrench to secure it fully. Do not overtighten, as this can strip the threads or damage the pedal. A snug fit is all you need to keep the pedal in place.
Step 5: Test the Installation
Spin the pedals by hand to ensure they rotate smoothly. Check for any wobbling or looseness, which could indicate improper installation. If everything feels secure, your new pedals are ready for a test ride.
Take a short ride around your neighborhood to confirm the pedals are working correctly. Pay attention to any unusual noises or resistance, which may signal a problem. If all is well, you are good to go.
Unique Tip: Use a Rubber Band for Extra Grip
If you struggle to get enough leverage when tightening the pedals, try wrapping a rubber band around the wrench handle. This provides a better grip and reduces the risk of slipping. It is a simple trick that works surprisingly well.
This method is particularly useful if you are working in a tight space or with limited tools. The rubber band adds friction, making it easier to apply the necessary force. It is a small hack that can save you a lot of frustration.
Common Mistakes to Avoid
One of the most common mistakes is forgetting that the left pedal is reverse-threaded. Turning it the wrong way can strip the threads and damage the crank arm. Always double-check the direction before applying force.
Another mistake is not cleaning the crank arms before installation. Dirt and grime can cause the new pedals to sit unevenly, leading to wobbling or premature wear. Take the extra minute to clean the area thoroughly.
Overtightening the pedals is also a frequent issue. While you want them secure, too much force can damage the threads or the pedal itself. Use your wrench to tighten just enough to eliminate any play.
Maintaining Your New BMX Pedals
Regular maintenance extends the life of your pedals and keeps them performing at their best. After every few rides, check the pedals for looseness or wear. Tighten them as needed to prevent accidents.
Clean your pedals regularly, especially if you ride in muddy or wet conditions. Use a damp cloth to remove dirt and debris, and reapply grease if necessary. This prevents rust and keeps the threads in good condition.
If you notice the pedals are wearing down unevenly, it may be a sign of improper alignment. Recheck the installation and ensure both pedals are screwed in straight. Misaligned pedals can cause discomfort and reduce efficiency.
Climate-Specific Tips for BMX Riders
Riders in humid climates should pay extra attention to rust prevention. After cleaning your pedals, apply a light coat of lubricant to protect against moisture. This is especially important if you store your bike outdoors.
In dry, dusty areas, dirt can accumulate quickly and cause the pedals to grind. Clean them more frequently and consider using a dry lubricant to repel dust. This keeps your pedals spinning smoothly.
For those in colder climates, be mindful of ice and salt, which can corrode metal parts. Rinse your bike and pedals with fresh water after riding in snowy or salty conditions. This removes harmful residues and prevents damage.
Conclusion
Installing new BMX pedals using standard tools is a straightforward process that anyone can master. By following the steps outlined in this guide, you can ensure a secure and long-lasting installation. Do not forget the unique tip of using a rubber band for extra grip when tightening.
Regular maintenance and climate-specific care will keep your pedals in top shape for years to come. Upgrading your pedals is a small investment that pays off in improved performance and safety. Now that you know how to do it, grab your tools and give it a try.
If you found this guide helpful, share it with fellow riders. Happy cycling!
FAQ
Do I need special tools to install BMX pedals?
No, a 15mm wrench and a 6mm Allen key are usually sufficient for most BMX pedals.
How often should I replace my BMX pedals?
Replace your pedals if you notice significant wear, reduced grip, or damage.
Why is the left pedal reverse-threaded?
The reverse threading prevents the pedal from loosening due to the natural rotation of the crank arm.
Can I use any grease for my BMX pedals?
Yes, any bike grease or general-purpose lubricant will work for pedal installation.
What should I do if my pedal threads are stripped?
If the threads are stripped, take your bike to a professional for repairs or replacement.

Welcome to outdoorxsports.com! I’m Russell, your guide to the awesome world of mountain biking. This blog is all about building a community of riders who love to share their passion for the sport. Expect inspiring stories, local trail recommendations, fun challenges, and tips for making the most of your time on two wheels.