
Indoor cycling gains popularity as a safe and effective workout option. Over 50 million Americans now use a bike trainer stand for training. Attaching your bicycle correctly ensures stability and prevents damage. A secure setup also improves performance and reduces injury risks. This guide will walk you through the process step by step.
Why Use a Bike Trainer Stand
A bike trainer stand transforms your outdoor bike into a stationary exercise machine. It allows you to train regardless of weather conditions. Cyclists in cold climates benefit from consistent workouts indoors. It also provides a controlled environment for focused training sessions.
Using a trainer stand helps maintain fitness during off seasons. It is ideal for recovery rides after injuries. Many athletes use it for interval training and endurance building. The setup is simple and requires minimal space at home.
Trainer stands are cost effective compared to gym memberships. They offer convenience for busy schedules. You can watch TV or listen to music while cycling. This setup also reduces wear on your bike compared to outdoor riding.
Types of Bike Trainer Stands
There are several types of bike trainer stands available. Each type offers unique features and benefits. Choosing the right one depends on your training goals. Here are the most common types.
Fluid Trainers
Fluid trainers use liquid resistance to simulate real road conditions. They provide a smooth and quiet ride. These are popular for serious cyclists. They offer progressive resistance as you pedal harder.
Fluid trainers are durable and require little maintenance. They are ideal for long training sessions. The resistance adjusts automatically with your speed. This makes them great for interval training.
Magnetic Trainers
Magnetic trainers use magnets to create resistance. They are generally quieter than fluid trainers. These trainers often come with adjustable resistance levels. They are a good option for beginners.
Magnetic trainers are lightweight and portable. They are easy to store when not in use. Some models include remote resistance control. This allows you to change intensity without stopping.
Wind Trainers
Wind trainers use a fan to generate resistance. The resistance increases with your pedaling speed. These are often the most affordable option. They can be noisy but are simple to use.
Wind trainers are less common today but still used. They provide a realistic road feel. These are best for short, high intensity workouts. They are not ideal for quiet environments.
Direct Drive Trainers
Direct drive trainers require removing the rear wheel. The bike attaches directly to the trainer. This provides the most realistic riding experience. They are often used by professional cyclists.
Direct drive trainers are precise and offer high resistance levels. They are compatible with virtual training apps. These trainers are heavy and less portable. They are also more expensive than other types.
Preparing Your Bicycle
Before attaching your bike, ensure it is clean and in good condition. Dirt and grime can damage the trainer. Check the tires for wear and proper inflation. A well maintained bike ensures a smooth training session.
Inspect the rear axle and skewer for any damage. Ensure the quick release or thru axle is secure. Tighten any loose bolts on the frame. This prevents accidents during training.
If using a wheel on trainer, check the tire pressure. A properly inflated tire reduces slippage. For direct drive trainers, remove the rear wheel carefully. Store the wheel in a safe place.
Gather all necessary tools before starting the setup. You may need a wrench or Allen keys. Some trainers require specific adapters for your bike. Check the trainer manual for compatibility.
Step by Step Attachment Guide
Step 1: Position the Trainer Stand
Place the trainer stand on a flat and stable surface. Avoid carpets or uneven floors. This ensures the trainer remains steady during use. A wobbly stand can cause accidents.
Ensure there is enough space around the trainer. This allows for safe mounting and dismounting. Keep the area free of obstacles. This prevents tripping hazards.
If using a mat, place it under the trainer. This protects your floor from sweat and scratches. It also reduces noise during workouts. A mat adds stability to the setup.
Step 2: Adjust the Trainer for Your Bike
Most trainers have adjustable settings for different bike sizes. Adjust the roller or clamp to match your wheel size. This ensures a snug fit. Refer to the trainer manual for specific instructions.
For direct drive trainers, align the dropout with the trainer. Ensure the chain is properly positioned. This prevents misalignment during pedaling. A misaligned chain can cause damage.
Check the resistance unit for proper alignment. It should contact the tire evenly. Uneven contact can cause excessive wear. This also affects the smoothness of your ride.
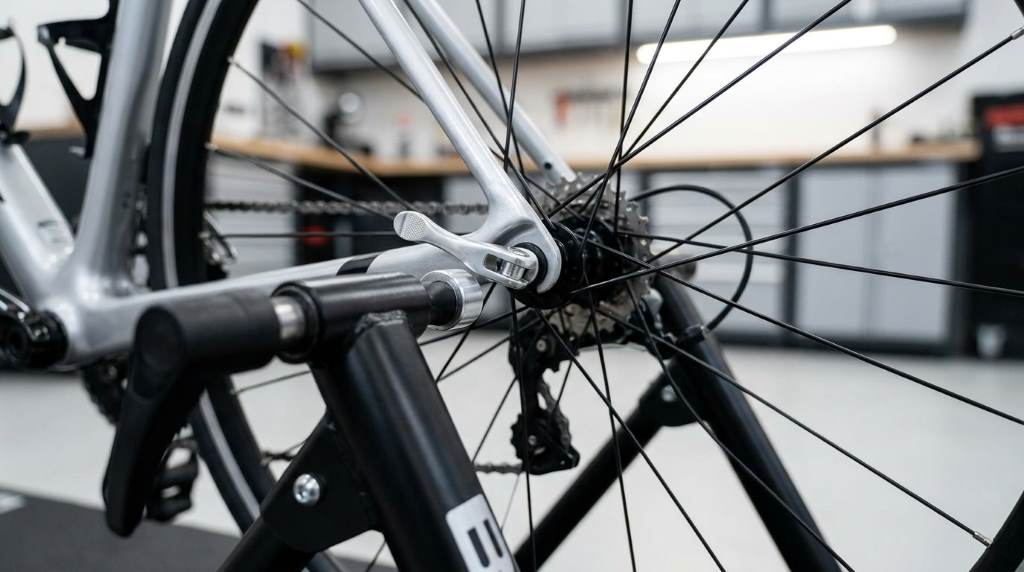
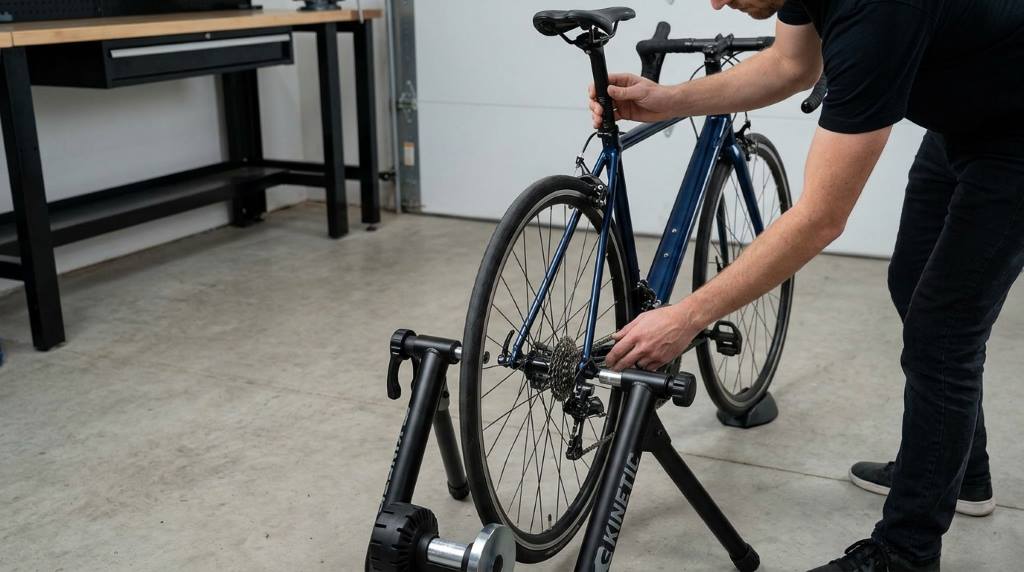
Step 3: Secure the Bicycle
Lift the bike and position the rear wheel into the trainer. Ensure the axle sits securely in the clamp. Tighten the clamp or quick release mechanism firmly. This prevents the bike from slipping.
For wheel on trainers, lower the roller onto the tire. Adjust the pressure to ensure good contact. Too much pressure can cause tire wear. Too little pressure can cause slippage.
Double check all connections before starting. Ensure the bike is level and stable. Test the setup by gently pedaling. This confirms everything is secure.
Step 4: Test the Setup
Start pedaling slowly to test the setup. Listen for any unusual noises. These could indicate misalignment or loose parts. Address any issues before increasing speed.
Check the resistance levels to ensure they work properly. Adjust as needed for your workout. Ensure the bike remains stable at all resistance levels. This prevents accidents during intense sessions.
If using a smart trainer, connect it to your device. Ensure the app recognizes the trainer. Calibrate if necessary for accurate data. This enhances your training experience.
Safety Tips for Using a Bike Trainer Stand
Always wear proper cycling shoes when using the trainer. This ensures a secure connection to the pedals. Avoid loose clothing that could get caught in the bike.
Keep a towel and water bottle nearby. Staying hydrated is important during workouts. A towel helps manage sweat and keeps the bike dry.
Never leave the trainer unattended while in use. Always dismount carefully to avoid falls. Ensure children and pets stay clear of the area.
Regularly inspect the trainer and bike for wear. Replace any damaged parts immediately. This ensures long term safety and performance.
Common Mistakes to Avoid
One common mistake is not tightening the clamp enough. This can cause the bike to slip during use. Always ensure the clamp is secure before starting.
Avoid using a worn out tire on a wheel on trainer. This can cause slippage and damage. Replace the tire if it shows significant wear.
Do not ignore unusual noises during use. These can indicate serious issues. Stop and inspect the setup if something sounds wrong.
Using the wrong adapter for your bike can cause damage. Always check compatibility before attaching. Consult the trainer manual if unsure.
Maintaining Your Bike Trainer Stand
Clean the trainer regularly to remove sweat and dirt. This prevents corrosion and wear. Use a damp cloth and mild detergent for cleaning.
Lubricate moving parts as recommended by the manufacturer. This ensures smooth operation. Regular maintenance extends the life of your trainer.
Store the trainer in a dry place when not in use. Avoid extreme temperatures. This prevents damage to the resistance unit and frame.
Check for software updates if using a smart trainer. This ensures compatibility with training apps. Updates often include performance improvements.
Unique Considerations for Humid Climates
Humid climates can cause rust and corrosion on metal parts. Wipe down the trainer after each use. This removes moisture that can lead to damage.
Use a dehumidifier in your training area if possible. This reduces moisture in the air. It helps protect both the bike and trainer.
Apply a protective coating to metal parts. This adds an extra layer of defense. Regular inspections are crucial in humid environments.
Store the trainer with silica gel packets. These absorb moisture and prevent rust. This is especially important during rainy seasons.
Advanced Tips for Serious Cyclists
Use a cadence sensor to track your pedaling efficiency. This helps improve your training. Many smart trainers include this feature.
Incorporate structured workouts into your routine. Use apps to follow training plans. This maximizes the benefits of indoor cycling.
Join online cycling communities for motivation. Share your progress and learn from others. This keeps training fun and engaging.
Consider a dedicated indoor cycling bike for frequent use. This reduces wear on your outdoor bike. It also provides a more consistent training experience.
Conclusion
Attaching your bicycle to a bike trainer stand is straightforward. Following the steps ensures a safe and effective workout. Regular maintenance keeps your setup in top condition. This allows you to train indoors with confidence.
Remember to always prioritize safety during setup and use. Address any issues immediately to prevent accidents. Enjoy the convenience of indoor cycling year round.
Start your indoor training journey today. Experience the benefits of a consistent workout routine. Share your progress with fellow cycling enthusiasts.
FAQ
How often should I clean my bike trainer stand?
Clean your bike trainer stand after every use to prevent sweat buildup and corrosion.
Can I use any bike with a trainer stand?
Most bikes are compatible but check the trainer manual for specific requirements.
Do I need special tires for a bike trainer stand?
Use trainer specific tires for wheel on trainers to reduce wear and noise.
How do I know if my bike is securely attached?
Test by gently pedaling and checking for any movement or noise.
What is the best resistance type for beginners?
Magnetic trainers are a good option for beginners due to their adjustability and quiet operation.

Welcome to outdoorxsports.com! I’m Russell, your guide to the awesome world of mountain biking. This blog is all about building a community of riders who love to share their passion for the sport. Expect inspiring stories, local trail recommendations, fun challenges, and tips for making the most of your time on two wheels.