
Indoor cycling keeps you fit regardless of the weather outside. Studies show that over 40 percent of cyclists use a bike trainer fan to stay cool during intense sessions. Proper airflow can lower your core temperature by up to 10 degrees Fahrenheit. This boosts performance and reduces fatigue. Setting up your fan the right way makes all the difference.
Heat buildup is a common issue for indoor cyclists. Without proper cooling your body struggles to regulate its temperature. This leads to early exhaustion and a less effective workout. A well placed fan can solve this problem. It also helps mimic outdoor riding conditions.
Why Cooling Matters for Indoor Cycling
Your body sweats to cool down during exercise. Indoor environments often lack the natural breeze you get outside. This makes it harder for sweat to evaporate. Evaporation is how your body releases heat. Without it you overheat quickly.
Overheating reduces your endurance and focus. It can also lead to dizziness or nausea. A good fan setup prevents these issues. It keeps your heart rate in the optimal zone. This means you can train longer and harder.
Research shows that even a slight rise in body temperature can hurt performance. Cyclists in hot rooms produce less power. They also recover more slowly. Cool air helps maintain your speed and stamina.
Choosing the Right Bike Trainer Fan
Not all fans are created equal for indoor cycling. You need one with strong airflow and adjustable settings. Look for fans with multiple speed options. This lets you match the airflow to your workout intensity.
Size matters when it comes to fans. Larger fans move more air but take up more space. Smaller fans are easier to position. Consider the size of your training area. A 20 inch fan works well for most home setups.
Noise level is another important factor. Loud fans can be distracting during workouts. Choose a model designed for quiet operation. This keeps your focus on the ride. Some fans also come with remote controls for convenience.
Types of Fans for Bike Trainers
Floor fans are the most common choice for cyclists. They are powerful and easy to move around. You can place them directly in front of you. This provides a steady stream of air. They are also affordable and widely available.
Tower fans offer a space saving design. They are tall and narrow. This makes them ideal for small rooms. They often come with oscillation features. This spreads the airflow over a wider area.
Pedestal fans combine the best of both worlds. They sit on a stand that you can adjust. This lets you direct the airflow exactly where you need it. They are also powerful and quiet. Many cyclists prefer them for their versatility.
Optimal Fan Placement for Maximum Cooling
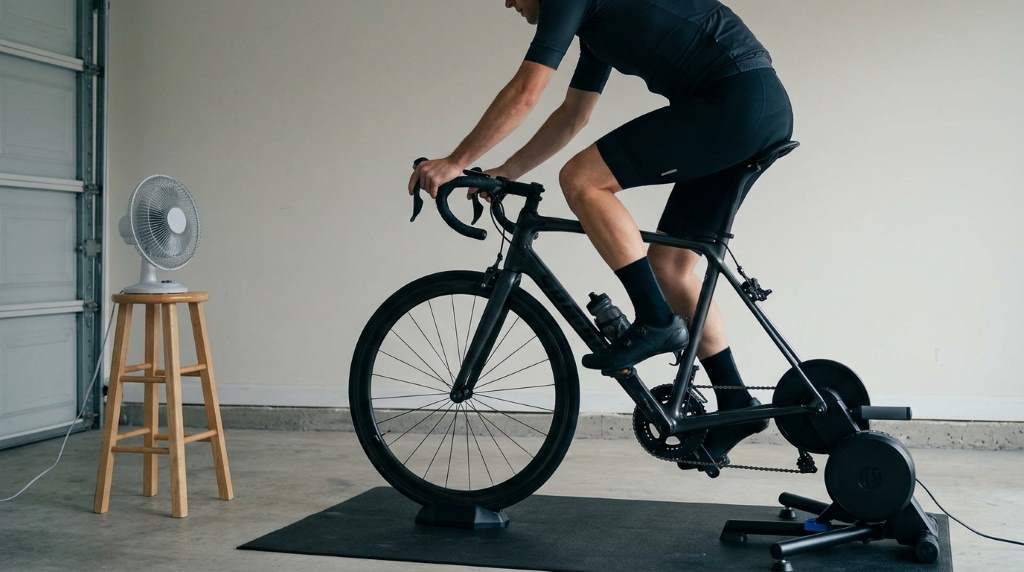
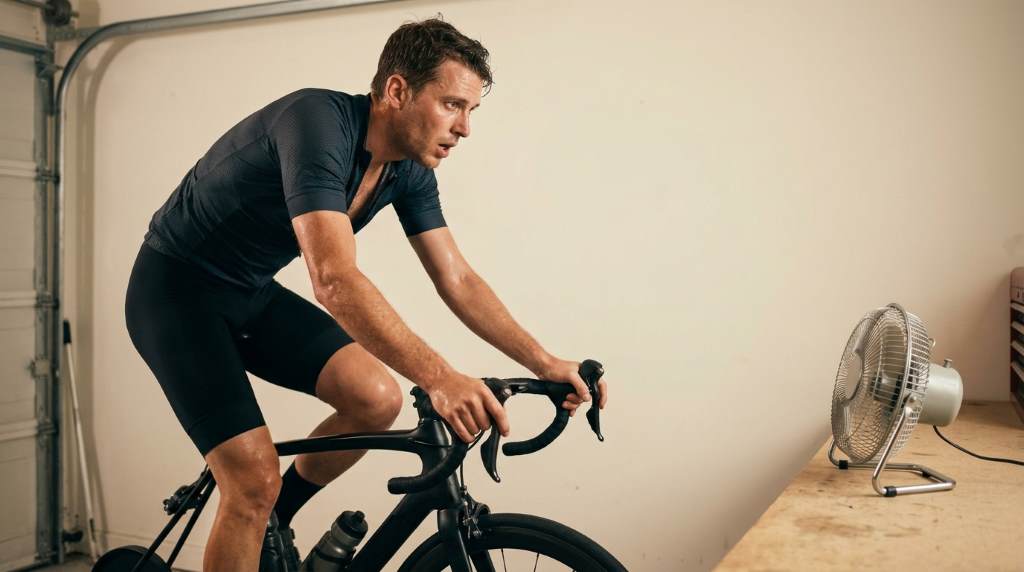
Where you place your fan is just as important as the type you choose. The best position is directly in front of you. This creates a headwind that mimics outdoor riding. It also helps evaporate sweat from your face and chest.
Keep the fan at a distance of about 3 to 5 feet. This gives you strong airflow without being overwhelming. If the fan is too close it can be uncomfortable. If it is too far the air will not reach you effectively.
Elevate the fan to match your height. If you are using a floor fan place it on a stable surface. This could be a small table or a fan stand. The airflow should hit your upper body. This is where you sweat the most.
Using Multiple Fans for Better Airflow
One fan may not be enough for intense workouts. Adding a second fan can improve cooling. Place one in front of you and one behind. This creates a cross breeze. It helps circulate air around your entire body.
If space is limited try placing fans at angles. Position one on each side of your bike. This directs air toward your torso and legs. It also prevents hot spots. This setup works well in small rooms.
For the best results use fans with different speeds. Set the front fan to high for direct cooling. Use a lower setting for the fan behind you. This balances the airflow. It also prevents the air from feeling too strong.
Adjusting Fan Settings for Different Workouts
Your cooling needs change with the intensity of your workout. For easy rides a low fan speed is usually enough. This keeps you comfortable without overcooling. It also saves energy.
Increase the fan speed for high intensity intervals. This helps remove the extra heat your body produces. It also keeps your muscles from overheating. This is important for sprints and hill climbs.
If you are doing a long endurance ride vary the fan speed. Start with a moderate setting. Increase it as your body warms up. This helps maintain a steady core temperature. It also prevents you from getting too cold.
Seasonal Adjustments for Your Fan Setup
Your fan setup may need to change with the seasons. In the summer you might need more airflow. Higher temperatures mean your body works harder to cool down. Use higher fan speeds and more fans if possible.
In the winter you may not need as much cooling. Lower fan speeds can be enough. This prevents you from getting too cold. It also helps you stay comfortable during longer rides.
Humidity also affects how you feel during workouts. In humid climates sweat does not evaporate as quickly. This makes it harder to cool down. Use fans with stronger airflow in these conditions. A dehumidifier can also help.
Unique Tips for Enhanced Cooling
Most cyclists focus only on front airflow. However cooling your back is just as important. Place a small fan behind you to target your lower back. This area sweats a lot but often gets ignored.
Use a fan with a misting feature for extra cooling. This adds moisture to the air. It helps lower your body temperature faster. This is especially useful in dry climates. It also feels refreshing during long rides.
Try using a fan with ionizing technology. These fans release negative ions into the air. This can improve air quality and make breathing easier. It also helps reduce static electricity. This is a unique feature not many cyclists consider.
If you train in a garage or basement consider an industrial fan. These are more powerful than standard fans. They can move air over longer distances. This is useful in large open spaces. They are also built to last.
Common Mistakes to Avoid
One common mistake is placing the fan too far away. This reduces the airflow you feel. It also wastes energy. Keep the fan close enough to feel the breeze. But not so close that it is distracting.
Another mistake is using only one fan for all workouts. Different intensities need different cooling levels. Adjust your fan settings to match your effort. This keeps you comfortable and efficient.
Avoid pointing the fan directly at your face. This can dry out your eyes and throat. It can also make breathing uncomfortable. Aim the fan at your chest or torso instead. This provides even cooling.
Do not ignore the noise of your fan. A loud fan can be distracting. It can also make it hard to hear music or videos. Choose a quiet model. This keeps your focus on your workout.
Maintaining Your Bike Trainer Fan
Regular maintenance keeps your fan running smoothly. Dust can build up on the blades. This reduces airflow and efficiency. Clean the blades and grill every few weeks. Use a damp cloth or a vacuum with a brush attachment.
Check the fan motor and bearings periodically. If the fan starts making noise it may need oiling. Follow the manufacturer instructions for lubrication. This extends the life of your fan.
Store your fan properly when not in use. Keep it in a dry place. Avoid folding or bending the blades. This prevents damage. It also keeps the fan ready for your next workout.
DIY Solutions for Better Cooling
If you do not have a fan you can make your own airflow. Open windows on opposite sides of the room. This creates a cross breeze. It is not as strong as a fan but it helps.
Use a large piece of cardboard to direct airflow. Place it behind a fan to focus the breeze. This can increase the airflow to a specific area. It is a simple and cost effective solution.
Try using a bucket of ice in front of a fan. This cools the air as it passes over the ice. It creates a makeshift air conditioner. This works well for very hot days.
Conclusion
Setting up your bike trainer fan the right way can change your indoor cycling experience. It keeps you cool and comfortable. This lets you train harder and longer. It also helps you get the most out of every workout.
Start by choosing the right fan for your space. Place it in the optimal position for airflow. Adjust the settings to match your workout intensity. Do not forget to maintain your fan for the best performance.
Try some of the unique tips for even better cooling. Experiment with different setups. Find what works best for you. Your body and your performance will thank you.
Ready to upgrade your indoor cycling setup? Try these fan tips today. Your next ride will be cooler and more enjoyable.
FAQ
How close should my fan be to my bike trainer?
Place your fan about 3 to 5 feet away for the best airflow.
Can I use a regular household fan for my bike trainer?
Yes a regular fan works but choose one with adjustable speeds for better control.
What is the best fan speed for indoor cycling?
Start with a moderate speed and adjust based on your workout intensity.
Do I need more than one fan for my bike trainer?
One fan is usually enough but two can provide better cooling for intense workouts.
How do I clean my bike trainer fan?
Use a damp cloth or vacuum to remove dust from the blades and grill.

Welcome to outdoorxsports.com! I’m Russell, your guide to the awesome world of mountain biking. This blog is all about building a community of riders who love to share their passion for the sport. Expect inspiring stories, local trail recommendations, fun challenges, and tips for making the most of your time on two wheels.