
Assembling a bike at home can save you time and money. The Schwinn Traxion 29 Inch Mountain Bike is a popular choice for beginners and seasoned riders alike. Over 60 percent of cyclists prefer assembling their bikes themselves for a personalized touch. This guide will walk you through each step to ensure a smooth and safe assembly process.
You will need basic tools like a wrench, screwdriver, and Allen keys. The process is straightforward if you follow the instructions carefully. Many riders find the experience rewarding and gain a deeper understanding of their bike. Let us start with the tools and preparation required for the task.
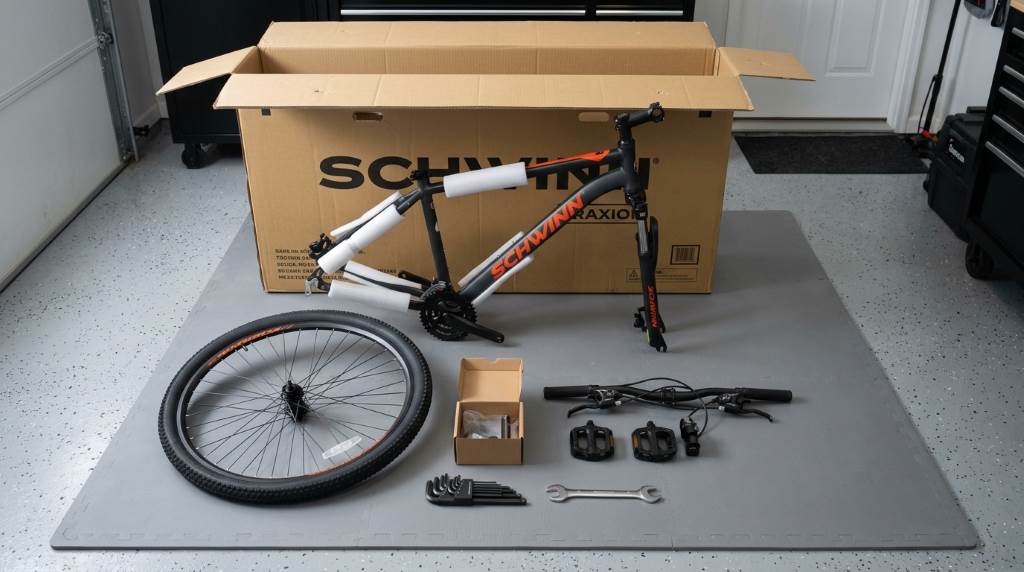
Tools and Preparation
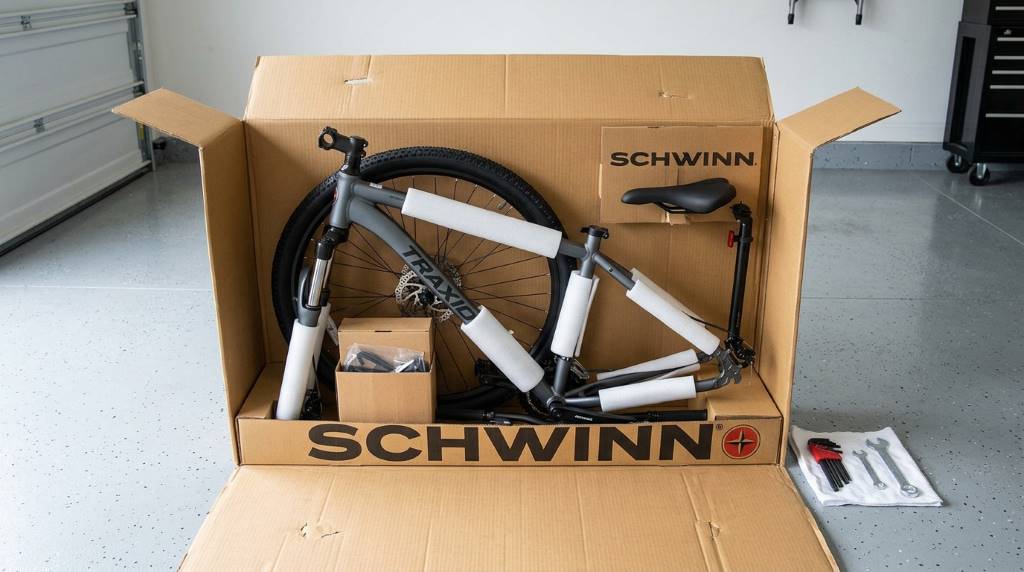
Gather all the tools listed in the bike manual before you begin. A clean workspace with ample light will help you avoid losing small parts. Lay out all the components to ensure nothing is missing from the box.
Check the bike frame for any visible damage or defects. Ensure the wheels, pedals, and handlebars are present and undamaged. Having a friend assist you can make the process faster and more enjoyable.
Organize your tools in a way that they are easily accessible. Keep a rag nearby to clean any grease or dirt from your hands. This preparation will make the assembly process smoother and more efficient.
Step-by-Step Assembly Guide
Step 1: Attach the Wheels
Start by attaching the front wheel to the fork. Align the wheel with the fork dropouts and secure it with the quick-release lever. Ensure the wheel spins freely without wobbling before tightening the lever.
For the rear wheel, align the chain with the smallest cog on the cassette. Slide the wheel into the frame dropouts and secure it with the quick-release lever. Double-check that the wheel is centered and the brake pads align with the rim.
Spin both wheels to confirm they rotate smoothly. If there is any resistance, recheck the alignment and tightness of the quick-release levers. Properly secured wheels are crucial for a safe ride.
Step 2: Install the Handlebar and Stem
Insert the stem into the fork steerer tube and align it with the front wheel. Secure the stem bolts evenly to avoid misalignment. The handlebar should be straight and centered with the front wheel.
Attach the handlebar to the stem using the provided bolts. Tighten them evenly to ensure the handlebar is secure and does not move. Check that the brake levers and gear shifters are in a comfortable position.
Test the handlebar by gently twisting it to ensure it is firmly attached. Any movement indicates that the bolts need further tightening. A secure handlebar is essential for controlling the bike safely.
Step 3: Attach the Pedals
Identify the left and right pedals as they are threaded differently. The right pedal has a standard thread, while the left pedal has a reverse thread. Apply a small amount of grease to the pedal threads for smooth installation.
Insert the right pedal into the right crank arm and turn it clockwise to tighten. For the left pedal, insert it into the left crank arm and turn it counterclockwise to tighten. Use a wrench to ensure both pedals are securely fastened.
Spin the pedals to confirm they rotate without any issues. If there is resistance, recheck the threading and tightness. Properly installed pedals ensure a comfortable and efficient riding experience.
Step 4: Install the Seat and Seatpost
Insert the seatpost into the frame and adjust it to your desired height. Secure it with the seat clamp bolt, ensuring it is tight enough to prevent slipping. The seat should be level and comfortable for your riding position.
Attach the seat to the seatpost using the provided bolts. Adjust the angle of the seat to a position that feels natural for you. A well-adjusted seat enhances comfort and control during rides.
Test the seat by sitting on the bike and checking for stability. If the seat moves or tilts, tighten the bolts further. A stable seat is crucial for a pleasant riding experience.
Step 5: Adjust the Brakes and Gears
Check the brake pads to ensure they align with the rim and do not rub against the tire. Adjust the brake cables if necessary to achieve proper tension. Squeeze the brake levers to test their responsiveness.
Shift through all the gears to ensure smooth transitions. If the chain does not move smoothly, adjust the derailleur using the barrel adjuster. Properly functioning brakes and gears are vital for safety and performance.
Take a short test ride in a safe area to confirm everything works as expected. Listen for any unusual noises and address them before embarking on longer rides. Regular checks ensure your bike remains in top condition.
Unique Tips for Different Climates
If you live in a humid climate, consider applying anti-rust spray to the bike frame and components. This prevents corrosion and extends the lifespan of your bike. Regular cleaning after rides in wet conditions is also recommended.
For hot and dry climates, lubricate the chain and moving parts more frequently. Dust and dirt can accumulate quickly and cause wear and tear. Keeping your bike well-lubricated ensures smooth operation.
In cold climates, check the tire pressure regularly as it can drop in lower temperatures. Properly inflated tires provide better traction and control. Always store your bike in a dry place to avoid damage from moisture.
Safety Checks Before Your First Ride
Inspect all bolts and nuts to ensure they are tight and secure. Loose components can lead to accidents and injuries. Pay special attention to the wheels, handlebar, and seatpost.
Test the brakes by squeezing the levers and checking for resistance. Ensure the bike stops smoothly and evenly. Properly functioning brakes are critical for your safety on the road.
Check the tire pressure and inflate them to the recommended PSI. Underinflated or overinflated tires can affect your ride quality and safety. Always carry a repair kit for emergencies during your rides.
Troubleshooting Common Issues
If the chain keeps falling off, check the derailleur alignment and tension. A misaligned derailleur can cause the chain to skip or drop. Adjust it using the barrel adjuster for optimal performance.
Squeaky brakes often indicate that the brake pads are worn out or misaligned. Replace the pads if they are worn and adjust their position if they are rubbing against the rim. Regular maintenance prevents such issues from arising.
If the gears are not shifting smoothly, inspect the cables for fraying or rust. Lubricate or replace them if necessary. Smooth gear transitions enhance your riding experience and prevent damage to the drivetrain.
Conclusion
Assembling the Schwinn Traxion 29 Inch Mountain Bike at home is a rewarding experience. It allows you to understand your bike better and ensures it is tailored to your preferences. Follow the steps outlined in this guide for a safe and enjoyable assembly process.
Regular maintenance and safety checks will keep your bike in excellent condition. Always prioritize safety and address any issues promptly. With proper care, your bike will provide many miles of enjoyable rides.
Now that your bike is assembled, take it for a spin and enjoy the freedom of cycling. Share your experience with others and encourage them to try assembling their bikes at home. Happy riding!
FAQ
How long does it take to assemble the Schwinn Traxion 29 Inch Mountain Bike?
It typically takes 1 to 2 hours for a first-time assembler.
Do I need any special tools for assembly?
Basic tools like a wrench, screwdriver, and Allen keys are sufficient.
Can I assemble the bike alone?
Yes, but having a friend assist can make the process easier.
What should I do if a part is missing from the box?
Contact the manufacturer or retailer for a replacement part.
How often should I lubricate the chain?
Lubricate the chain every 100 to 200 miles or after riding in wet conditions.

Welcome to outdoorxsports.com! I’m Russell, your guide to the awesome world of mountain biking. This blog is all about building a community of riders who love to share their passion for the sport. Expect inspiring stories, local trail recommendations, fun challenges, and tips for making the most of your time on two wheels.