
A deceased backbone is never good for a rider, and a dirty chain is worse for the rider’s bike!
Bicycle’s chain works as a backbone for it. In the time of pedaling, the chain turns the rear wheel, and the power of the rear wheel keeps pressurizing the front wheel and the bike runs.
Many categories of bikes are available in the market. Each of them is made for a different purpose. They don’t match with one another in shape, size, and measurement, but one of the similarities between every bike has and must have to be THE CHAIN.
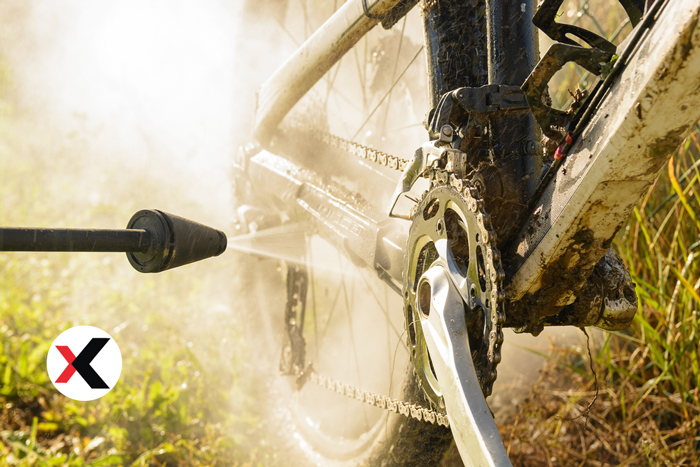
As bikes are not just made for riding on the clean road but muddy terrains, sandy deserts, Rocky Mountains. So, the chain is the first thing which gets dirtier as it is placed at the bottom of the bike.
Not cleaning the chain by the time turn your next ride a hazardous one. Many problems can be created only not because of cleaning the chain-like poor shifting, harsh pedaling, costly wear, and wasted efficiency.
Most of the riders don’t clean the chain because of not knowing the proper easy ways. So, this article is all about how to clean a bike chain for a smooth ride.
Why clean the bike chain?
Chain cleaning is an essential part of bike maintenance. It increases the life of the drivetrain, smoothens the shifting ability, and makes the bike run faster.
Dirty chains if not cleaned as it needs to be can get rusty, which can cause a severe breakdown during the ride. A rusty chain can also damage the cranks, sprockets, and derailleurs of the bike.
Not cleaning the bike on time to clean make the task harder and costly too. It feels very annoying to clean a chain when it gets rusty because it needs more effort and tools. Also if the chain becomes rustier, it will turn useless so have to buy a new one which can cost you extra cash.
That’s why cleaning the bike chain, and the bike is very important after every hard ride or once a week at least.
What can happen if the chain is not clean?
These drivetrains are the part of the bicycle which gets dirtier more than any parts. It is very natural and common for this drivetrains to get dirty. The problem occurs when it is left as dirty as it is.
Only because of the dirty chain more new problem arises for the bike. Many of them are just very much dangerous and can be proved fatal during the ride. Some of the serious issues a dirty chain is responsible are:
- The rate of chain wear can be increased.
- The chain can fall repeatedly.
- Shifting performance can get impaired.
Etc. Many more problems can occur only because of one cause, and that is the dirty chain.
How to Clean Bike Chain with Household Products
In the term of cleaning the bike, most of the time, the issue is time and space. And if you are having trouble with these same issues, this one will be the best solution for you.
This method of cleaning your bike is the easiest way to be found. Only some handy things that you can find almost anywhere you will be needed.
Tools
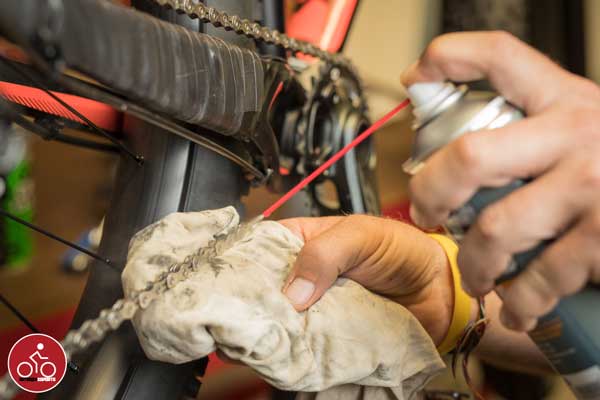
- A normal rag.
- Any degreaser spray.
- Chain lube of your choice.
Steps
1. Put your bike upside down.
2. Wrap a clean lint-free cloth in the middle of the chain with your hand.
3. Now backpedal the drivetrain and wipe the chain with the cloth wrapped.
4. Keep spraying degreaser spray.
5. Keep continuing the process until the chain becomes clean fully.
6. Once the chain looks clean wipe it with clean cloth by backpedaling.
7. Apply some lube on the chain.
8. Again repeat the same process of wiping.
9. Now re-lube the chain and when applying the lube, keep pedaling.
So, you will have to clean less. You can use any clean rag for this process and also using baby wipes can be helpful.
How to Clean a Bike Chain without Removing It
Who doesn’t want a clean, shiny chain every time on his bike? But the problem is the roads which don’t always allow you to ride on a clean surface. Sometimes it is watery, sometimes it becomes muddy, and sometimes snowy so your bike must have to be dirty when it’s on a ride.
The portion which observes more and more dirt is the drivetrain and needs to be washed most. So, you can enjoy a healthy and hazard-free ride.
The issue is not having enough time and the proper method. Below the quickest and really useful method is given.
Tools
- Bike repair stand.
- Degreaser of any certified brand you like.
- Chain lube of your choice.
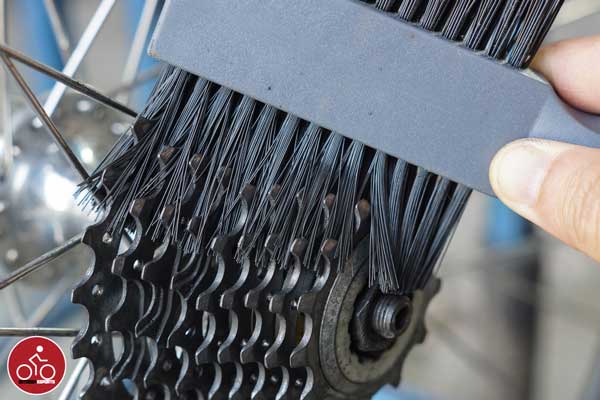
- A chain brush or any normal brush.
- Another wider brush for the gear cassette and the chainrings.
- A chain keeper. (additional)
- A half sliced plastic bottle or a container which can fit in bidon cage to hold degreaser.
- Water supply. (hose, spray nozzle, or bucket full of water)
- A place to proceed where you can wash easily later.
- Gloves to keep your hand clean.
- Chain cleaning tool.
- Cleaning solvent.
- Soap water.
- A rag to wipe.
- Air compressor if available.
- Warm water.
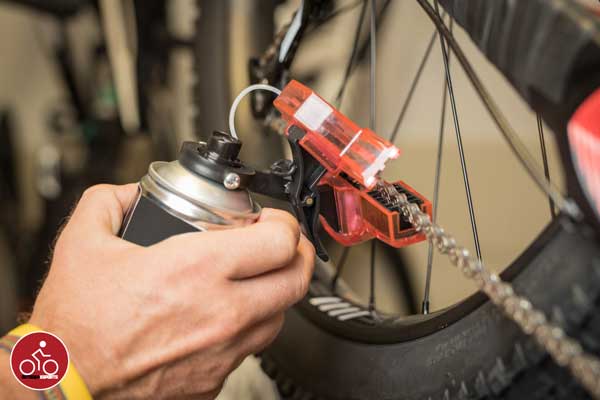
If You Have A Chain Cleaner Tool
Steps
1. Put the bike in a repair stand.
2. Rotate the bike, so the rear section of the chain is on the level.
3. Shift to the smallest cog in the front and rear.
4. If you have the chain keeper remove the rear wheel.
5. Set the chain on the keeper (A chain keeper is recommended not required).
6. If you have the chain cleaner attach it to the rear section of the chain.
7. Make sure it fully seats onto the brushes. Fill the cleaner with the solvent.
8. Now slowly pedal backward — pedal at-least 30 revolutions.
9. Remove the cleaner and put the solvent on the container.
10. You can use the solvent again later if the contaminants set down.
11. Rinse out the chain cleaner and fill it with soapy water.
12. Repeat the process done with the solvent in the same way.
13. Remove the cleaner and wash it off.
14. Wipe the drivetrain with a clean rag and leave the chain to air dry or use the air compressor to make it dry.
15. When the chain is dry, it is important to lube it.
16. Now use the lube and put single drops of lube to each rivet of the chain.
17. Take a clean, dry rag and backpedal to wipe off the excess lube.
18. If you used the chain keeper remove it and put the rear wheels on.
If You Don’t Have A Chain Cleaner Tool
Steps
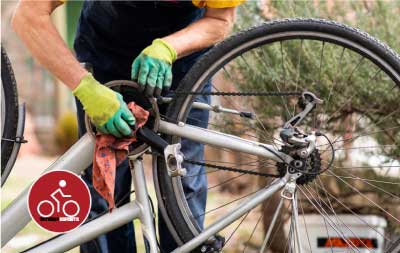
1. Use the brush and degreaser to get rid of the muck from the chainrings and derailleur machine wheels.
2. Brush degreaser onto the chain, and keep backpedaling the chain.
3. Brush degreaser onto the sprockets with the bigger brush.
4. Rinse off the container, chain, chainrings, and derailleur pulleys with an unaggressive stream of water.
5. Don’t jet water directly into any bearings.
6. Keep your hydraulics out from the degreaser.
7. Dry every part with a clean rag, and so set the bike aside to air dry more.
8. You can also use an air compressor to dry if you have.
9. Relube bike chain.
This is the most common bike cleaning method. If you follow the steps, you can make your chain a new one again.
How to Clean Bike Chain Rust

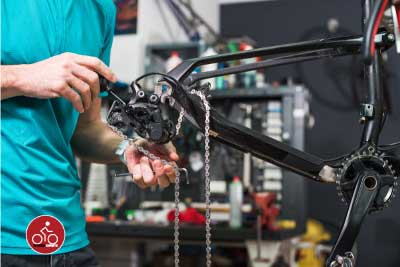
This way is the most critical and mechanical way to clean your drivetrain — everything in the detail you have to wash in this way. You have to remove almost all the parts of your drive train.
Most time, costly and professional way of chain cleaning is this one. More experience, tools, and time you will be needed to apply this method. On extremely rusty chains, you have to apply this method.
Tools
- Tools to remove the drivetrain, derailleur, and the sprockets.
- Rust remover.
- Bike chain cleaner solvent.
- Brushes (one medium and one bigger).
- A container to give the parts a degreaser bath.
- Soap water.
- Warm clean water to rinse.
- Clean rags to wipe it off.
- Gloves for safety.
- An air compressor.
Steps
1. First, examine the chain is just worn out, or it needs replacement.
2. Now use a chain remover tool and remove the chain.
3. Remove the rear wheel and take away the container.
4. Remove chainrings from the crank.
5. Disassemble the derailleur pulleys.
6. Put every disassembled part in the container.
7. Pour some rust remover on the container.
8. Leave all the parts on the remover solution for 12 hours if the rust is more leave it for 24 hours.
9. After the time passes, drain the rust remover solution. You can also keep it and use it again later.
10. Give the parts a dip into clean, warm water.
11. Now have some warm water on the container and mix some soap on it.
12. Using the brushes clean all the parts thoroughly with the soapy water.
13. Now again wash everything with warm, clean water and wipe it off with a clean rag.
14. Leave everything to dry properly or use an air compressor to make it dry.
15. Once dry, assemble all the parts as it was.
16. Lube everything as discussed earlier. Wipe everything off with a clean rag to avoid access lube.
Now your bike is clean as new and ready to ride. But that’s not the end, many more problems you will face while cleaning the chain. Below here, you will find some important issues to watch during cleaning, and some important installation tips to make the process easier.
Ultrasonic Chain Cleaning
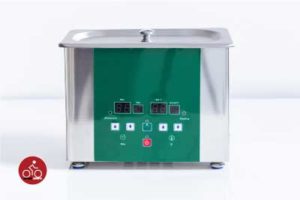
This one is the most advanced and easy way to clean your bike chain. This way is very much compact and time-saving. Applying this way you can make your bike chain more clean in just minimum time.
Tools
- Chain remover or chain pliers.
- A brush.
- Degreaser.
- Ultrasonic cleaning machine.
- Warm water.
Steps
1. Remove the chain, chainrings, and the cogs.
2. Put everything in the ultrasonic machine.
3. Fill the 2/3 of the machine with warm water.
4. Put some degreaser in the water.
5. Turn on the machine, which is by default 90 seconds.
6. Repeat the process two times.
7. Drain the water and clean everything with the brush thoroughly.
Your bike’s chain has become clean as new and ready to install.
Issues You Have to Keep Eyes on During Cleaning
Cleaning a chain is just not enough — some issues you always have to keep your eyes on during cleaning. Otherwise, the effort you are giving will go in vain. These issues are of those for which you have to replace the chain not just clean.
Tight links
Those links which are no longer bending smoothly on the spokes are called tight links. By backpedaling slowly and keeping eyes on every link when they sit on the spokes, you can identify this problem.
Mostly this problem is caused by dirt or corrosion between link plates of your bike. This problem can be fixed by proper cleaning, lubing, and continuous back and forth pedaling. It is caused by improper installation. Sometimes it becomes impossible to fix this problem. That time it is better to replace the damaged chain for a safe ride.
Chain stretch
Chain stretch is a kind of problem where nothing stretches. The chains wear become longer, and that’s called chain stretch.
Because of this problem, the gear skips sometimes, and it also causes extra wear and can damage the chainrings and cog teeth. Chain-indicators can help you out with this problem. If the prong of the tool fits in the chain, it is better to replace it.
Some Important Installations and Uses
There are some tools you can find in the market which can be very helpful for your bike chain cleaning. Here the installation process will be discussed to make your task easier.
How To Use A Bike Chain Remover
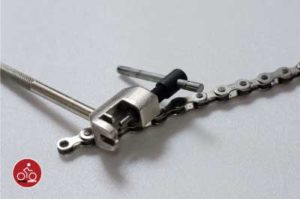
Knowing this one is very important because this one is the only way to remove a bike chain. Easy and simple process this one with just use of a handy tool. This one will help you so much to proceed on the way to clean your bike chain and on the replacement of the chain when it needs to be.
Tools
- Chain remover tool.
Steps
1. Place the bike on a repair stand.
2. Select the place where you can break the chain.
3. Unscrew the punch further from the slots and place the link you would like to open within any.
4. Keep screwing the punch until it touched the head of the rivet of the chain.
5. Make it sure that the punch rests within the center of the rivet head which the opposite finish of the rivet isn’t cornered by the body of the remover.
6. Keep screwing the punch into the tool until the rivet comes out of the front plate and thru the rear plate of the chain.
7. Notice if the rivet is almost out.
8. Remove the punch and try to break the chain by flexing with your thumb.
Your bike chain is broken and ready to do anything if it is cleaning or replacing.
How To Install A Removable Chain Link
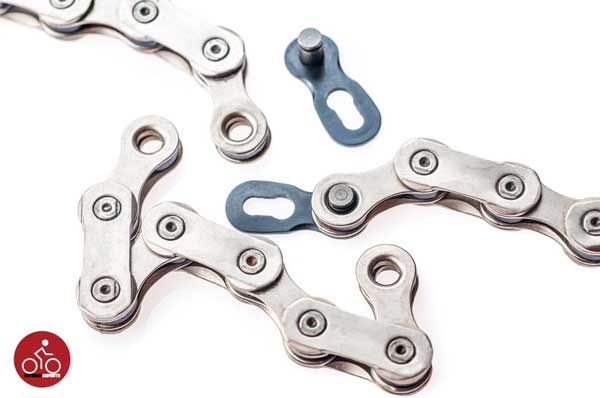
Installing a removable chain link is the smartest and useful idea for a bike rider. Installing this device makes the chain cleaning and replacement of the chain more time saving and faster.
Tools
- Chain remover tool.
- Chain pliers.
- Removable chain link.
Steps
1. Following the steps discussed earlier, use the chain remover and remove the chain.
2. Remove one link completely from the chain.
3. Take the removable link and set it on the holes of the rivet.
4. Press the rear brake and push the front pedal.
5. Using the pliers, you can remove the chain-link any time.
Now you can remove your chain any time either you have to wash it or replaced it.
How To Measure A Bike Chain To Wear
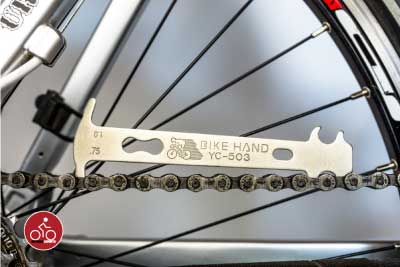
Chains are an expendable a part of the bicycle’s drivetrain. As you pile on the miles, your bike’s chain can wear out. The internal components of the chain, the rollers, and rivets begin to subsume and provides the illusion of stretching. This wear will cause the chain to mesh poorly with the cogs and chainrings, inflicting poor shifting, premature wear to the cogs, and even skipping over the cogs.
And since it’s way more costly to switch cogs than a sequence, you can truly save cash by learning once it’s time to switch the chain. There are different ways of measuring chain wear
from merely lifting the chain off the front chainrings, to measure the space between 2 rivets on a sequence however the simplest and most correct way is to verify the number of life left in your chain with a tool.
Tools
- A ruler (12 inches).
Steps (Easy Method)
1. Set the bike on a repair stand on a stable position.
2. Shift to the smallest cog in the rear and the large chainring in front and lift the chain.
3. Lift the chain off the front chainring.
4. If it lifts off the chainring and you can see a great deal of daylight. The chain is worn out.
5. The chain needs to be replaced.
Steps (Classic Method)
1. Take a ruler.
2. Set the ruler on the lower portion of the chain.
3. Each rivet is half-inch apart.
4. Consider any rivet as first and line up at zero.
5. The 24th rivet must have to be in the 12-inch mark.
6. The 24th rivet must have to be in the 12-inch mark.
7. It is better to replace the chain.
Applying these methods, you can very easily measure the chain of your bike get to know either you just have to clean it or change it.
This whole article is based on how to clean the bike chain and gears to help you to keep your bike healthy and your ride safer.
Almost every method of how to clean a bike chain is discussed and described here. All detailed information about bike chain and installation of bike important bike chain parts also have been included.
Most importantly, measuring bike chain wear and how to remove a bike chain is also added to make the cleaning task easier.
At last, the most important thing is nothing is 100% perfect in this world, and so we are. Our article is just a little try to make your task easier and add some more expertise to your bike skills. Mistakes can be there as we are human and “To err human.”
If you notice any information missing in this article, let us know in the comment section about it. We will try to make it better.

Taylor is an outdoors & sports equipment specialist, sports author, bike traveler, bicycling and skating expert, and smoke-free ride activist. He is also a regular reviewer of outdoor sports gadgets and accessories. About safety gear and biking facts he analyzes and gives his feedback to outdoorxsports. Writes and tests to help him, you, and us.