

Removing a bicycle handlebar stem might seem daunting, but with the right tools and approach, it can be a straightforward process. Whether you’re upgrading your bike, making adjustments, or simply performing maintenance, follow this comprehensive guide to successfully remove your handlebar stem.
Understanding the Different Types of Handlebar Stems
Before diving into the removal process, it’s crucial to identify the type of stem your bike has. This will determine the specific tools and techniques required. Common types include:
- Threaded Stems: These are older, classic stems found on vintage bikes. They are secured to the steerer tube with a wedge and an expander bolt.
- Quill Stems: Similar to threaded stems, quill stems are also inserted into the steerer tube. However, they lack threads and rely on a wedge and bolt for tightening.
- Threadless Stems: The most common type on modern bikes, threadless stems clamp onto the steerer tube using faceplate bolts.
Tools You’ll Need
Gather the necessary tools before starting the removal process. The specific tools may vary depending on the stem type, but generally, you’ll need:
- Allen Wrenches: These are essential for loosening and tightening various bolts.
- Torque Wrench: If you’re dealing with a threadless stem, a torque wrench will ensure proper tightening to prevent damage.
- Rubber Mallet: This may be helpful for gently tapping on stubborn stems.
- Flathead Screwdriver: For prying open faceplate bolts on threadless stems.
- Hammer: This might be necessary for removing the wedge in threaded or quill stems.
More Bike Hacks
Cityscape Cycling: Helmet to Handlebars: Safety Tips and Hybrid Bike Size Charts
BLITZU Bike Light Set Review: Illuminate Your Ride Day or Night
Crostice Phone Holder for Peloton Bike: A Unique Blend of Convenience and Functionality
Step-by-Step Instructions
1. Prepare Your Workspace:
- Find a clean, well-lit area to work.
- Place your bike on a stable stand or have someone hold it steady.
2. Remove Handlebar Grips and Controls:
- Carefully slide the handlebar grips off. You might need to use a lubricant like WD-40 if they are stuck.
- Disconnect any brake levers, shifters, or other controls attached to the handlebar.
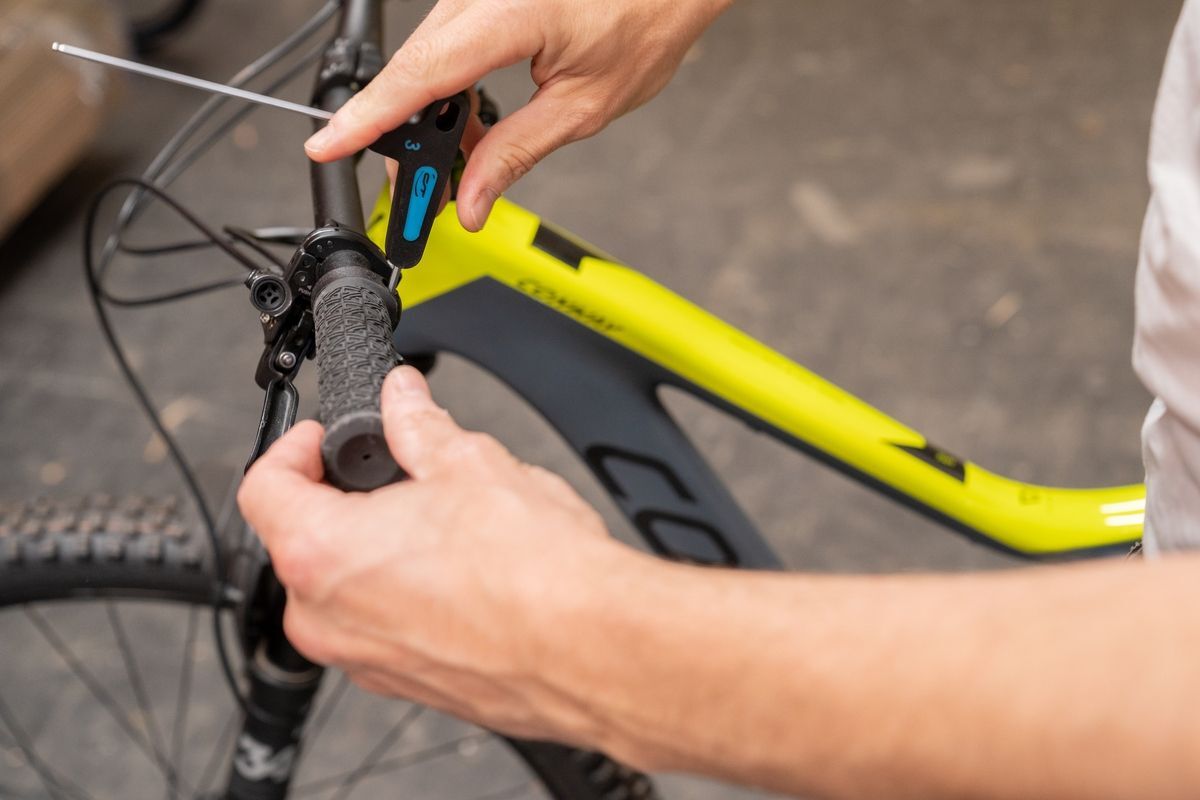
3. Loosen the Stem Bolts:
- Threaded Stems:
- Locate the expander bolt on top of the stem and loosen it with an Allen wrench.
- If the stem is still tight, tap the bolt gently with a mallet to loosen the wedge inside.
- Quill Stems:
- Find the bolt on the side of the stem and loosen it.
- If necessary, tap the bolt to release the wedge.
- Threadless Stems:
- Loosen the faceplate bolts evenly using an Allen wrench.
- Once loose, carefully pry open the faceplate with a flathead screwdriver.
4. Remove the Stem:
- Threaded and Quill Stems:
- Once the wedge is loose, the stem should slide out of the steerer tube.
- If it’s stuck, gently tap the top of the stem with a rubber mallet.
- If the wedge remains inside the steerer tube, use a hammer and a long punch to tap it out.
- Threadless Stems:
- With the faceplate open, the stem should lift off the steerer tube.
- If it’s tight, gently wiggle it back and forth while pulling upwards.
5. Clean and Inspect:
- Once the stem is removed, take the opportunity to clean the steerer tube and the inside of the stem.
- Inspect both for any signs of damage or wear.
Tips and Precautions
- Take your time: Don’t rush the process. Rushing can lead to mistakes and potential damage.
- Use the right tools: Ensure you have the correct Allen wrench sizes and a torque wrench if needed.
- Don’t overtighten: Overtightening bolts can strip threads or damage components.
- Be gentle: Avoid using excessive force, especially when tapping on the stem or wedge.
- Consult a professional: If you’re unsure about any step or encounter difficulties, seek help from a bike mechanic.
Conclusion
Removing a bicycle handlebar stem is a manageable task that can be accomplished with the right tools and approach. By following this step-by-step guide and taking the necessary precautions, you can successfully remove your stem and proceed with your bike upgrades, adjustments, or maintenance. Remember, patience and attention to detail are key to a successful outcome. Happy cycling!
Additional Considerations
- Carbon Steerer Tubes: If your bike has a carbon Steerer tube, be extra cautious when tightening bolts. Overtightening can cause cracks or damage.
- Grease: Apply a thin layer of grease to the steerer tube and the inside of the stem before reinstallation. This will prevent corrosion and ensure smooth operation.
- Stem Spacers: If your bike has stem spacers, pay attention to their order and orientation when reassembling.
- Torque Specifications: Refer to your bike’s manual or the stem manufacturer’s instructions for the correct torque specifications when tightening bolts.
Remember, working on your bike can be a rewarding experience. Take your time, enjoy the process, and don’t hesitate to seek help if needed. Happy cycling!

Taylor is an outdoors & sports equipment specialist, sports author, bike traveler, bicycling and skating expert, and smoke-free ride activist. He is also a regular reviewer of outdoor sports gadgets and accessories. About safety gear and biking facts he analyzes and gives his feedback to outdoorxsports. Writes and tests to help him, you, and us.