
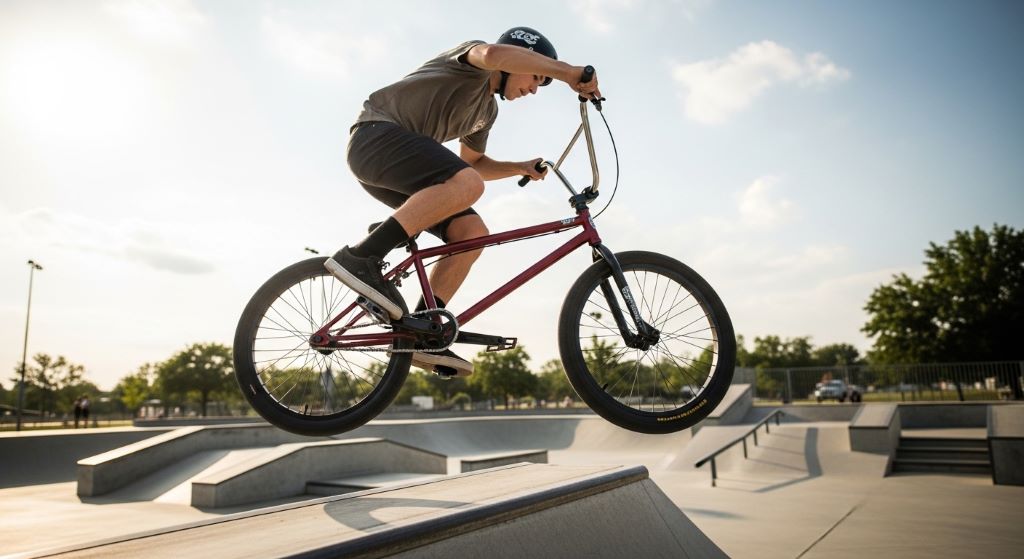
BMX riding is exciting. However, frequent repairs can slow you down and drain your wallet. The good news is that a smart bike setup can save you a lot of time and money. By choosing the right parts and maintaining them well, you can spend more time riding and less time fixing. This article walks you through practical ways to build a durable, low maintenance BMX bike setup that lasts.
Why Your BMX Setup Matters More Than You Think
Many riders focus only on tricks and style. They overlook how their bike setup affects long-term performance. The truth is, a poorly chosen setup leads to constant wear and tear. Parts break faster, bolts loosen often, and the overall ride quality drops.
On the other hand, a well-built setup holds up under pressure. It handles hard landings, rough surfaces, and daily use without falling apart. Therefore, investing time in the right setup from the beginning pays off greatly. You ride more confidently, and you spend far less on replacement parts over time.
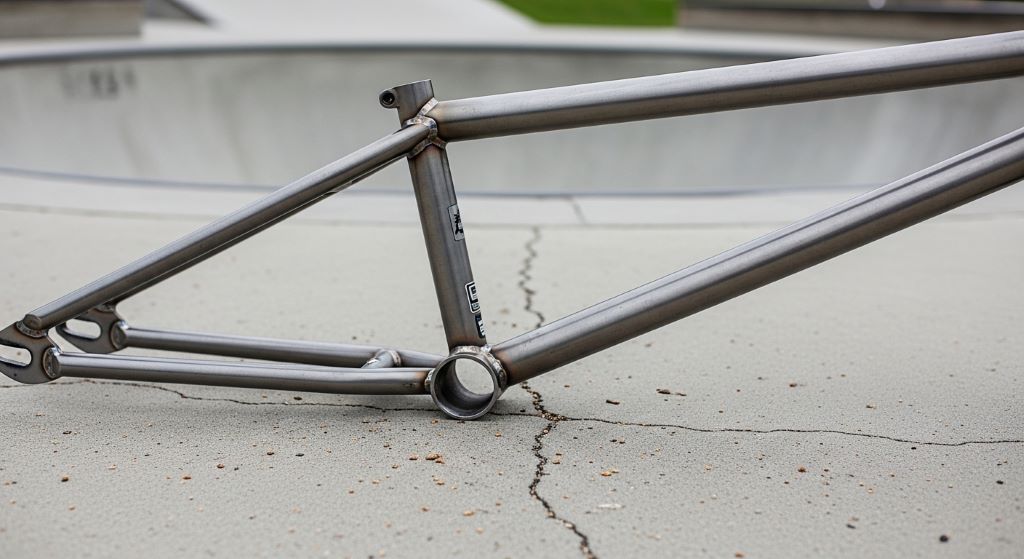
Choosing the Right Frame for Long-Term Durability
The frame is the heart of your BMX bike. It needs to be strong, light enough to handle, and resistant to damage. Chromoly steel is a popular choice among serious riders. It offers excellent strength without being too heavy. Additionally, chromoly bends slightly before it breaks, which makes it safer and more forgiving during crashes.
High-tensile steel is cheaper, but it is also heavier and more prone to cracking over time. If you ride often or hit big ramps, avoid high-tensile steel frames. They simply do not last as long.
When picking a frame, also check the geometry. A frame that fits your riding style reduces stress on welds and joints. That means fewer structural problems down the line. Look for frames with reinforced areas around the bottom bracket and head tube, as these spots take the most impact.
Selecting Wheels and Tires That Go the Distance
Wheels take a beating on a BMX bike. Therefore, choosing quality wheels from the start is essential. Double-walled rims are far stronger than single-walled ones. They resist denting and cracking much better, especially during drops and grinds.
Sealed bearing hubs are another smart choice. They keep dirt and water out, which means the bearings last longer and spin smoothly with minimal upkeep. Open bearings, by contrast, need frequent cleaning and replacement. Sealed hubs reduce that work significantly.
When it comes to tires, thicker and harder compound tires wear more slowly. They also offer better grip on rough surfaces. However, tire pressure matters too. Riding with the correct pressure prevents pinch flats and sidewall damage. Check your tire pressure regularly — it takes only a minute but saves a lot of trouble.
Additionally, stainless steel spokes hold tension better than standard ones. They resist rust and stay true for longer. When you build or buy a wheel set, ask for stainless spokes if possible.
Picking a Reliable Drivetrain
The drivetrain includes your cranks, sprocket, chain, and bottom bracket. These parts work together constantly, so they need to be tough.
For cranks, look for three-piece chromoly cranks. They are much stronger than one-piece cranks and handle torque better. One-piece cranks are common on budget bikes, but they wear out faster and are harder to service.
Your sprocket should be made of heat-treated aluminum or chromoly steel. Smaller sprockets with fewer teeth are simpler in design and therefore less likely to develop issues. Many street and park riders prefer a 25-tooth sprocket setup for this reason.
A good chain makes a big difference too. KMC and other quality brands offer chains with better coating that resists rust and stretching. A stretched chain wears down your sprocket and rear cog faster, leading to more repairs. Therefore, replace your chain before it gets too worn. A chain checker tool costs very little and tells you exactly when it is time.
The bottom bracket is another part worth spending money on. Sealed mid or Spanish bottom brackets stay smooth for longer and require very little attention. Avoid cheap loose-ball bottom brackets — they loosen quickly and need constant adjustment.
Brakes or No Brakes: Making the Low-Maintenance Choice
Many BMX riders eventually go brakeless. This is actually one of the most effective ways to reduce maintenance. Brakes have cables, pads, levers, and housing — all of which wear out and need replacing. Going brakeless eliminates all of that.
However, riding without brakes requires skill and experience. If you are not ready for that, choose a quality brake setup that is simple and reliable. U-brakes or V-brakes with linear-pull are strong and easy to maintain. Avoid complex cable routing, as it adds friction and creates more things to go wrong.
Use quality brake pads that match your rim material. Softer pads wear faster but grip better. Harder pads last longer but may not stop as well in wet conditions. Therefore, match your pads to your typical riding environment.
If you do use brakes, inspect the cables every few weeks. A frayed cable can snap at the worst moment. Replace cables and housing once a year even if they look okay. It is cheap insurance.
Pegs and Grind Materials That Hold Up
Not all riders use pegs, but for those who do, material choice is important. Steel pegs are the most durable option. They grind smoothly on metal rails and concrete. However, they are heavier than aluminum pegs.
Aluminum pegs are lighter but wear down faster. If you grind often, you will replace aluminum pegs more frequently. Steel pegs are therefore the better long-term investment for active grinders.
Some riders use plastic sleeves over their pegs. These sleeves wear out instead of the peg itself, which saves money. They are also quieter and slide more easily on certain surfaces. Replacing a plastic sleeve is quick and cheap compared to replacing a whole peg.
Bolt Maintenance: The Small Detail That Prevents Big Problems
Loose bolts cause many BMX problems. A loose stem bolt can make steering dangerous. A loose crank bolt can damage the spindle. Fortunately, keeping bolts tight is easy if you do it regularly.
Use a torque wrench when possible. Over-tightening can strip threads, which is just as bad as under-tightening. Most BMX bolts have a recommended torque rating. Following it prevents both problems.
Applying a small amount of thread-locking fluid to key bolts helps them stay in place. Use the medium-strength type so you can still remove the bolt when needed. This simple step can prevent hours of repair work.
Additionally, stainless steel bolts resist rust far better than standard bolts. Replacing key bolts with stainless versions costs little but adds years of reliable use.
Bearing Care: Keeping Everything Spinning Smoothly
Bearings are found in your wheels, bottom bracket, headset, and sometimes your pegs. When bearings fail, parts wobble, grind, or seize up. Fortunately, sealed bearings need very little attention.
Still, it helps to check bearings periodically. A clicking or grinding noise usually means a bearing is worn or dirty. Catching this early prevents damage to surrounding parts.
When replacing bearings, always use quality brands. Cheap bearings wear out quickly and can cause damage. A few extra dollars on a good bearing set saves money in the long run.
Keep water away from bearings when possible. After riding in rain or wet conditions, wipe down your bike and let it dry in a ventilated area. This simple habit extends bearing life significantly.
Building a Smart Maintenance Routine
Even the best BMX bike setup needs some care. The key is keeping your routine simple and consistent. A quick inspection before each ride takes less than five minutes and can prevent serious problems.
Check tire pressure, bolts, brake cables (if you have them), and chain tension before you ride. After riding, wipe down the frame and check for any new cracks, bends, or loose parts. Clean and lube your chain every week or two depending on how often you ride.
Once a month, do a deeper check. Spin each wheel and listen for bearing noise. Test your headset by holding the front brake and rocking the bike forward — any clicking means the headset needs tightening. Check your crank bolts and bottom bracket for play.
This kind of routine catches small problems before they become expensive ones. It also keeps your bike feeling tight and responsive, which makes riding more enjoyable.
Budget-Friendly Upgrades That Reduce Repairs
You do not need to spend a fortune to build a reliable setup. A few smart upgrades go a long way. Start with the parts that wear out fastest: chain, tires, and brake pads. Spend a little more on these and they will last much longer.
Next, consider upgrading your bottom bracket and hubs to sealed versions if they are not already. These upgrades reduce the need for frequent servicing and keep your ride smooth for longer.
Additionally, replacing plastic parts with metal ones where possible adds durability. Metal stem caps, metal chain tensioners, and metal cable clamps all outlast their plastic counterparts by a wide margin.
You do not have to upgrade everything at once. Replace parts as they wear out, and choose better quality each time. Over one or two years, you will have a significantly more durable bike without a huge upfront cost.
Conclusion
Building a durable, low maintenance BMX bike setup is not complicated. It starts with choosing strong materials like chromoly steel frames, double-walled rims, and sealed bearings. It continues with smart decisions about drivetrains, brakes, and bolt care. Finally, a simple but consistent maintenance routine keeps everything working as it should.
By making these choices, you reduce the time and money you spend on repairs. You also improve your overall riding experience. A reliable bike gives you confidence to push your limits without worrying about something falling apart. Start with one area, make improvements over time, and enjoy more time on the bike doing what you love.
Frequently Asked Questions
- What is the most durable frame material for a BMX bike? Chromoly steel is the most durable and widely recommended material. It is strong, slightly flexible under impact, and lasts much longer than high-tensile steel under regular riding conditions.
- How often should I replace my BMX chain? You should check your chain for stretch every one to two months. Most chains need replacing after three to six months of regular riding, depending on how often and how hard you ride.
- Are sealed bearings really worth the extra cost? Yes. Sealed bearings keep out dirt and moisture, which means they last longer and need far less maintenance. The upfront cost is higher, but you save money and time over the long term.
- Should I go brakeless to reduce maintenance? Going brakeless does eliminate brake-related maintenance entirely. However, it requires experience and skill. If you are a beginner or intermediate rider, maintain a reliable brake system and consider going brakeless only when you are confident in your stopping ability.
- How do I know when my BMX tires need replacing? Look for visible wear on the tread, cracks in the sidewall, or frequent flats. If the center of the tire looks smooth or the rubber feels hard and brittle, it is time to replace them.
Related Topics:
Finding Your Perfect Ride: What Size BMX Bike for a 6-Foot Man?
Mongoose Legion Kids Freestyle Sidewalk BMX Bike: A Fun and Safe Ride for Young Beginners

Welcome to outdoorxsports.com! I’m Russell, your guide to the awesome world of mountain biking. This blog is all about building a community of riders who love to share their passion for the sport. Expect inspiring stories, local trail recommendations, fun challenges, and tips for making the most of your time on two wheels.