
Removing bike pedals can seem straightforward. However, when the cranks are stuck or the pedals have not been removed in years, the job becomes much harder. Rust, dirt, and over-tightened threads all make things difficult. The good news is that you do not need a professional mechanic or expensive equipment to get the job done.
This guide will show you how to remove bike pedals on stuck cranks using simple tools. You will learn why pedals get stuck, what tools you need, and how to apply the right technique safely. Additionally, you will find tips to prevent the same problem from happening again. Whether you are a beginner or an experienced cyclist, this article will help you succeed.
Why Bike Pedals Get Stuck on Cranks
Understanding why pedals get stuck is the first step. There are several common reasons this happens. Knowing the cause helps you choose the right approach to fix it.
The most common reason is corrosion. When moisture gets between the pedal threads and the crank arm, rust forms over time. This rust acts like a natural adhesive, bonding the pedal tightly to the crank. Therefore, bikes that are stored outdoors or ridden in wet conditions are especially prone to this problem.
Another reason is over-tightening. Pedals are sometimes installed too tightly, making them very hard to undo later. Additionally, road vibrations can cause threads to tighten even further over time. This is known as self-tightening, and it affects both the left and right pedals, though in different directions.
Finally, dirt and grime can pack into the threads. This creates extra friction that makes removal difficult. However, with the right tools and technique, even the most stubborn pedals can be removed safely.
Understanding Pedal Thread Direction
Before you begin, you must understand how pedal threads work. This is one of the most important things to know. Getting it wrong means you will tighten the pedal further instead of loosening it.
The right pedal uses a standard right-hand thread. This means you turn it counterclockwise to loosen it. Most people are familiar with this direction. It follows the common rule: righty tighty, lefty loosey.
The left pedal, however, uses a reverse left-hand thread. This means you must turn it clockwise to loosen it. This design is intentional. It prevents the pedal from unscrewing itself during normal pedaling. Therefore, always double-check which pedal you are working on before applying force.
Mixing up the thread direction is a very common mistake. It can strip the threads and cause serious damage to your crank arm. So take a moment to confirm the correct direction before you start.
Tools You Will Need
One of the best things about this job is that you do not need many tools. Most of the items listed below are already found in a basic home toolkit. A few are bike-specific but are still affordable and easy to find.
Essential Tools
- 15mm pedal wrench or a 15mm open-end wrench: This is the most important tool. A proper pedal wrench has a longer handle, which gives you more leverage.
- 8mm Allen key or hex wrench: Many modern pedals have a hex socket on the axle end, which allows removal from the crank side.
- Penetrating oil such as WD-40 or a similar rust-loosening spray: This is essential for stuck pedals. It soaks into the threads and breaks down rust and corrosion.
- A rubber mallet or hammer: Useful for applying controlled force when pedals are extremely stuck.
- A clean rag or cloth: For wiping away grease, dirt, and excess oil during the process.
Optional but Helpful Tools
- Pipe extension or breaker bar: Fits over the wrench handle to increase leverage.
- Wire brush: For cleaning threads before and after removal.
- Work stand or bike repair stand: Keeps the bike stable while you work.
Additionally, wearing gloves is a good idea. It protects your hands from sharp edges and keeps them clean. Therefore, gather all your tools before you begin. Having everything ready saves time and reduces frustration.
How to Prepare the Bike Before Starting
Preparation is key to a successful job. Rushing into the removal without preparation can make things worse. Follow these steps to get your bike ready.
Step 1: Position the Bike Correctly
Place the bike on a stable surface. A bike stand is ideal. However, if you do not have one, you can lean the bike against a wall or lay it on its side. Make sure the bike will not move while you apply force. Stability is very important when working with stuck pedals.
Step 2: Clean the Pedal and Crank Area
Use a rag to wipe away any visible dirt and grease from around the pedal and crank arm. This helps you see what you are working with. Additionally, it prevents dirt from being pushed further into the threads during removal. A clean work area also reduces the risk of slipping.
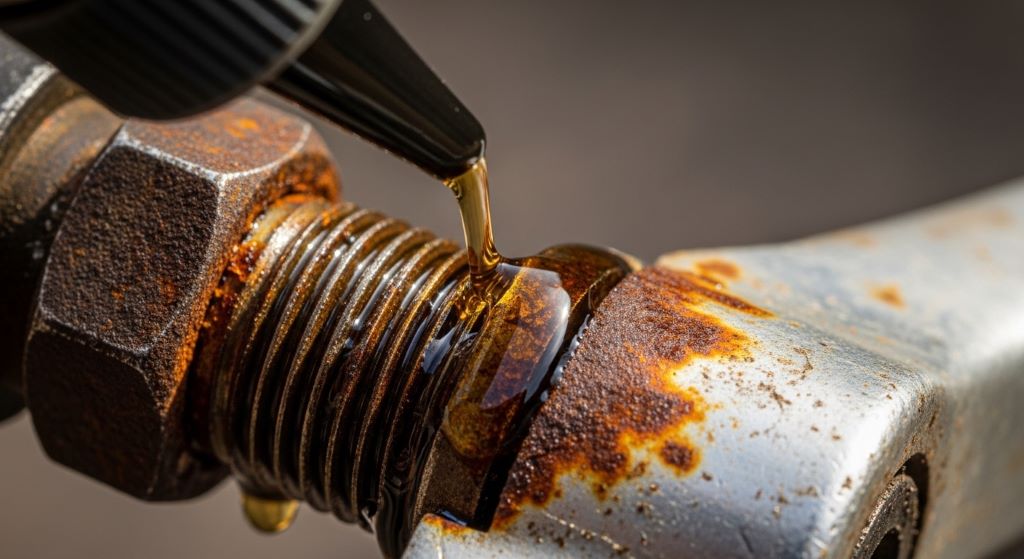
Step 3: Apply Penetrating Oil
Spray penetrating oil generously around the pedal axle where it meets the crank arm. Let the oil soak in for at least 15 to 20 minutes. For very stuck pedals, it is better to wait longer, even up to a few hours or overnight. The longer the oil has to work, the easier the removal will be. Therefore, do not skip this step. It is one of the most effective things you can do.
How to Remove a Stuck Bike Pedal Step by Step
Now that your bike is prepared, you are ready to begin. Follow these steps carefully. Take your time and avoid rushing. Applying too much sudden force can damage the crank arm or strip the threads.
Step 1: Position the Crank Arm Correctly
Move the crank arm to the three o’clock or forward horizontal position. This gives you the best angle to apply downward force on the wrench. It also keeps your knuckles away from the wheel and frame. Additionally, this position gives you the most mechanical advantage when using your body weight.
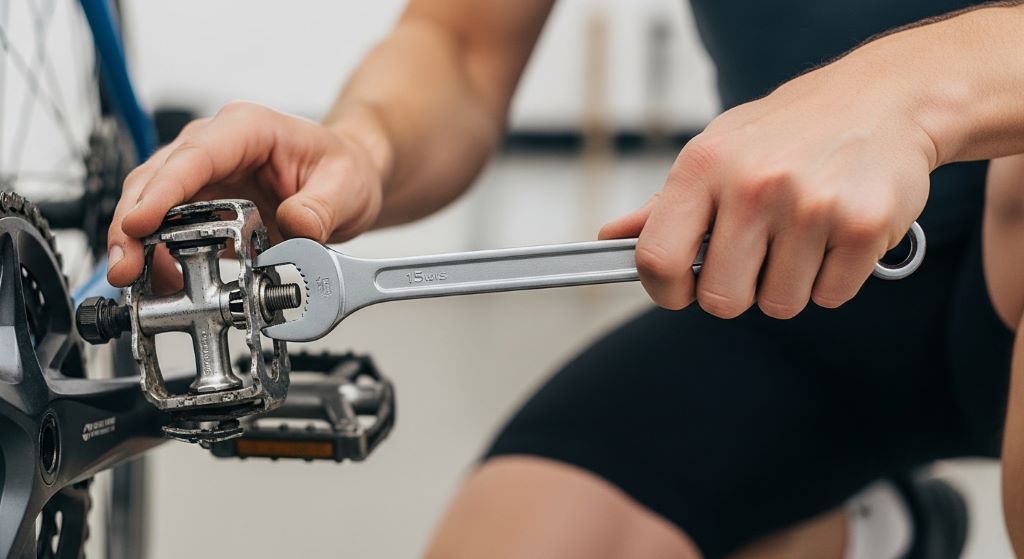
Step 2: Attach Your Wrench
Fit your 15mm pedal wrench onto the flat of the pedal axle. Make sure the wrench is fully seated and secure. A loose wrench can slip and injure your hand. If the pedal has a hex socket on the crank side, insert your 8mm Allen key instead. The Allen key method can offer better control on very stuck pedals.
Step 3: Apply Steady Downward Pressure
Remember the thread direction. For the right pedal, push the wrench counterclockwise. For the left pedal, push clockwise. Apply slow, steady pressure rather than a sudden jerk. If the pedal does not move, increase the force gradually. You can also try rocking the wrench back and forth slightly to help break the corrosion loose.
Step 4: Use Extra Leverage If Needed
If the pedal still will not budge, you need more leverage. Slide a metal pipe over the wrench handle to extend it. This is sometimes called a breaker bar technique. The longer the handle, the more torque you can apply. However, be careful not to use so much force that you crack the crank arm.
Another method is to position the wrench so that it faces downward and then use your foot to press down on it. This lets you use your body weight instead of just your arm strength. Many cyclists find this technique very effective for extremely stuck pedals.
Step 5: Apply More Oil and Repeat If Necessary
If the pedal still does not move, apply more penetrating oil and wait again. Sometimes one application is not enough. Repeat the process of soaking and applying force until the pedal starts to turn. Be patient. Persistence is more effective than brute force in most cases.
Step 6: Once Moving, Remove Completely
Once the pedal starts to turn, continue rotating it in the correct direction. Support the crank arm with your other hand to keep it steady. Remove the pedal fully and set it aside. Wipe the threads on both the pedal axle and the crank arm with a clean cloth.
What to Do If the Crank Itself Is Stuck
Sometimes the problem is not just the pedal. The crank arm itself may be loose, bent, or corroded onto the bottom bracket axle. In this case, removing the pedal first is still the right approach. However, you may also need to address the crank separately.
A crank puller tool is designed to remove the crank arm from the bottom bracket spindle. This tool attaches to the crank arm and uses a threaded bolt to push the spindle out. Additionally, penetrating oil is helpful here as well. Apply it where the crank meets the spindle and let it sit before using the crank puller.
If you suspect the crank is damaged, it is best to consult a bike mechanic before forcing anything. However, for most stuck crank situations caused by corrosion, the crank puller and penetrating oil method works very well.
Common Mistakes to Avoid
Avoiding common mistakes will save you time and protect your bike from damage. Here are the most important things to watch out for.
- Turning the wrench in the wrong direction: Always confirm thread direction before applying force. Left pedal loosens clockwise, right pedal loosens counterclockwise.
- Using too short a wrench: A short wrench does not provide enough leverage. Use a proper pedal wrench with a long handle for best results.
- Skipping the penetrating oil: Many people try to force pedals off without using oil first. This significantly increases the risk of damaging the threads.
- Applying sudden jerking force: Slow and steady pressure is far more effective and safer than quick, sharp movements.
- Not cleaning the threads after removal: Dirty threads make reinstallation harder and increase the chance of future corrosion.
How to Reinstall Pedals and Prevent Future Sticking
Once the pedals are off, take the opportunity to prepare them properly for reinstallation. This will make the next removal much easier.
First, clean the threads on both the pedal axle and the crank arm thoroughly. Use a wire brush to remove any remaining rust, dirt, or old grease. Then apply a fresh layer of anti-seize compound or grease to the pedal threads. This lubricant creates a protective barrier that prevents corrosion and makes future removal simple.
When reinstalling, hand-tighten the pedal first to avoid cross-threading. Then use your wrench to tighten it firmly. Right pedal tightens clockwise, left pedal tightens counterclockwise. Do not over-tighten. A snug fit is enough. Additionally, check your pedals every few months, especially after wet rides, to make sure they have not corroded in place again.
Tips for Maintaining Your Bike Pedals Long Term
Long-term maintenance keeps your pedals easy to remove and your bike running well. These habits take very little time but make a big difference.
- Clean and inspect your pedals after every wet or muddy ride.
- Apply a thin layer of grease or anti-seize to the threads every six to twelve months.
- Store your bike in a dry, sheltered location to reduce exposure to moisture.
- Check for play or wobble in the pedals regularly. Loose pedals can damage threads if not addressed.
- Replace pedals that show signs of serious wear, cracking, or damage to the axle.
Furthermore, investing in quality pedals from the start reduces many of these problems. Cheap pedals are more prone to corrosion and thread damage. Therefore, choosing well-made pedals is a smart long-term decision for any cyclist.
Conclusion
Removing stuck bike pedals does not have to be a stressful experience. With the right knowledge and the correct simple tools, it is a job that most cyclists can handle at home. The key steps are understanding thread direction, using penetrating oil, applying steady leverage, and being patient.
Always remember that the left pedal loosens clockwise and the right pedal loosens counterclockwise. Additionally, never skip the penetrating oil step. It is the single most effective way to make the job easier. Use a proper pedal wrench or Allen key, apply controlled force, and give the oil enough time to work.
After removal, clean the threads, apply fresh grease, and reinstall properly. This prevents future problems and keeps your bike in excellent condition. Furthermore, regular maintenance checks will help you avoid stuck pedals altogether. By following the steps in this guide, you will save time, money, and effort every time you need to service your bike pedals.
Frequently Asked Questions
1. Which direction do I turn to remove a bike pedal?
The right pedal loosens by turning counterclockwise. The left pedal loosens by turning clockwise. This reverse threading on the left side is intentional and prevents the pedal from working itself loose during normal riding. Always confirm which side you are working on before applying force to avoid damaging the threads.
2. What is the best penetrating oil for stuck bike pedals?
WD-40 is the most widely available option and works well for most situations. However, dedicated penetrating oils such as PB Blaster or Liquid Wrench are often more effective on severely corroded pedals. Apply the oil generously around the pedal axle and let it sit for at least 15 to 20 minutes, or longer for very stubborn cases.
3. Can I remove bike pedals without a pedal wrench?
Yes, in many cases you can. Many modern pedals have an 8mm hex socket built into the axle end, which allows you to use a standard Allen key. Additionally, a regular 15mm open-end wrench can work if a dedicated pedal wrench is not available. However, a proper pedal wrench with a long handle gives you the most leverage and control.
4. What should I do if I strip the pedal threads?
Stripped threads are a serious problem. If the threads on the pedal axle are stripped, the pedal will need to be replaced. If the threads in the crank arm are stripped, you may need a thread repair kit or a new crank arm altogether. Therefore, always use the correct wrench size, turn in the right direction, and avoid applying excessive force to prevent thread damage.
5. How often should I remove and re-grease my bike pedals?
It is a good idea to remove and re-grease your pedals once every six to twelve months. This is especially important if you ride frequently in wet or muddy conditions. Regular greasing prevents corrosion from building up in the threads and ensures that the pedals remain easy to remove whenever you need to service or replace them.
Related Topics:
How to Fix Bike Crank Slipping on Spindle
The Definitive Guide to Mountain Bike Suspension Pumps

Welcome to outdoorxsports.com! I’m Russell, your guide to the awesome world of mountain biking. This blog is all about building a community of riders who love to share their passion for the sport. Expect inspiring stories, local trail recommendations, fun challenges, and tips for making the most of your time on two wheels.