
Today I’m gonna teach you how to straighten out the wheel on your bicycle which is called truing the bike. It’s one of the slightly more advanced skills to master but one that is incredibly satisfying to learn is the art of truing your own wheels.
Step to Follow
Step 1: Arrange Workspace and Tools
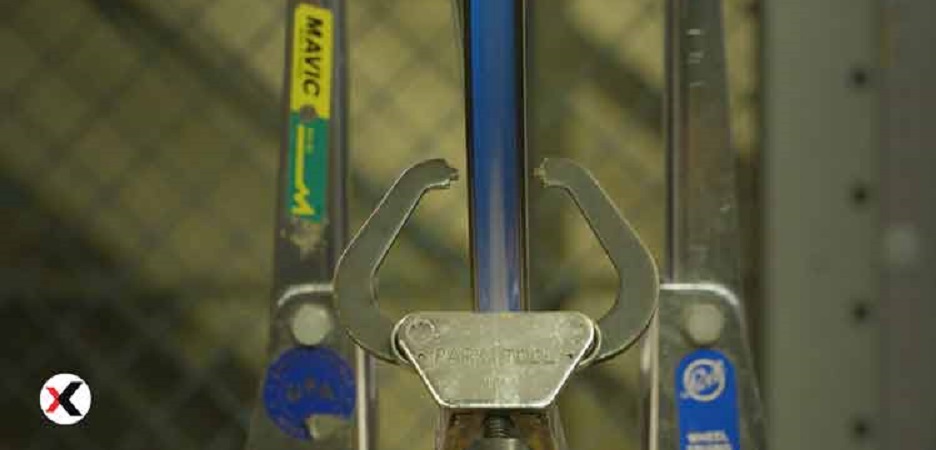
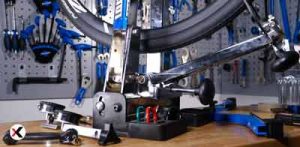 Now before we get started, you’ll notice that we do indeed have a wheel truing stand here
This is not really compulsory but it will make the task easier.
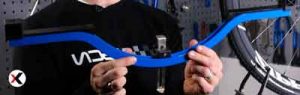
If you don’t have a wheel truing jig at home and chances are you probably don’t you already own the perfect wheel truing jig and that is the frame or the forks on your bike.
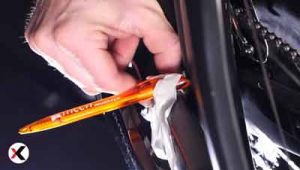
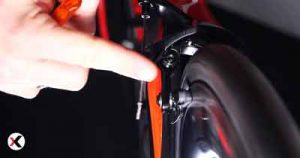
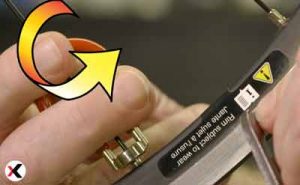
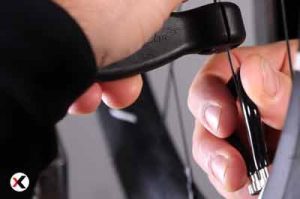
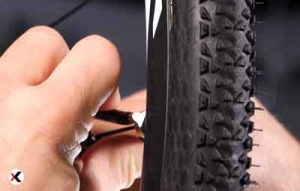
Simply leave the wheel mounted in your bike and attach a pen or chalk on the seat stays or on the fork with some masking tape.
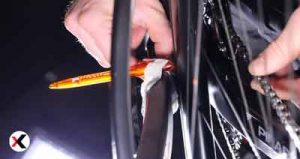
Then adjust them has the gauge on the rim every time the wheel comes over where it’s buckled it’ll touch the pen and that will be your marker for working out where the buckle.
Tools to Use
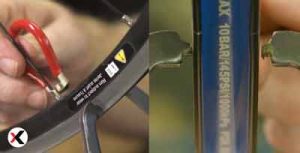
The tools you’re going to need for the job well first and foremost is the spoke key. I’m not sure why it’s called a spoke key and not a nipple key because it does turn the nipples and not the spokes.
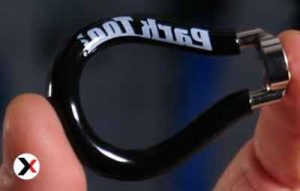 Nipples come in all different shapes sizes and colors for example these are anodized therefore is really important to have a nipple key that fits your nipples perfectly.
If you have one that’s slightly too big, you’re gonna end up rounding your nipples off and that’s going to make it really hard to make any adjustments to your will.

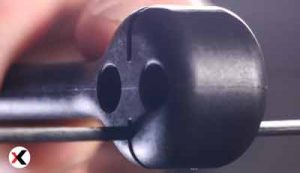
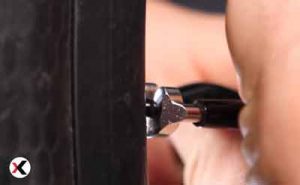
The spokes you don’t want to turn at all so four-bladed spokes you need a specific tool spoke holder.

This but if you’re doing it on a budget and you do have a pair of pliers already at home or you have round spokes these will work just fine.
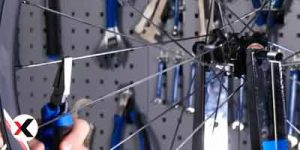
Simply clamp them and prevent the spokes from twisting with the nipple.
Step 2: Identifying the Buckle and Adjustment
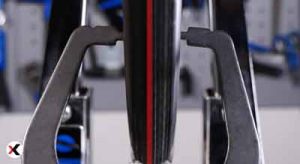 True the wheel with a standing spins the wheel and notice how the space between the rim and the caliper arms change to determine which sections of the rim move closest to the caliper arms compared to the rest of the rim use the spoke wrench to tighten or loosen the spoke nipples.
In this section reposition the rim so the rim equally clears the caliper arms all the way around the rim to tighten the spoke nipple turn the spoke wrench counterclockwise.
 To loosen the spoke nipple turn the spoke wrench clockwise. To move the rim in a particular direction it may be necessary to tighten one spoke nipple and loosen the spoke nipple directly next to it.
During the truing process continually move the caliper arms closer to the rim for more accurate truing.
Then you can see the rim is too far to the right so we’re going to turn the spoke wrench clockwise to loosen the spoke so it moves the rim to the left and clears the caliper arm.
 After tightening spoke nipples stress relieves the wheel by squeezing on opposing spokes on the wheel.
This unwinds any spokes and creates a more stable wheel. Then after you’ve finished unwinding the spokes recheck the trueness of the wheel in the stand.
Step 3: How to Adjust

I’m going to focus my adjustments on the one really important thing to remember that went really well is that spokes work in opposing pairs by tightening the spokes on the left-hand side.

You’re pulling the wheel over to the left by tightening the spokes on the right-hand side. You’re putting it over to the right.
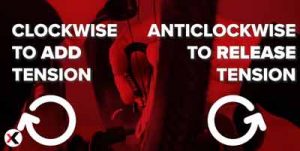
The most important thing to remember is the direction you’re turning the nipple and I always find it easiest to stand above the wheel and to picture screen the nipple down onto the spoke clockwise to add tension and anti-clockwise to release tension.
Now if highlighted where the buckle is more often than not the cause of this will be the fact that the spokes on the opposite side have lost their tension this is because of the flex and the use of the wheel thread is life span.
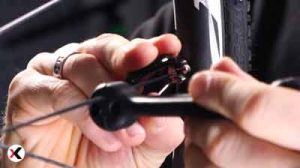
The impact that it received so we’re going to start by making very small minor adjustments. we’ll take our spoke holder to prevent the spokes from twisting and We’ll start to apply a tiny bit of attention to these nipples.
So, the best way to do this is to look down from above and picture then screwing the nipple onto the spoke in other words you’ll be turning it in a clockwise mode.
We recommend not giving it more than half a turn at a time and then checking how that adjustment works because we have bladed spokes in this wheel it’s actually very simple to do.
If you have round spokes at home, you’re likely to have to squeeze very hard with the pliers to keep them in place.
You may even find it beneficial to give the nipple an extra turn and then turn it back this often returns the spoke to its natural position.
So far, I’ve made one adjustment to one spoke just half a turn and that’s had a significant improvement to the shape of my wheel but it’s still touching my gauge so I now need to turn and see which part of the rim is being pushed against that gauge.
 Then I can see quite clearly but it’s this next spoke here so taking the same approach to this spoke or to this nipple.
I’m going to turn it down on top of the spoke to add a little tension to it this should have the effect of bringing the rim bag from the right-hand side of the wheel towards the left.
 Once you get to the point where your rim is no longer keeping the gauge that you’re going place whether that’s a makeshift one at home your rim brakes or a wheel train jig.
You can probably start to ease up on the adjustments you’re making whilst it’s great to chase perfection chasing the buckle around the wheel is only gonna weaken your wheel as you start to make those minor adjustments.
Keep your attention focused on that initial area and you’ll have no problems.
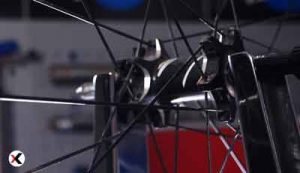
In the case of a severe buckle, you may find that you can actually fear what the buckle is just by squeezing the spokes you’ll notice these are twin cross as they leave the hub, they cross each other twice squeeze those pairs and work out where the tension is or isn’t.
 You will also find that the drive side of a rear-wheel will have tighter tension and the braking side of a front-wheel will often have more tension as well.
There’s one more thing that I haven’t mentioned and this is perhaps more relevant if you’re renovating a new bike and that’s making sure that your wheel stays within the alignment.
 If you don’t have a wheel alignment gauge like this one you already own the best alignment gauge out there and that’s your frame.
Make sure that your will is dead true with your seat you be at the back and at the center of your rim is in line with the center of your head tube on the front.
So, there you have it something that at first perhaps seems quite complicated but in reality, is actually really simple to do and in a way, it’s kind of therapeutic as well have you ever tried cheering a wheel.
Conclusion
There are many reasons why you may need to true your wheels throughout the course of your life.
Follow our step-by-step guide to having your wheels running sweet once more.
Let us know down in the comments below how you got on if you enjoyed this article and give us a thumbs up and for more maintenance.

Steve J. Robin is the Senior Mountain Bike Review Editor at Outdoorxsports. Steve has lived in Heron Way, Milwaukie for 15 years. Steve earned his Bachelor’s degree at the University of Wisconsin Milwaukee, which has extensive biking training facilities, he had taken up biking seriously as a teenager and later became obsessed with mountain biking. He is an obsessive mountain bike racer and rubbed shoulders with the bike and that he rides with, riding is so much more than a hobby for him with a mild addiction to Endomondo. On September 21, 2015, he released a five-and-a-half-minute mountain biking’s video on YouTube that was to change his biking life. The video got a few thousands of views overnight as of today– the world went crazy for Steve. Since the video went viral, things changed fast; Steve found himself featured in MTB-MAG, joined a production as a stunt man.